
Gosh I still can't believe today is the 1st of January already. It feels like each year passes by faster and faster, doesn't it?
Looking back though, 2015 has been such a great year for me. Even though I had to put my career on hold whilst I try to work things out in my head, I have achieved a lot personally and I've grown up in the process.

For my 2016 New Year's resolution, even though there are still a lot of fats to lose (especially with all the Christmas eating haha), it's not about losing weight anymore, it's about getting healthier, fitter and stronger. I promise I will put in a lot of effort to achieve that. I want to be leaner and I strongly believe that I can do it. Fighting!! (Note to self: Don't procrastinate, start today!!)
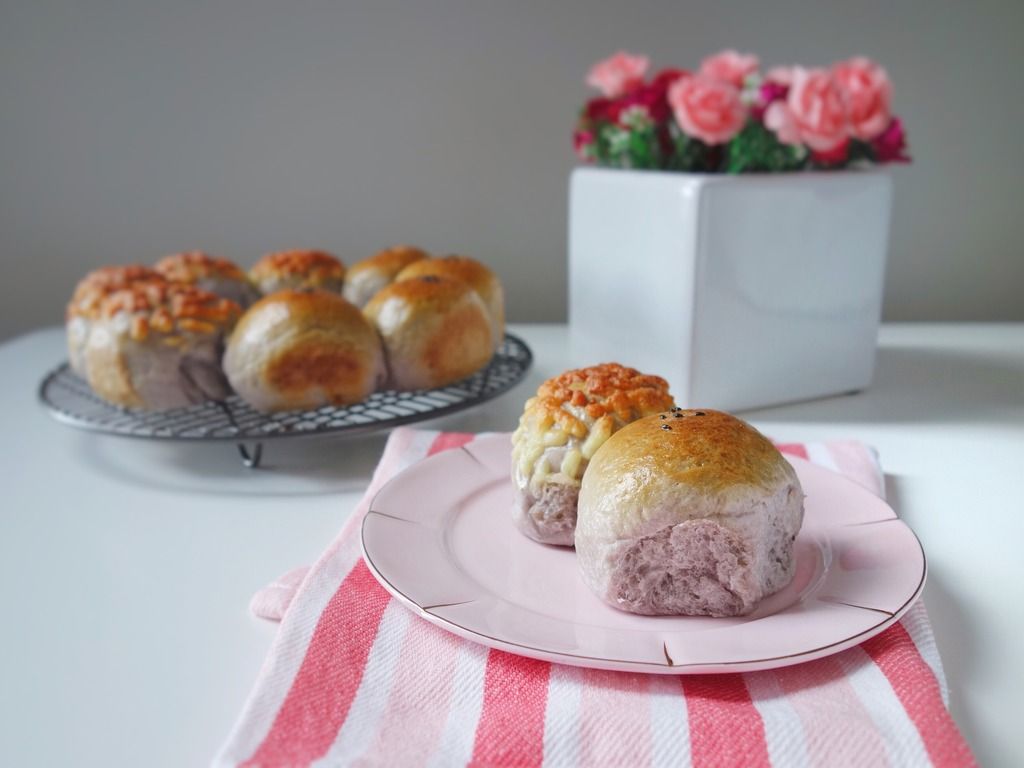
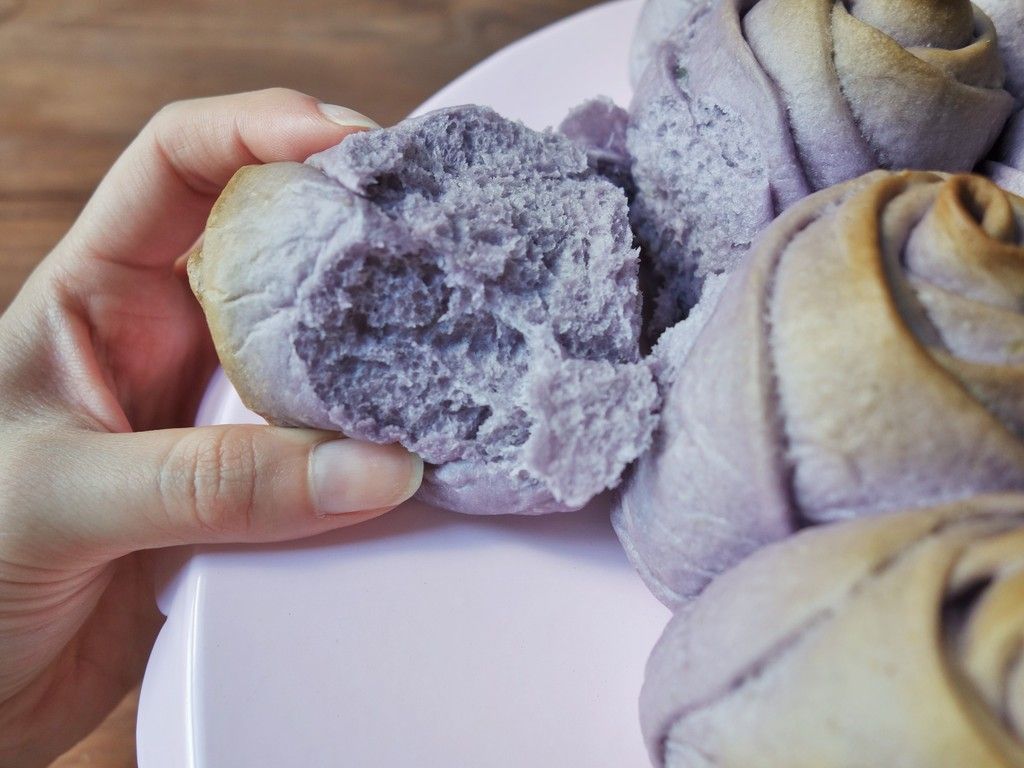
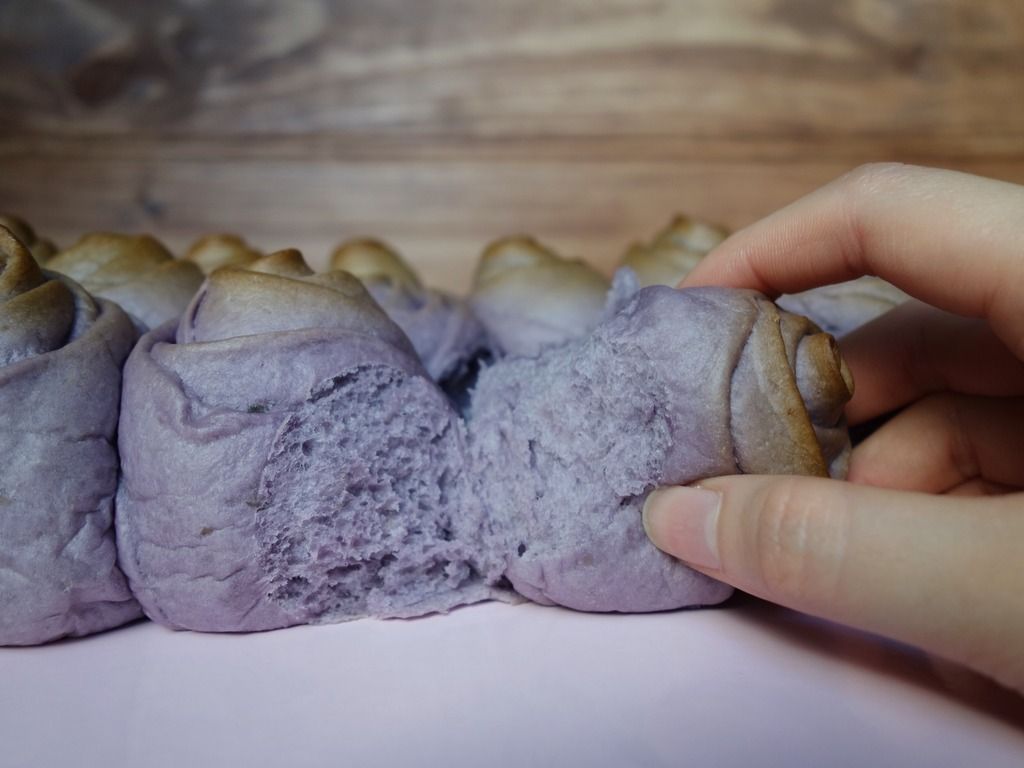
This rose-shaped purple sweet potato bread recipe that I am sharing today is one of my favouritest recipe of 2015, and I hope you will love it as much as I do.

Rose-shaped Purple Sweet Potato Bread
Recipe adapted from Kitchen Corner and modified by The Bakeanista
Ingredients
- 300g bread flour
- 50g caster sugar
- 1/4 tsp salt
- 80g fresh milk
- 130g purple sweet potato (steamed and mashed)
- 17g whole egg (beat an egg to mix the white & yolk)
- 50g unsalted butter, softened at room temp
- 7g yeast
- Prepare purple sweet potato. Peel, core and cut into cubes. Steam until soft (it takes about 10-15 minutes) then mash up and set aside to cool. I often refrigerate for approx 15 minutes as I am impatient.
- Add all ingredients (except yeast) into a breadmaker, first the wet ingredients (milk, egg, butter then mashed purple sweet potato), followed by the dry ingredients (sugar, salt, flour).
- Select the "dough" mode (refer to the menu of your breadmaker to select the kneading dough programme).
- Knead for 15 minutes and the ingredients will come together. Stop the cycle, add in the yeast and restart the "dough" mode. The total kneading time is 35 minutes to ensure dough is smooth and elastic.
- Let the dough complete the 1st round of proofing until double in size, about 40-50 minutes, best temperature for proofing is 28C, humidity 75%, until double in size.
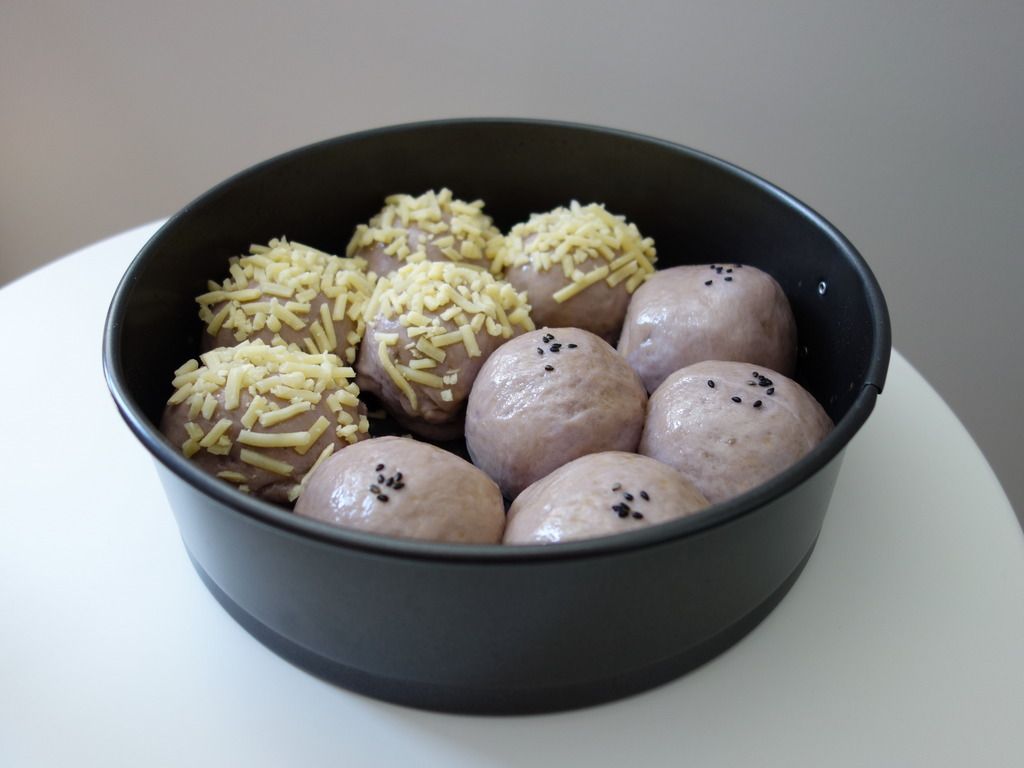
- Punch and deflate dough, then remove dough from bowl and shape into a big ball. The dough will be approximately 660g as a whole.
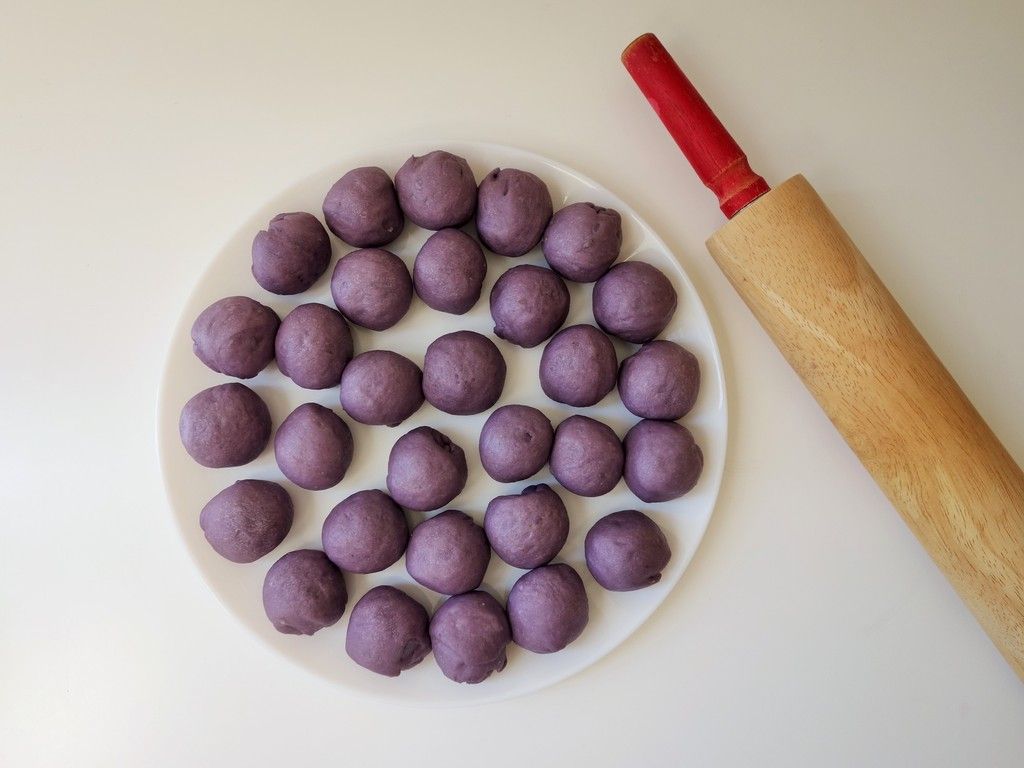
- Divide the dough into 42 portions weighing approximately 15g each.
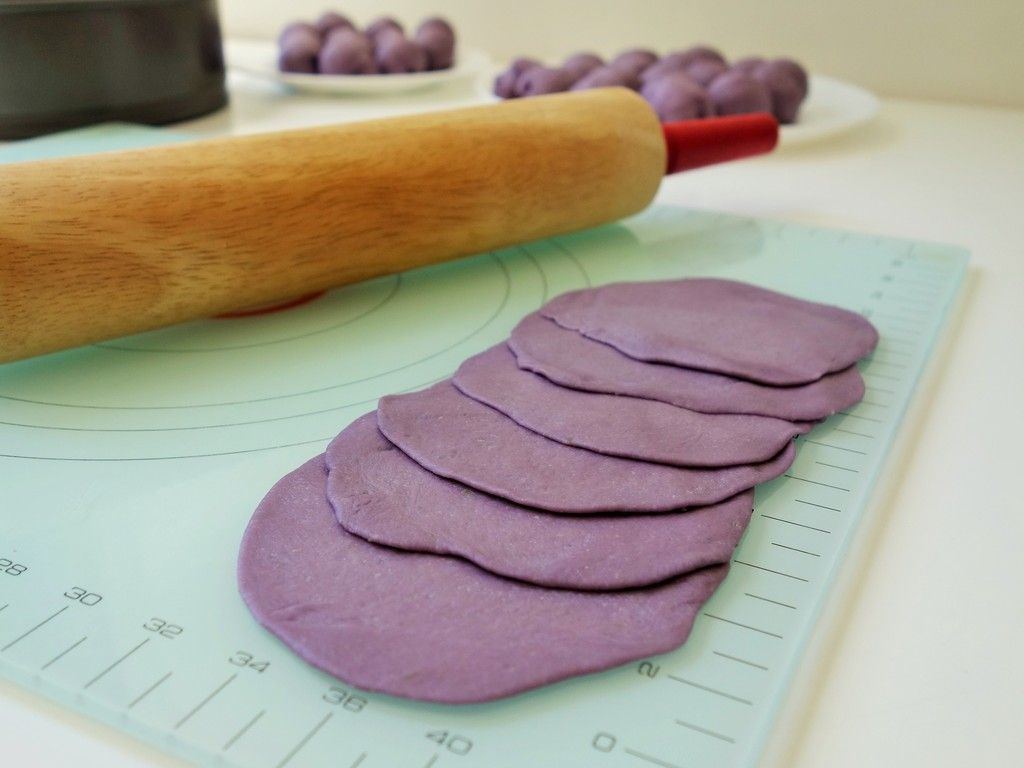
- Roll and flatten out each ball. Using your fingers, press the outer corners of the circle to create ripples. Arrange 6 pieces of flattened dough, half stacking on top of one another.
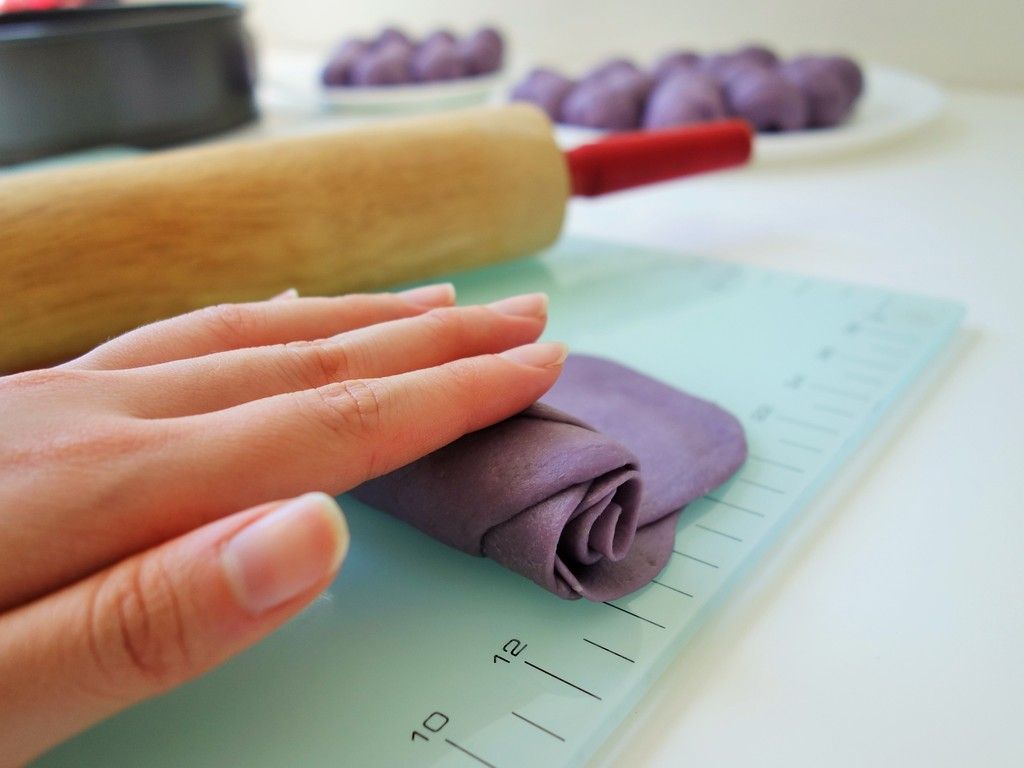
- Start rolling from the first piece on the bottom towards the top.
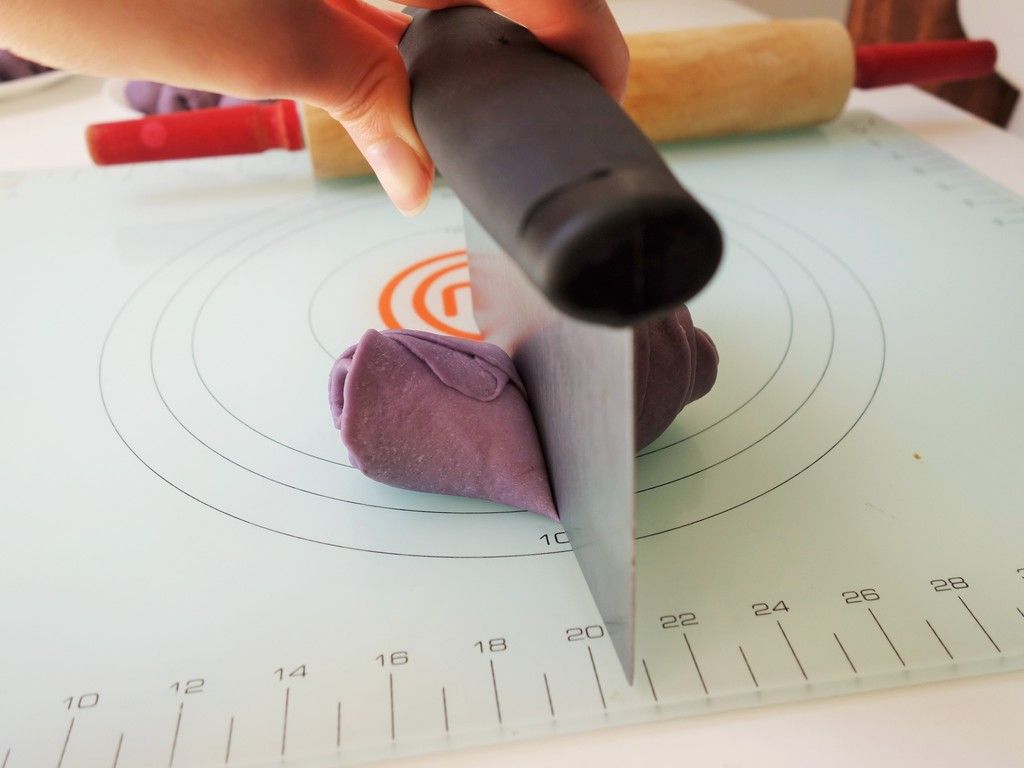
- Cut the log into half then using your fingers, round the bottom of each rose and place on lined/greased baking sheet. I used a 9-inch non-stick round pan brushed with oil.
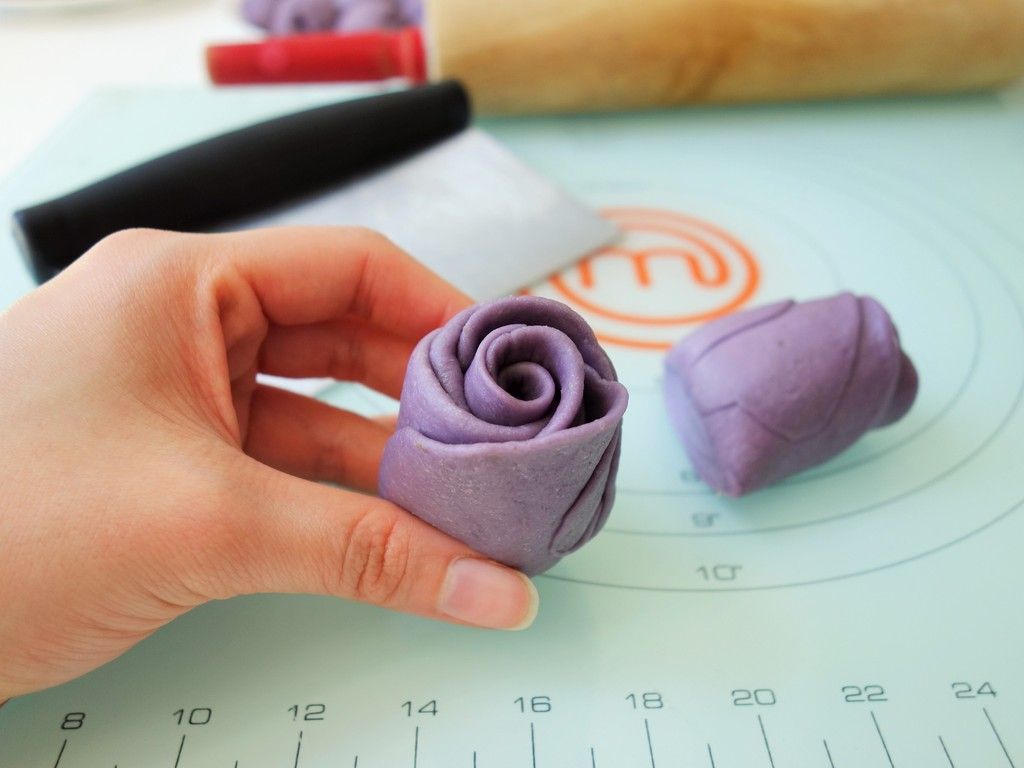
- Repeat for remaining dough. You should have a total of 14 roses (7 logs).
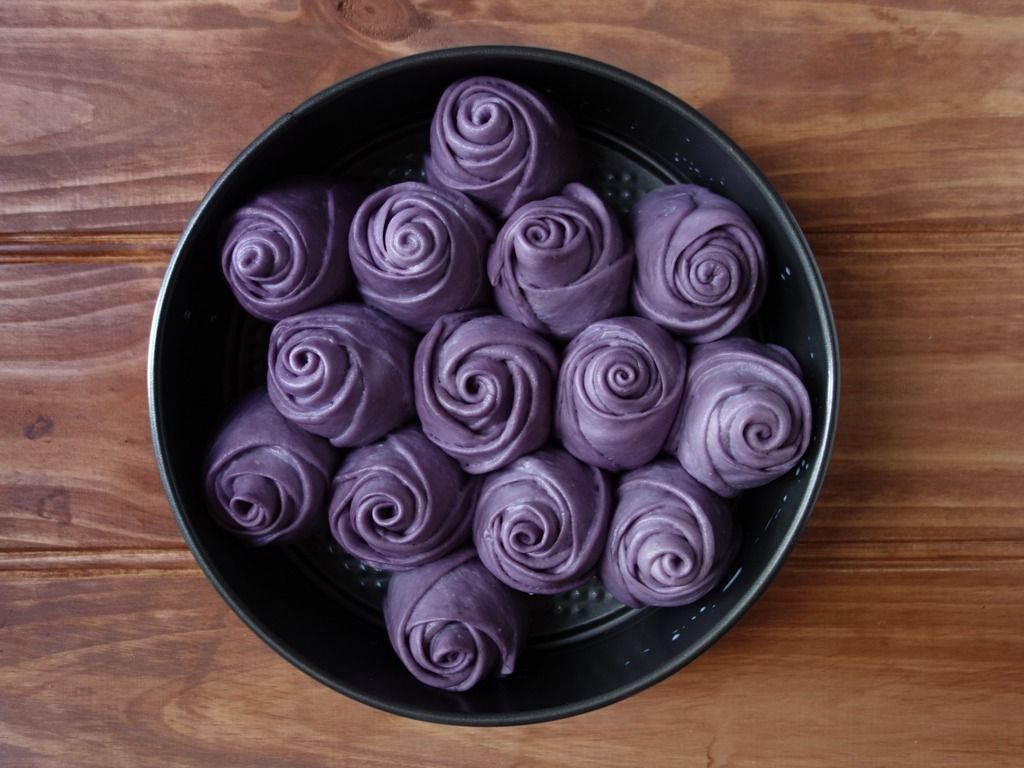
- Once complete, let buns rise until double in size, this takes about 20-25 minutes.
- Preheat the oven to 180 deg C. Milk wash the dough and bake for 16-20 minutes on the lower rack.
- Take out the buns from the oven and after 10-15 minutes later, transfer the bread to a wire rack to cool.
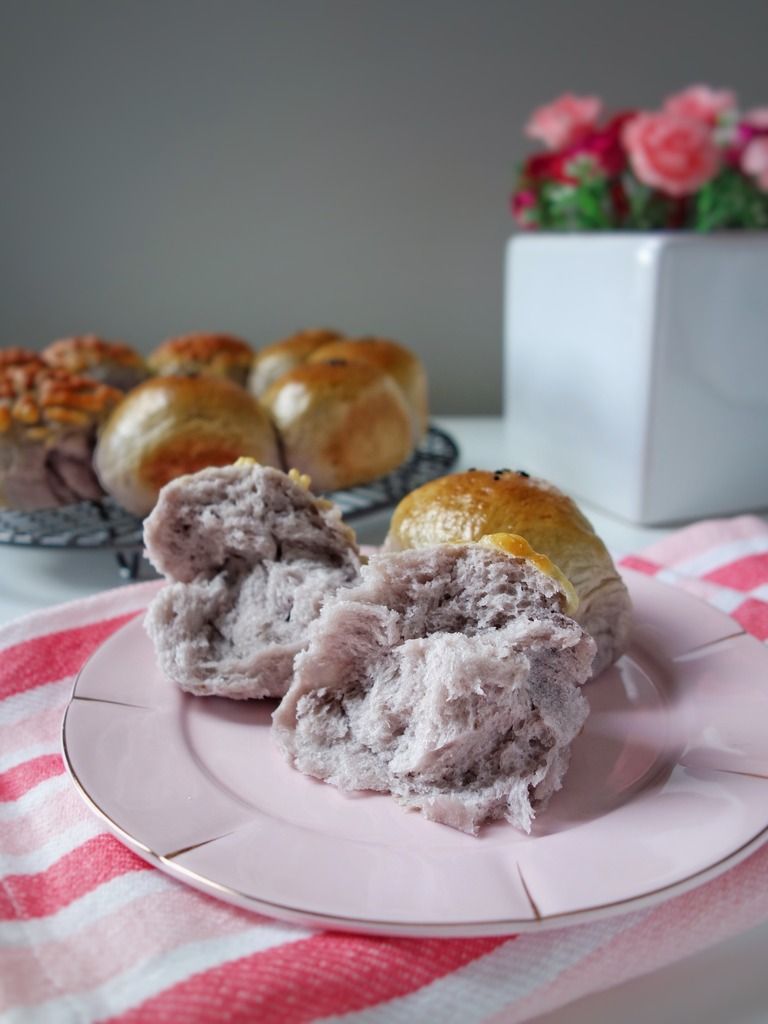
Happy 2016 - here's to a sweeter and better year for all of us!!! ♥
2 comments :
So clever :)
And congrats again on the weight loss! Hard work, but you did it! x
Hehe thanks Shellie!! xx
Post a Comment