I will no longer be updating this blog.
DO CHECK OUT MY NEW BLOG AT WWW.THEBAKEANISTA.COM
Showing posts with label Matcha. Show all posts

Thursday, April 28, 2016

Matcha Chia Pudding

Hello everyone! Sorry it's been a while since I last blogged. I've been really busy packing, unpacking and moving. I finally have some spare time on hand today and was looking back on my photos when I realised I haven't yet shared this recipe which I adore. And no surprises here, of course, it has to be matcha-related again! :P

Here I've got in my beautiful Maxwell & Williams Mansion glassware a mix of textures and colours paired with fresh summer flavours.

It's a base of matcha chia pudding, topped with matcha granola (gifted by the very lovely Lianne), pan-roasted organic coconut chips, fresh strawberries and mango.

Here's the recipe for my matcha chia pudding:

Matcha Chia Pudding
Recipe by The Bakeanista

Ingredients
  • 3 tbsp chia seeds
  • 1 cup milk 
  • 1 tbsp matcha powder (I used Zen Wonder's Shizen)
  • 1 tbsp maple syrup
  • fresh fruits for garnishing

Method
  1. Combine and mix well all ingredients in a bowl, or like I did in my Maxwell & William stemless glasses. 
  2. Let it soak overnight in the refrigerator. I cling wrap the glasses for hygiene purposes.
  3. Give it a good stir the following morning, and garnish with any topping you like. Enjoy! :)
Garnishing with flowers instantly make everything look that extra bit pretty, don't ya think? Here's an aerial view where you can get a good glimpse of all the toppings.

I invited a good friend over for brekkie and served this. She was going all ohh-and-ahh, saying my matcha chia pudding can be passed off as "cafe quality" both in taste and presentation. Hehe that made me so so happy!

As much as I love eating out and exploring new cafes, brekkie or brunch at home can be just as fun, yummy and pretty too! I had so much fun "plating" this up. This recipe in particular is also really easy to prepare and so delicious too!

As I used a really high quality matcha powder (Zen Wonder's Shizen), the matcha flavour really stood out. The matcha granola with dried blueberries also went really well with this chia pudding as I love the contrasting textures. So I highly recommend you make some the granola ahead of time to go with your chia pudding. :)

I hope you'll enjoy this healthy brekkie as much as I did!

Wednesday, February 24, 2016

Matcha Pancakes

There are days when I love going out for brunch, but there are also days when I love having brekkie or brunch at the comfort of my own home and on days like that, I often opt to make something simple.

I love it when I have on hand some delicious Brasserie Bread (my fav being the Single Origin Sourdough) so I could put together a quick luxurious brekkie.

Very simply just a sunny side up and stir fried shrooms with thyme on toast or bacon and scrambled eggs with a small dollop of chilli jam on toast. Both easy to whip up and so delicious!


But on other days when I have got no bread sitting around in my pantry, I like having pancakes because they're equally as easy to whip up. And seeing as I am on a roll with matcha, of course I had to make green tea pancakes!

I used Zen Wonder's new culinary grade matcha known as the Nakashi. Although the Nakashi isn't as fragrant as my ultimate fav Shizen in matcha latte's, the Nakashi is good enough for me to use in baking/cooking. It is also more affordable than the Shizen.


Soft & Fluffy Matcha Pancakes
Recipe by The Bakeanista; yields 12 thick pancakes

Ingredients:
  • 6 large eggs, separated 
  • 230g plain flour
  • 2 tsp baking powder
  • 2 tbsp matcha powder 
  • 200ml milk 
  • Pinch of sugar (about 1 tbsp)

Method:
  1. First separate the eggs, putting the whites into one bowl and the yolks into another.
  2. Sift the flour, baking powder, and matcha powder into to the yolks, add milk then mix to a smooth thick batter.
  3. Whisk the whites with the sugar until they form stiff peaks. Fold into the egg yolk batter – it is now ready to use.
  4. Heat a good non-stick pan on medium heat. Pour some of your batter into the pan and fry for a couple of minutes until it starts to look golden and firm. When you start to notice bubbles, loosen pancake with a spatula and flip it over. Continue frying until both sides are golden.
  5. Stack the pancakes up, then top or layer with whatever tickles your fancy before digging in. 
I highly recommend serving them pancakes with a good drizzle of pure maple syrup and pan-fried crispy bacon! Sweet and savoury combo are the best! ;)

Saturday, February 6, 2016

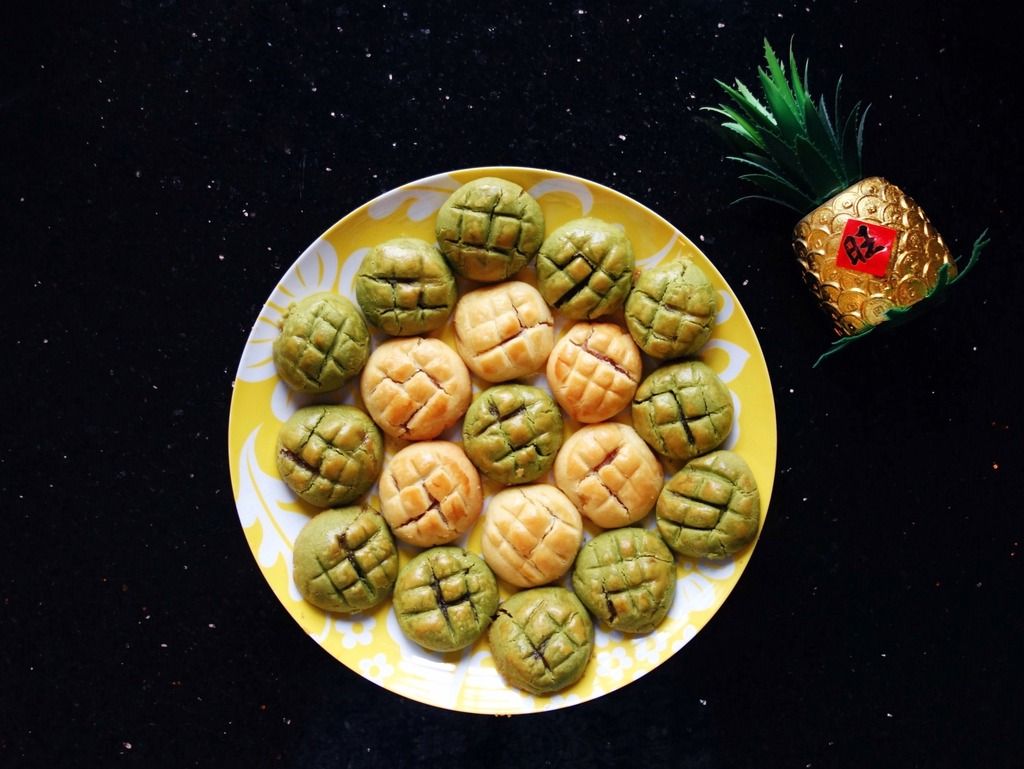
Melt-in-Mouth Matcha Pineapple Tarts

Yay, the Lunar New Year is around the corner! And CNY for me = pineapple tarts season! :D

Pineapple tarts are my absolute favourite CNY cookie. But I'm not a fan of the open-faced pineapple tarts nor the nastar pineapple rolls, I only like the enclosed ones.

My mum bought heaps of pineapple tarts, enclosed ones included but I was still itching to make some more myself because I am one very picky pineapple tart lover and it's really hard to find good ones out there that suits my preferences.

Plus I love soft melt-in-mouth pastry with pineapple jam that isn't too sweet and I often find the ones that we buy a little too sweet for my liking. As my mum would often say, "So picky, how to find?" Lol true, so no choice, have to make my own lor!

My mum bought two pineapples known in Hokkien as the "Gien-kee" pineapple variety, however I am not too sure what it's called in English. All I know is that "gien-kee" pineapple is really sweet even when enjoyed on its own. So using this variety of pineapple resulted in an amazing jam!

Hehe and as you know, to live up to my nickname - The Matchanista - I am on a mission to matcha-fy everything so there's no exception for my pineapple tarts! Actually the main reason why I wanted to make pineapple tarts was because I could not get the idea of matcha pineapple tarts out of my head. So I knew I had to make my own!

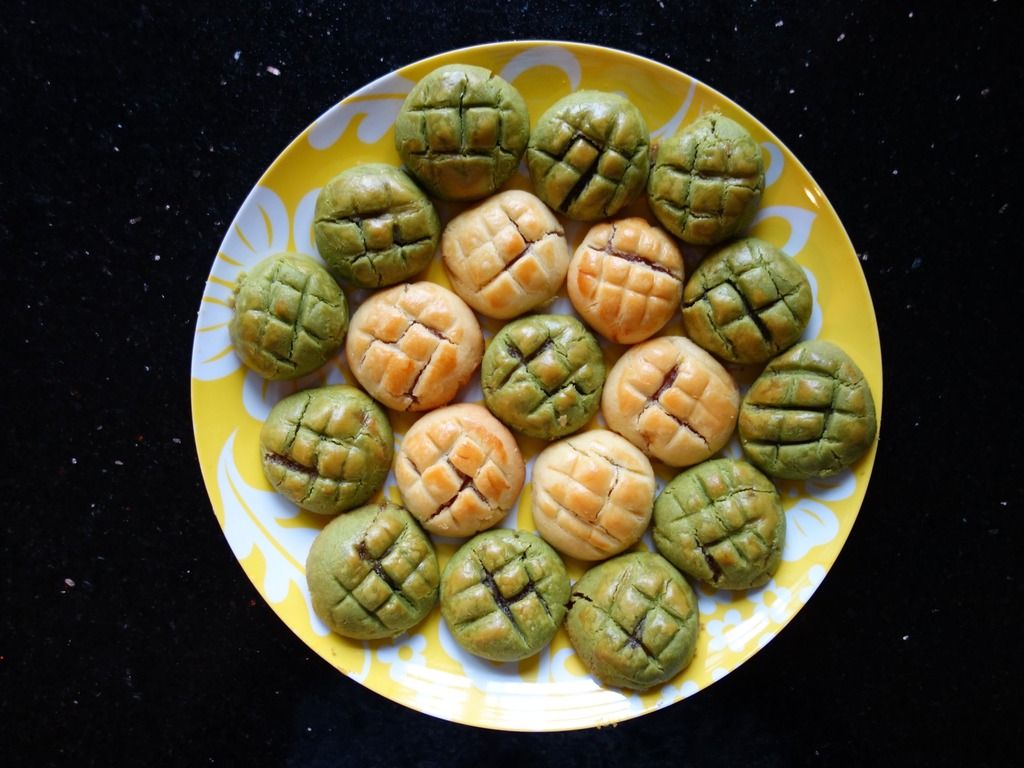
I have to admit, the whole process was really arduous but very worth it. The kitchen smelt absolutely AMAZING and the pineapple tarts were so so good! Buttery pastry that melts in your mouth... ahhh, it's the best! I could not stop at one, they're simply too easy to eat.

I personally prefer the matcha version as I found that the addition of matcha produced a more fragrant pastry, which I absolutely LOVED! My mum who isn't too big a fan of matcha also gave me the big thumbs up, and agreed that although subtle, it was slightly more fragrant.

So here I am, to share my matcha pineapple tarts recipe so you too can enjoy some, if you're keen enough to make. :)

I tried two different recipes for the pastry dough - Wendy's (Table for 2) and Sonia's (Nasi Lemak Lover). I found Sonia's recipe a little more simple in terms of ingredients and although both weren't sticky, Sonia's recipe yielded a pastry dough that was a little easier to handle.

I've shared Wendy's recipe in my previous attempt here - so today I will share Sonia's.

Melt-in-Mouth Pineapple Tarts (Makes 65 pieces)
Recipe adapted from Nasi Lemak Lover and modified by The Bakeanista

Ingredients
  • 300g butter
  • 85g condensed milk
  • 435 plain flour
  • 2 egg yolks
  • 1 egg yolk + 1 tsp milk, for egg wash
  • 550g pineapple jam (see recipe below)

Method

  1. Cream butter and condensed milk till light.
  2. Add in egg yolk one at a time, and beat until well combined.
  3. Sift in flour, mix till become a soft and not sticky dough. 
  4. To make matcha pastry, sift in 2 tsp of matcha powder and mix until just combined. Don't overmix. I did a half-half, so I separated the dough equally and mixed 1 tsp of Zen Wonders Taishiro into half of the dough.
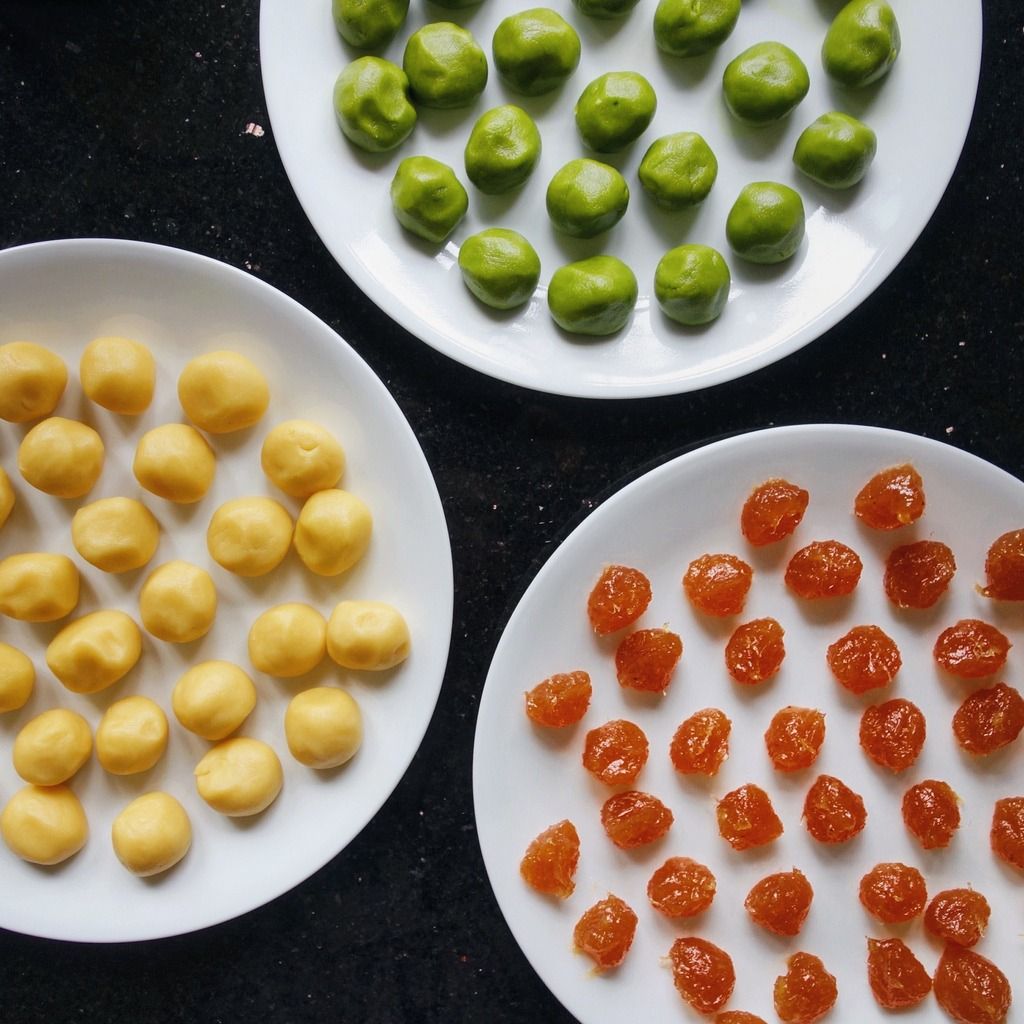
  5. Roll pineapple filling into ball (8g each) and roll dough into ball (12g each). I like my tarts with more pastry than jam, so for some I used only 6g of filling to 12g of pastry dough. The best thing about homemade tarts is that you can adjust accordingly to suit your liking.
  6. Flatten a piece of pastry dough and place a piece of the roll pineapple filling in the middle. Bring the edges of the dough together and press lightly to seal. Roll it in between your palms to shape it into a round roll.
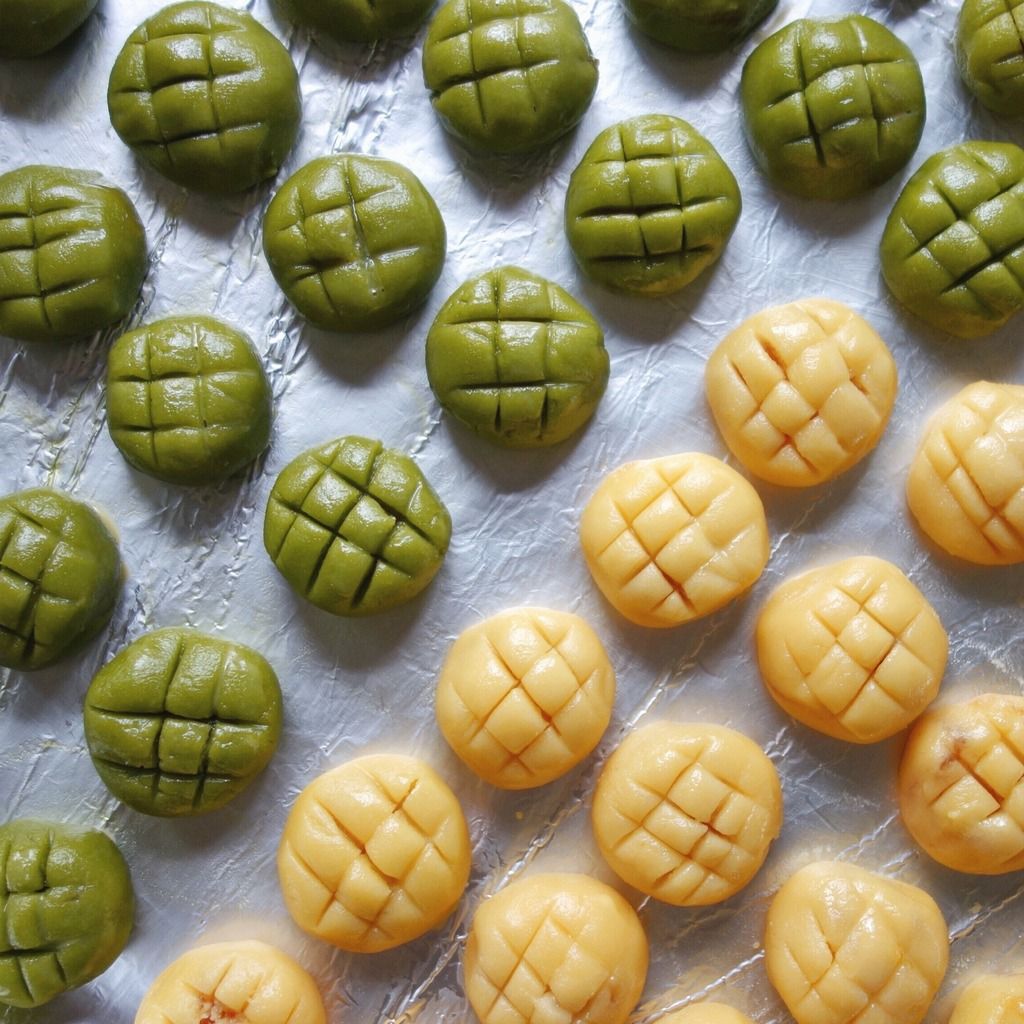
  7. Cut few lines on the pineapple balls to create pineapple pattern, apply egg wash with a brush.
  8. Bake in preheated oven at 165C (fan forced) for 23mins or until golden brown.
  9. Cool completely before storing. I stored mine in an airtight container at room temperature.

Please note that this pineapple jam recipe below yields approximately 550g jam, just the right amount needed for the pastry recipe above.

Homemade Pineapple Jam
Recipe adapted from Table for 2 and modified by The Bakeanista

Ingredients
  • 900g pineapple, chopped into chunks 
  • 300g sugar
  • 1 cinnamon stick

Method
  1. Put half of the pineapple chunks into the blender and pulse. Add remaining pineapple chunks and continue to blend.
  2. Pour the blended pineapple into a pan or wok, and cook pineapple paste with cinnamon stick on medium heat until pasty, like thick oatmeal.
  3. After the cooked pineapple jam has lost 80% of its water content, approximately 30 mins later, add in sugar. It will turn watery again but don't worry, it's normal. The jam splatters quite a bit a lot, so be very prepared and careful. Use kitchen mitts to stir.
  4. Turn to lower medium heat, and cook until very pasty. Stir only occasionally, (about once every 2-3 mins) but be sure to keep an eye on it to ensure that the pineapple jam doesn't burn.
  5. When the jam is pasty enough, increase the heat to high to allow the base to take on some colour and caramelize the jam. Stop when the jam reaches your preferred colour and consistency.
  6. Set aside to cool. I let mine cool for over an hour.
  7. Roll jam into 6g balls each. I measured mine one by one to ensure that each piece has the right amount of jam. 
  8. You may opt to prepare the jam one day ahead as it is rather time consuming and by doing so, it'll allow you to focus on the tarts alone the following day. 
Happy baking! I hope if you do give this recipe a go, you will love it as much as I do. 

My PT kept saying to me "Don't binge eat!". It's going to be really tough watching what I put in my mouth but seeing as we celebrate CNY only once a year, I personally think we're all allowed to indulge in some amazing pineapple tarts. I had maybe 10 of them, in one day. *shifty eyes* I highly recommend sharing the calories with your family, like I did, so you feel less guilty hehehe! ;)

Happy Chinese New Year and may the year of the monkey bring to all of you an abundance of good luck, prosperity and most importantly, joy and happiness!

新年快乐, 心想事成!

Monday, January 18, 2016

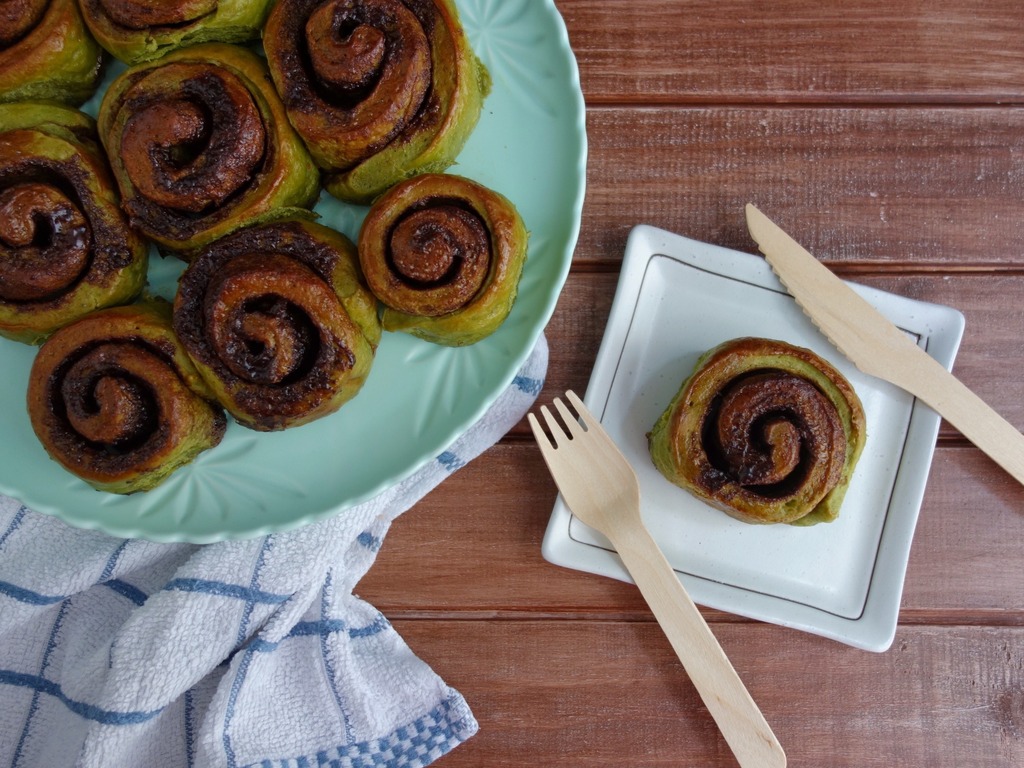
Matcha Chocolate Cinnamon Scrolls

If there's anything at all that my Mum requests for every single time she visits us, it's my infamous cinnamon rolls. So when my parents were in town a few weeks ago, I made them some scrolls.

And as you all know, I am crazily in love with matcha at the moment and as it seems, I am matchafying everything, so of course there is no exception for my cinnamon rolls too.

This idea for a matcha chocolate cinnamon scroll creeped into my head as I was rolling out the dough. I was thinking, "Hmmm, it'd be really nice if it was all matcha-y and green!"

I did a quick google search and could not find any recipe out there that's similar to the idea that I had in mind, so I set out to come up with a recipe of my own. And VOILA - The Bakeanista's very own matcha chocolate cinnamon scrolls! ;)

The first time I baked them to test the recipe, I did not take any photos. As it was really good and we all loved it a lot (I received stamps of approval from The Brudder and The SIL who requested for moreeeee), I decided to make another batch and this time I made sure to photograph them. ;)

As this is an original recipe by yours truly, I also wanted to note that I did test the recipe twice, adjusting it ever so slightly the second time around and came up with this final version that I hope you will enjoy! :)

Matcha Chocolate Cinnamon Scrolls
Original recipe by The Bakeanista

Ingredients for dough:
  • 300g plain flour, plus more for dusting work surface
  • 100g bread flour
  • 2 tbsp matcha powder
  • 50g sugar
  • 1/4 tsp salt
  • 14g yeast
  • 40g unsalted butter, melted
  • 200ml milk
  • 1 egg
  • 1 egg for glazing

Ingredients for filling:
  • 80g butter
  • 70g brown sugar
  • 1 tsp cinnamon
  • 2 tsp cocoa powder
  • 1 tbsp matcha
  • 15g dark choc, chopped finely

Method:
  1. Combine flour, sugar, salt and yeast in the mixing bowl of a stand mixer and set aside.
  2. Chop chocolate until fine and set aside.
  3. In another clean bowl, melt butter and milk over double boiler, then let butter mixture cool down before beating in the eggs. Alternatively you could zap the mixture in the microwave in 3 sets of 15 seconds, until the butter has melted altogether.
  4. Add butter mixture from (3) into (1) and knead with dough hook.
  5. Knead until well-combined, and check to ensure that the dough has reached windowpane stage then form into a ball and cover with a clean and slightly damp kitchen towel.
  6. Set aside in a relatively warm place for 30-40 minutes to allow the dough to rise.

  7. Prepare the filling 30 minutes into the proofing time. Mix the softened butter and brown sugar until well combined. Add in cinnamon powder, then sift in cocoa and matcha powder, and continue mixing until well combined and mixture resembles wet sand.
  8. Preheat the oven to 220°C and grease two 8" inch square baking tray generously with butter. I lined with a layer of aluminium foil so there's less to wash then grease the foil with butter. ;)

  9. The dough by now would have risen to the top of the bowl. Remove the kitchen towel and punch down the dough. Turn the punched dough out onto a lightly floured work surface and knead until smooth, for about 1 minute. Divide the dough into two equal portions. My dough worked out to be 700g in total, so I had two portions of 350g.

  10. Roll out one portion of the dough into a rectangular shape then sprinkle the dough evenly with the brown sugar filling. Press the filling firmly into the dough and scatter half of the chopped chocolate pieces generously. (I did add more after the photo was taken btw)
  11. Using a bench scraper or spatula, loosen the dough from the work surface. Starting at a long side, roll the dough away from you, pressing lightly, to form a tight log. 

  12. Pinch the seam to seal. Roll the log seam-side down and cut it evenly into 9 pieces.

  13. Turn the pieces over on their flat sides and arrange them on the baking tray. Using your hand, slightly flatten each piece of dough to seal the open edges and keep the filling in place.
  14. Brush with egg wash then cover the baking tray with a kitchen towel and set aside to let dough rise on the countertop for at least 15 minutes before baking. Repeat with remaining dough.
  15. Remove the towel and bake for 15 to 20 minutes, until golden brown. 
  16. Let cool for 5 minutes, then remove and place scrolls on a wire rack. 
Enjoy whilst still warm, for they are the BEST fresh out of the oven! ;)

The rolls smelt really matcha-y prior to baking, but as the chocolate melted during the baking process, it did end up being a little more chocolatey that it is matcha-y after baking.

Still very delicious regardless, but if you want it stronger in matcha flavour, I recommend upping it from 2 tbsp to 3 tbsp of matcha powder in the dough instead. I'm planning to do that the next time I make this recipe again, which I can foresee will be very soon!

As usual I used Zen Wonders organic culinary grade Shizen. For those keen to try, Zen Wonders is offering an exclusive 10% off the total bill across all products for The Bakeanista's friends. Just enter "BAKENSTA" at check out. ;)

Wednesday, January 13, 2016

Chewy Green Tea Cookies with Matcha Chips

Remember these matcha white chocolate chips that I made a few weeks ago? I've been so busy running errands, and taking my parents around for the past two weeks that they've just been sitting in my fridge, waiting.

So this week after my parents have flown back to Malaysia, and The Boyfriend has gone back to work after his 2 weeks break, I finally had some time to myself.

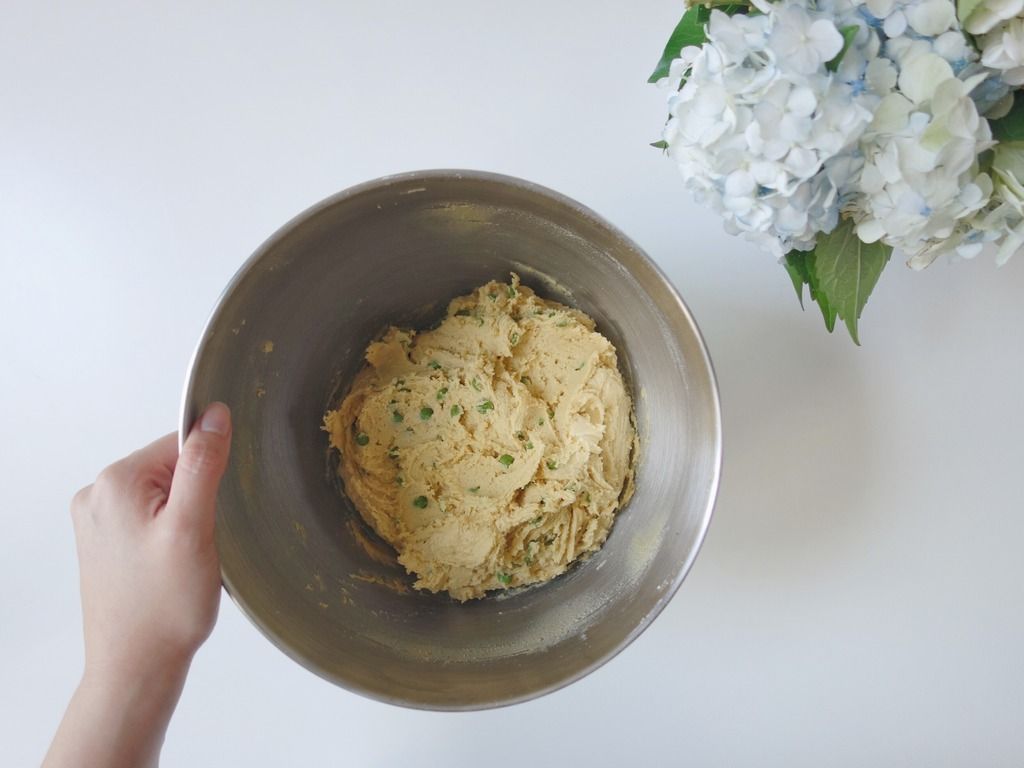
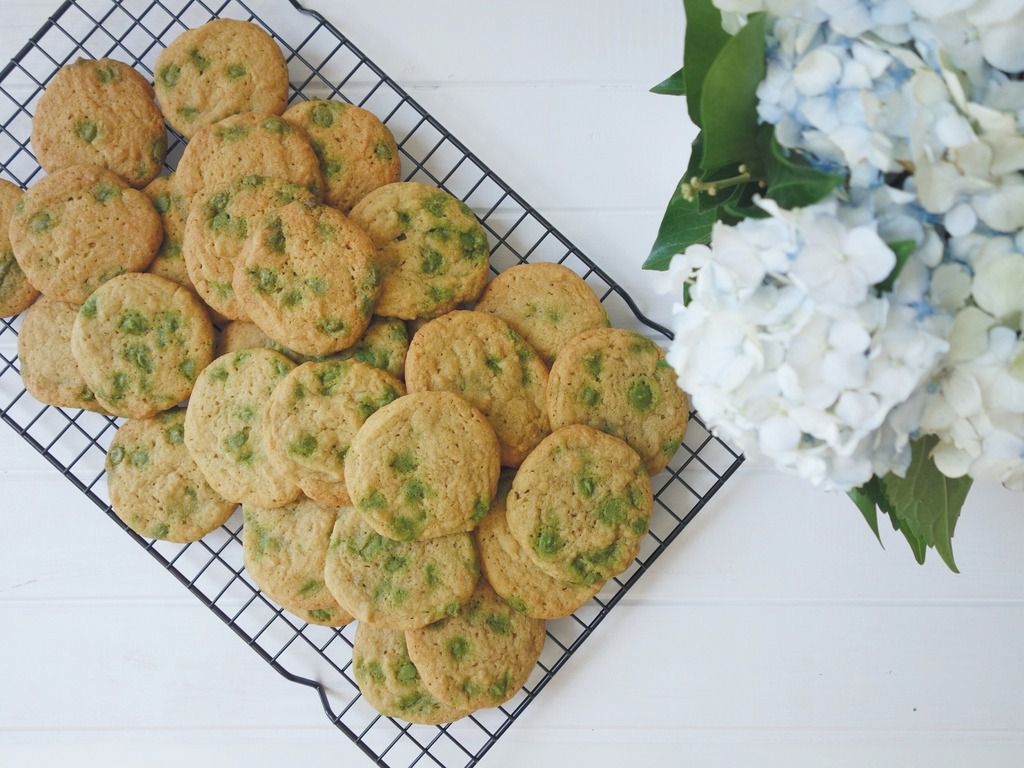
And I got right down to baking that very morning! I absolutely love the tinge of green mini matcha chips amidst the cookie dough.

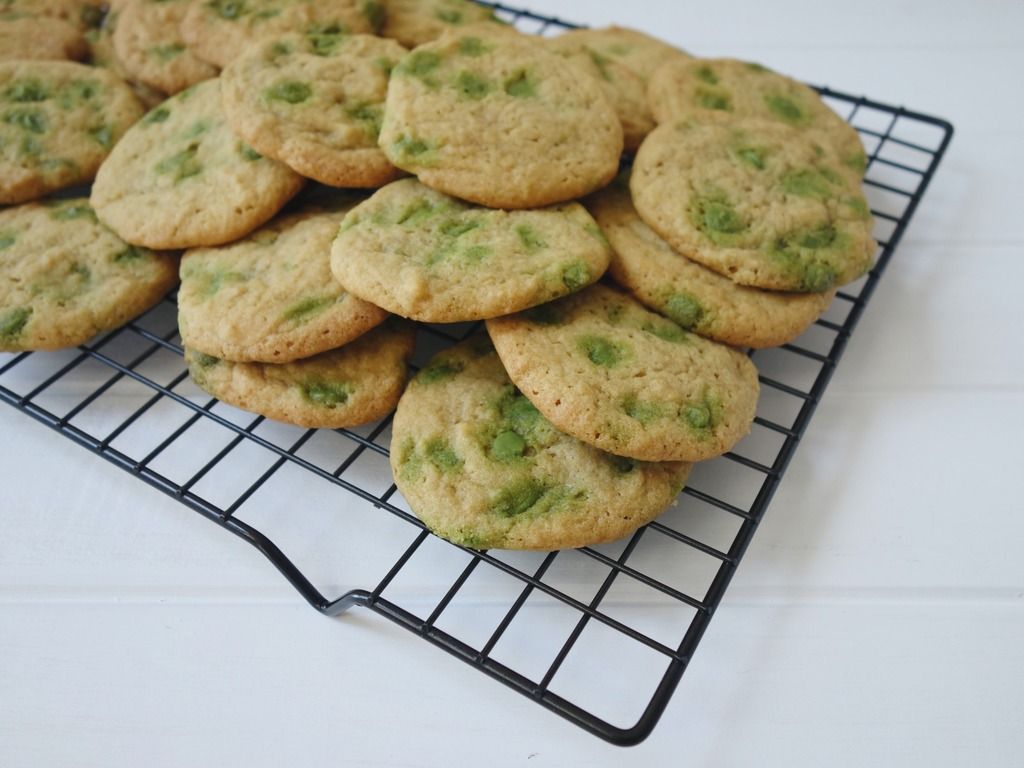
This simple recipe produces the chewy type of cookie. These divine beauties are crisp on the outside yet soft and chewy in the middle and with delicious matcha chocolate chips spread throughout them... Oh, they are a scrumptious treat!

And the best part about homebaking is the smell of freshly baked goodies. My kitchen smelt so SO good the entire afternoon. I hope you will enjoy this recipe as much as I did:

Chewy Matcha Chip Cookies
Recipe adapted from Une-deux and modified by The Bakeanista

Ingredients
  • 230g or 1 cup butter, softened
  • 1 cup castor sugar
  • ½ cup brown sugar
  • 1 egg
  • ½ tsp vanilla
  • 4 tbsp strong-brewed green tea
  • 2 3/4 cups plain flour
  • 1 tsp. baking soda
  • ½ tsp baking powder
  • ½ tsp salt
  • 1½ cup matcha chocolate chips

Method
  1. Make matcha chocolate chips and set aside - eecipe available here. You can make a day or even a week in advance, just ensure that the chocolate chips are kept in air tight container. As it is summer now in Australia, I had to refrigerate the chips.
  2. Preheat the oven to 180°C. Line a cookie sheet with parchment paper, set aside.
  3. Brew a small amount of green tea. I used one teabag of Japanese green tea and 4 tbsp of hot water.
  4. In a small bowl, stir together the flour, baking soda, baking powder and salt; set aside.
  5. Using a mixer, beat together the butter and sugar until very smooth and fluffy. This takes about 4-5 minutes.
  6. Beat in the egg, vanilla and green tea.
  7. Gradually blend in the dry ingredients until well combined.
  8. Fold in the matcha chips carefully.
  9. Roll rounded tablespoonfuls of dough, then place on the prepared cookie sheet, about 1½ inches apart. Use your palm to press them down slightly.
  10. Bake for 10 minutes on middle rack or until lightly browned.
  11. Let stand on cookie sheet for 2 minutes before removing to cool completely on a rack.

The cookies were best enjoyed fresh out of the oven, still a little warm and with a cup of tea. I couldn't resist them, I had 4 pieces in one go and felt super guilty as I was meant to start clean eating again this week. But but... They really were too good to stop at one!

The green tea flavour really stands out as the cookie dough is infused with strongly brewed Japanese green tea, and paired with the matcha chips. Love! This is the perfect kind of cookie for me or anyone of you who loves green tea as much as I do.

There's a running joke that I should rename myself to The Matchanista instead of The Bakeanista, with all the green going on in my Instagram feed haha.

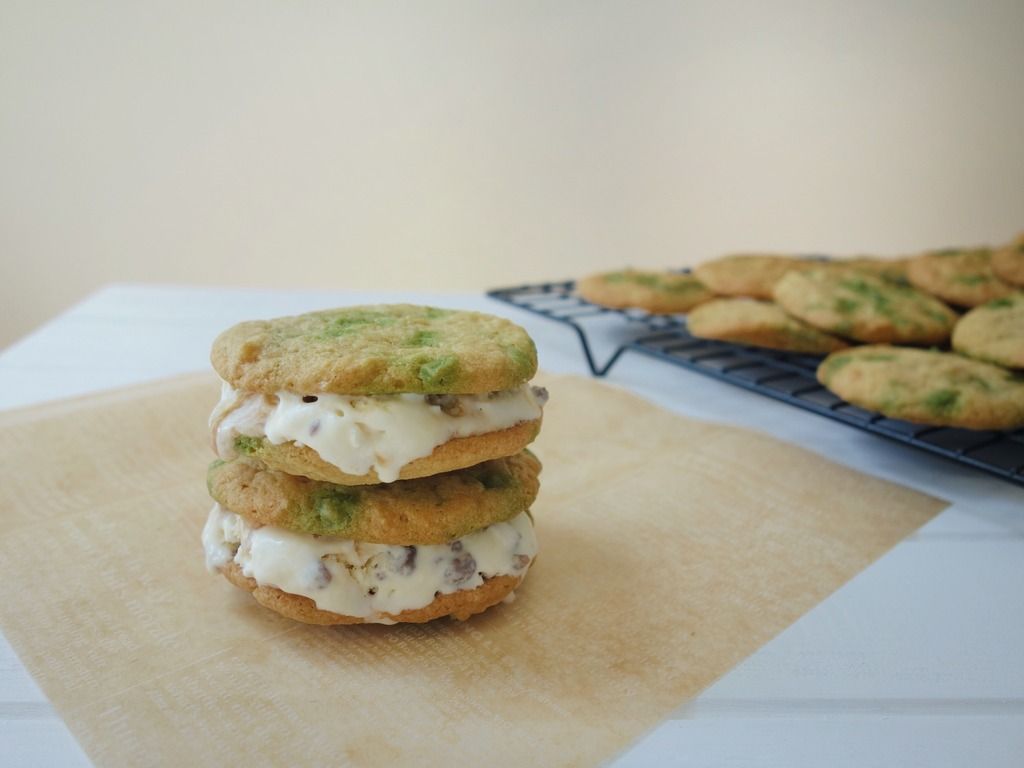
If you're a sweet tooth like I am, you could also put together a really quick summer dessert - ice cream cookie sandwich!! All you need is some ice cream and two pieces of cookies. ;)

And as usual, if you've got any questions or feedback, feel free to leave them in the comment box below. Happy baking! :)

Thursday, December 17, 2015

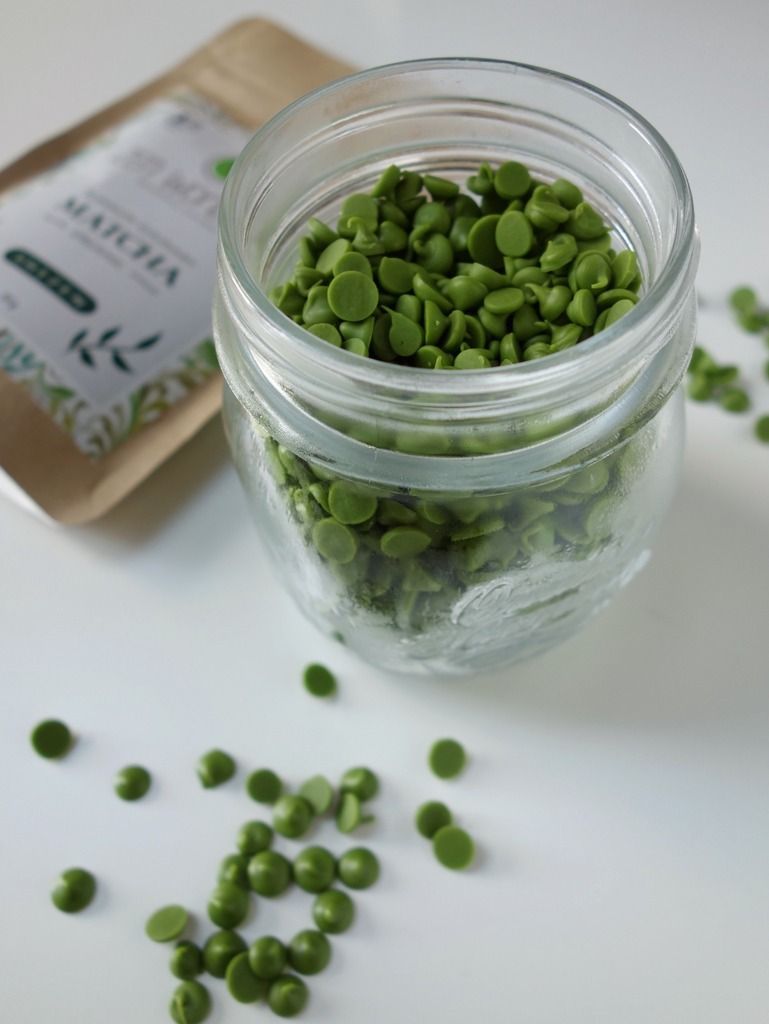
Matcha Green Tea Chocolate Chips

It seems that these days I'm matcha-fying almost everything. There's so much one can do with matcha powder - cakes, breads, cookies, ice cream, ganache - oh, the endless possibilities!

I've tried them all before and I was looking to experiment making something I've never done before. This time around I was inspired by Thirsty for Tea to make my very own matcha chocolate chips.

Look at the stunning green colour! Zen Wonders was really kind to provide me with a new packet of Shizen to experiment with.

I had a chat to Robert, the owner behind Zen Wonders and I was really impressed with how passionate they are about matcha. They really do pride themselves in offering only high qrade matcha.

In his exact words, "Although our margin would be comparatively lower than others in the market, we don't mind because we just want to share our love for good matcha with everyone else."

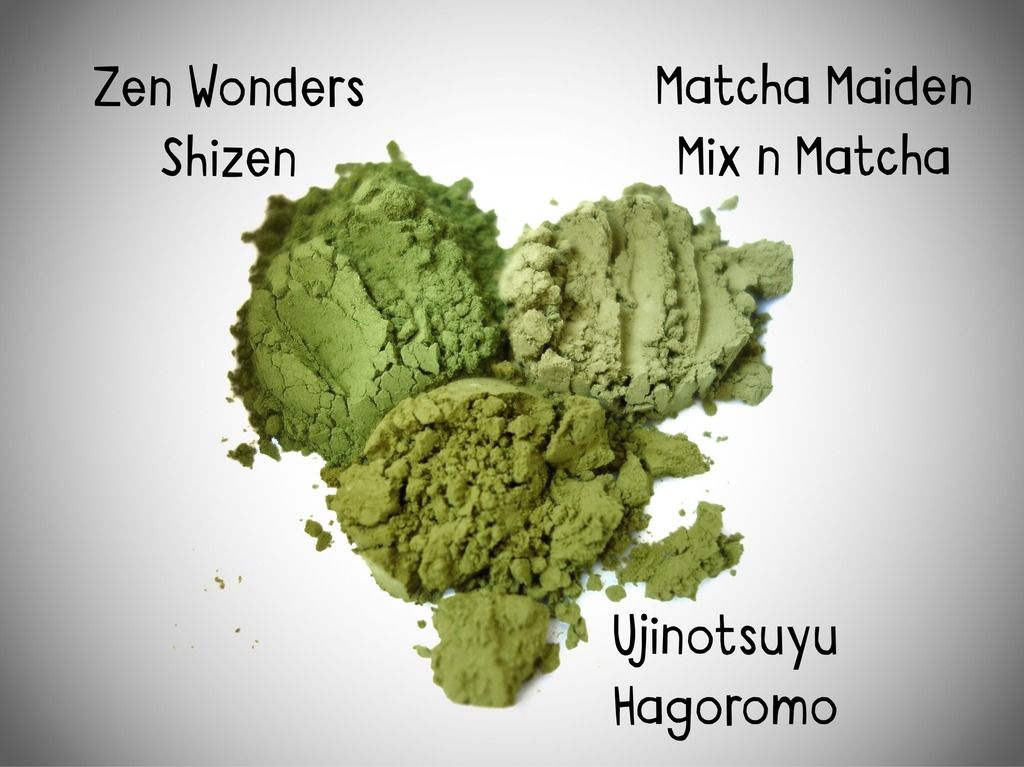
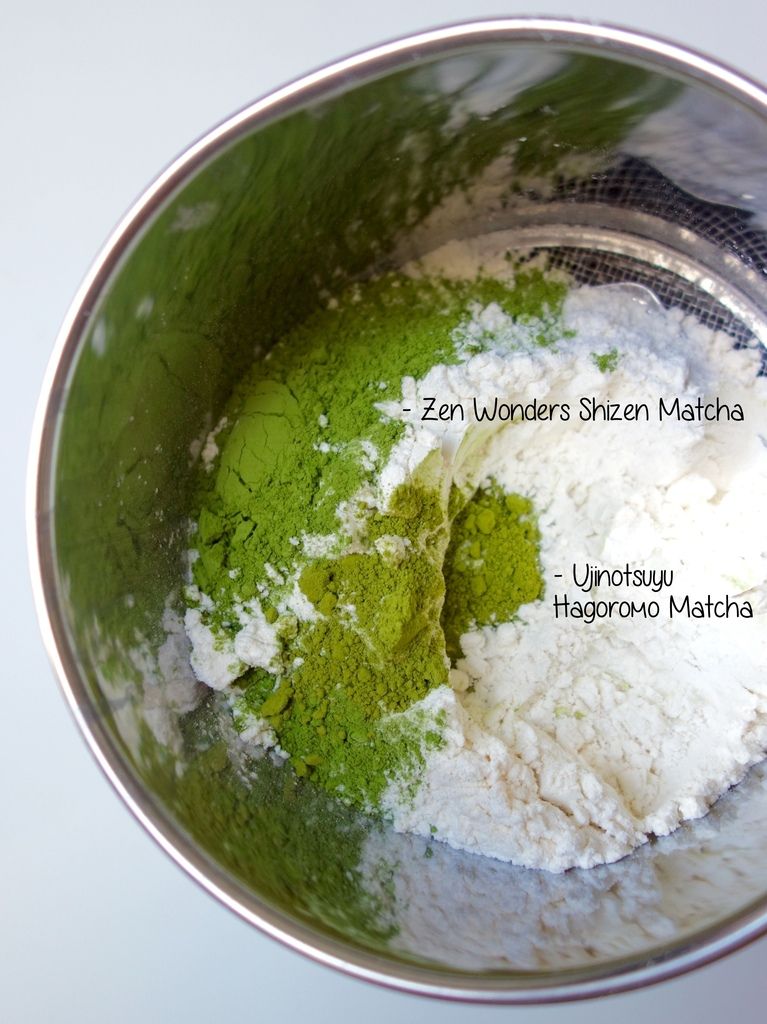
In my previous post, I shared a brief comparison between Zen Wonders Shizen and Ujinotsuyu Hagoromo Matcha and today I want to share yet another photo for comparison sake.

My friend Sally and I have both tried Matcha Maiden and sadly we weren't as impressed as I didn't find it any different from the Ujinotsuyu Hagoromo. I personally feel that Zen Wonders' Shizen takes it up a notch as it is definitely more fragrant, and the colour difference above is quite apparent.

As I mentioned in my previous post, the more vibrant and green it is, the better as it translates to a higher grade matcha.

In terms of pricing though, Zen Wonders is a tad more expensive, but you really get what you pay for. Below is the pricing for your perusal. Like everything else, there is a different grade with matcha as well and I guess it just really depends on how much you're willing to spend on matcha powder.

  • Zen Wonders Shizen: 50g for $26.90 ($5.38 per 10g)
  • Matcha Maiden Mix n Match: 70g for $24.95 ($3.56 per 10g)
  • Ujinotsuyu Hagoromo: 40g for $7 ($1.75 per 10g)

Even though I was given the product to bake with, I was not paid to write this. I am sharing this with you because I truly love their matcha powder. I wouldn't rave about a product that I personally do not like, that you can be rest assured of.

Plus, if my above photo does not convince you enough, I don't know what will. You've just really gotta try it for yourself. ;)

Update (11/01/2016) - For those keen to try, Zen Wonders Matcha is offering an exclusive 10% off the total bill across all products for The Bakeanista's friends. Just enter "BAKENSTA" at check out. 

Anyhow, here's the recipe for those keen to make their very own matcha chocolate chip:

Matcha Green Tea Chocolate Chips
Recipe adapted from Thirsty for Tea and modified by The Bakeanista

Ingredients
Method
  1. Melt white chocolate over a double boiler, making sure the bottom of the bowl does not make contact with the boiling water. Use a spatula to gently stir.
  2. Once chocolate is melted and smooth, sift in the matcha powder and mix until well incorporated.
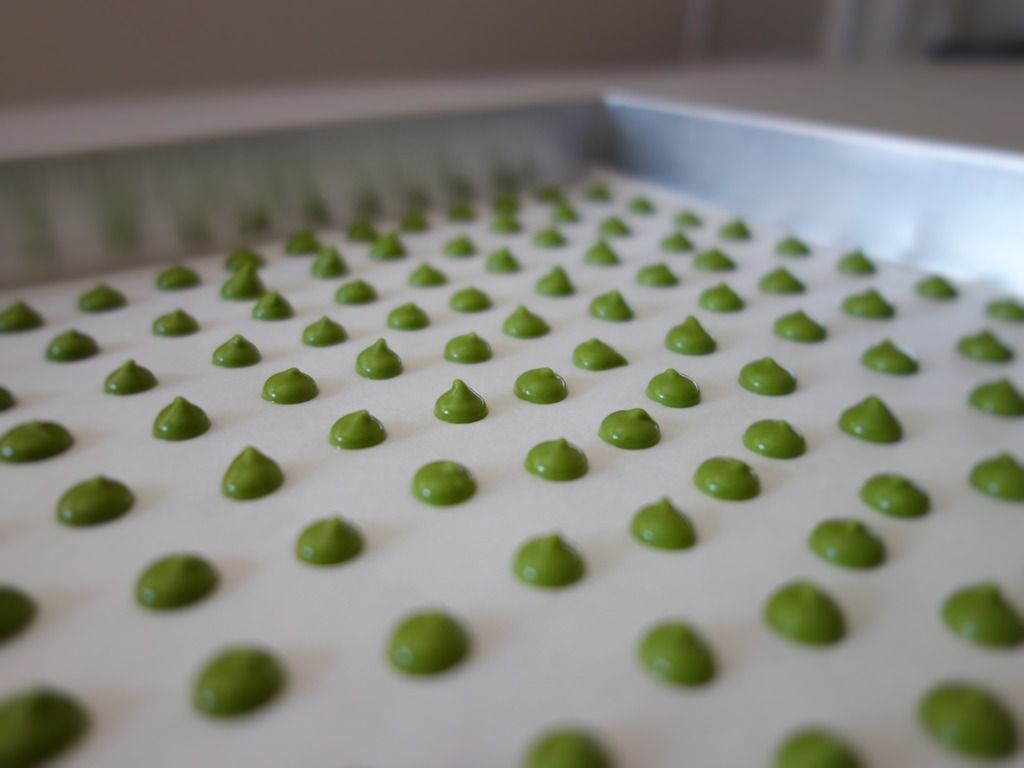
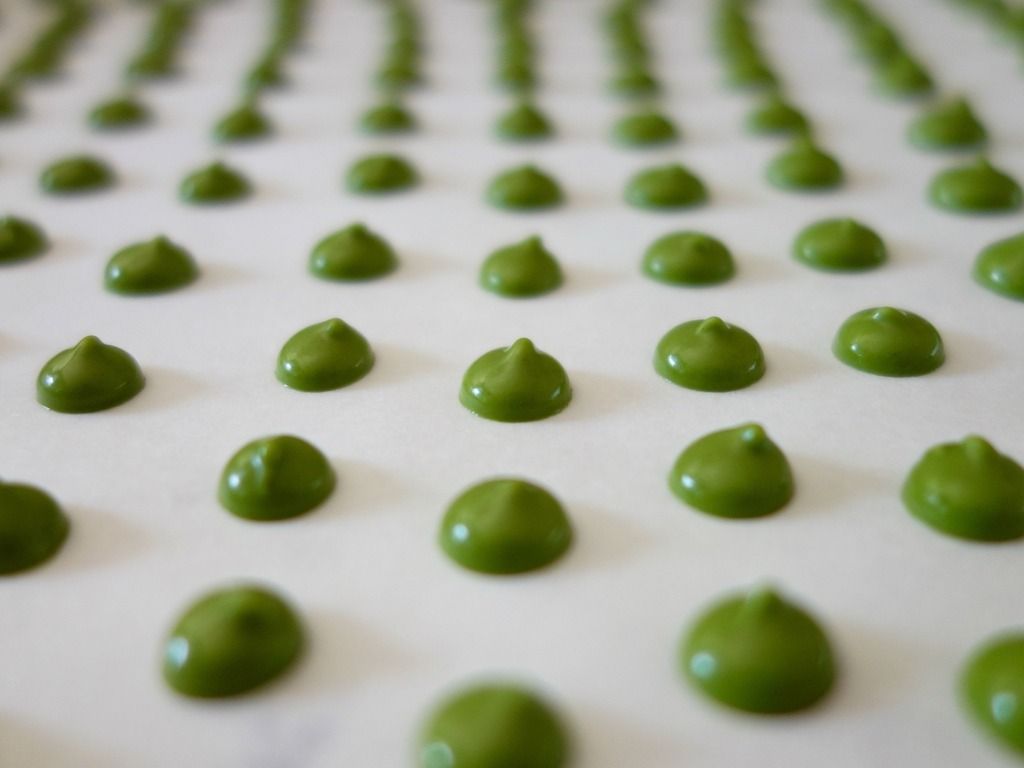
  3. Transfer to a piping bag with a small and round nozzle tip and pipe into 'chips' onto a piece of parchment paper ensuring that the chips do not touch each other. The chocolate will start to harden as you go, so make sure you work as quickly as you can. 
  4. Allow to harden completely, about 1 hour at room temperature or you can speed up the process by placing tray in refrigerator.
  5. Once harden, release the chips from the parchment by gently pulling the parchment up from each of the 4 corners towards the center of the baking sheet. Store them in an airtight container.

I have to admit though, piping these matcha chocolate chips was not an easy task. It was arduous and tiring. By the end of it, my fingers and arm were all aching! You have no idea how relieved I was when I got to the end.

As the chocolate was really hot at the start, I couldn't work as quickly as I'd like. The chocolate did start to harden as it cooled down, so I had to quicken up my pace which means no rest for my poor hands. And to think that I started making these right after I came home from my intense yoga class. *cringe* I won't lie, my hand started shaking towards the end haha!

But it was well worth the effort though. These tiny little gems are cute and delicious! I love the bittersweet taste of matcha; it cuts through the sugary sweetness of the white chocolate and the result is simply amazing! You may use these chips in any recipe, as you would chocolate chips.

I am planning to make chewy chocolate chip cookies, but instead of using milk chocolate chips as I usually do, I will use these matcha chocolate chips instead. I will be sure to share the recipe once I get to baking them! Till the next matchanista post. Enjoy baking, y'all. :)

Monday, December 14, 2015

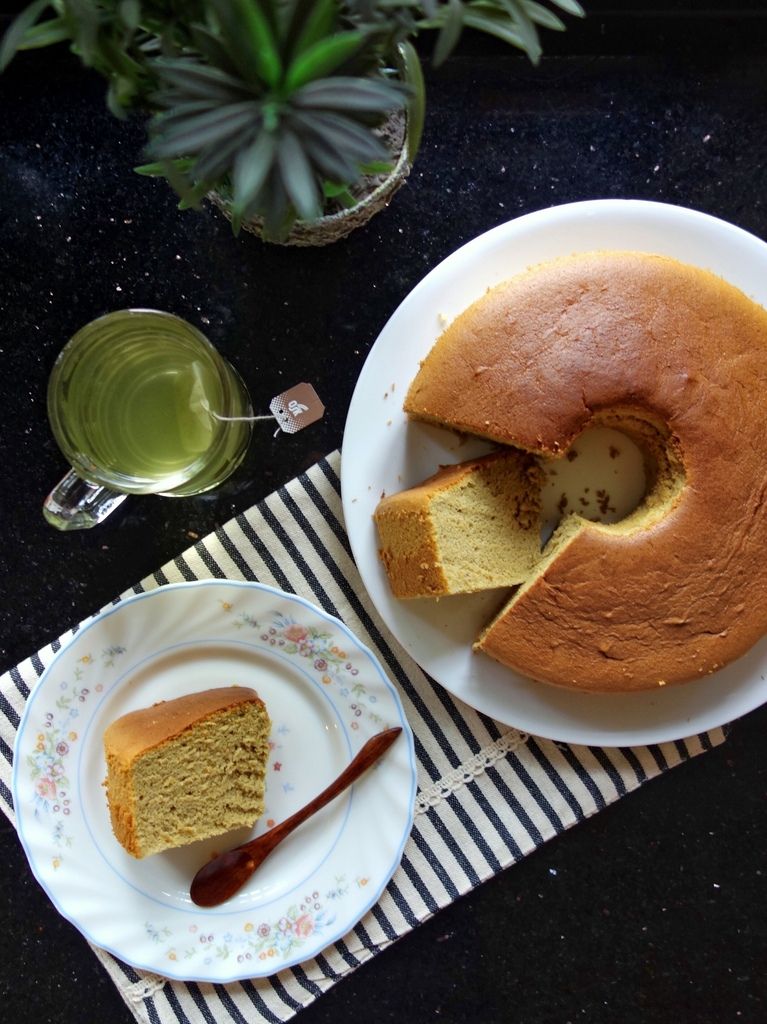
Green Tea Matcha Chiffon Cake

If you've been reading my blog or have been following me on Instagram (@thebakeanista), you'd know by now how much I love chiffon cakes and how obsessed I am with matcha.

Today I am sharing with you this matcha chiffon cake recipe that I have made many times in the past. I've received lots of amazing feedback from my family and friends whom I have shared the cake with.

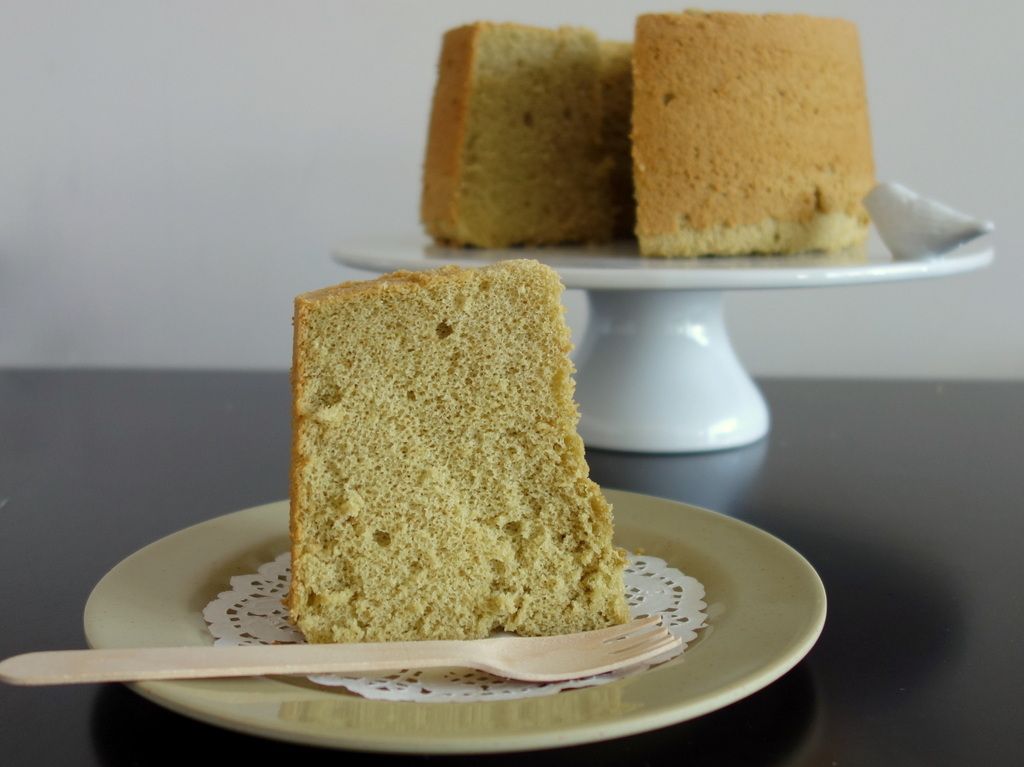
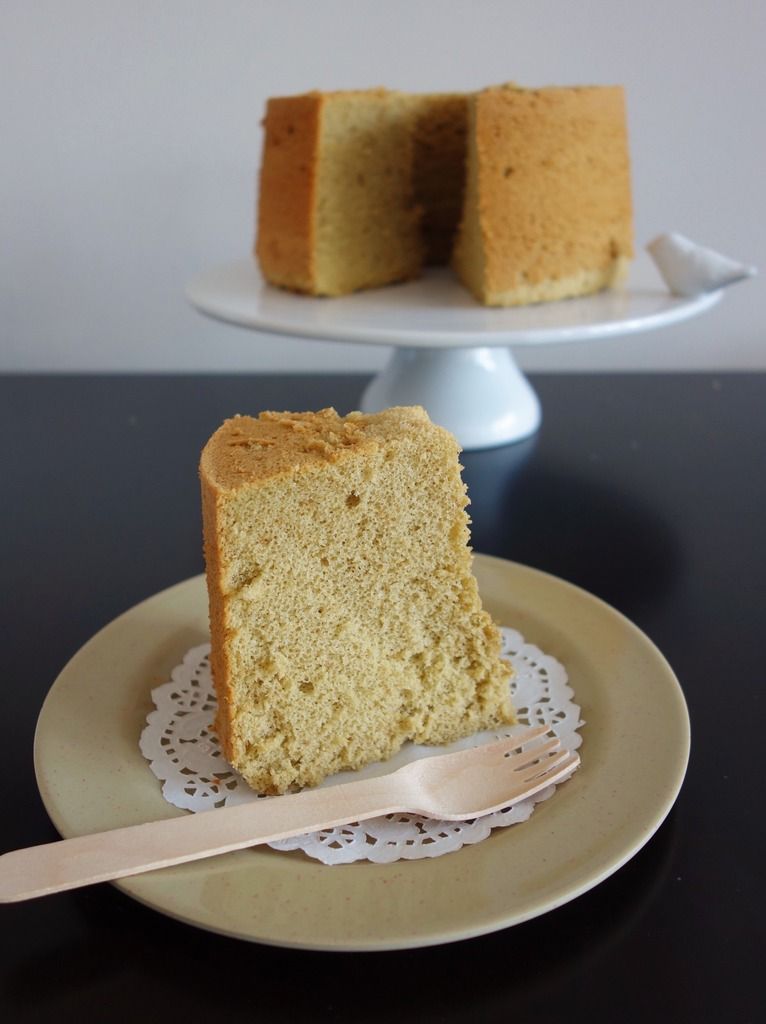
The texure of the cake is really airy, light and fluffy, as all chiffon cakes should be! Don't say I didn't warn you but you won't be able to stop at one slice. ;)

Here's the recipe and if you'd like to read on, I also shared a little on the difference between using low and high grade quality matcha powder.


Green Tea Matcha Chiffon Cake

Recipe adapted from Just One Cookbook and modified by The Bakeanista

Ingredients

(A)
  • 6 large egg yolks
  • 90g castor sugar
  • 80ml vegetable oil
  • 120ml water, room temperature
  • 150g cake flour (substitute w/ 122g plain flour & 33g corn flour)
  • 2 tsp baking powder
  • 1 tbsp matcha powder
(B)
  • 6 large egg whites
  • ½ tsp cream of tartar
  • 60g caster sugar

Method
  1. Preheat oven to 170°C. Sift flour once with baking powder and matcha powder then set aside. As I used a substitute of plain flour and corn flour, I had to sift the combination thrice before sifting again with baking powder and matcha.
  2. Combine egg yolks and sugar in a bowl and beat until mixture becomes light and colour turns pale. This takes approximately 4-5 minutes.
  3. Add vegetable oil and mix together. Add the water and whisk until well combined.
  4. Add flour mixture gradually in 4-5 folds, and mix until batter is well incorporated without any lumps. Set aside.
  5. To make meringue, in another clean and dry bowl, beat egg whites until foamy then add in cream of tartar. When the mixture starts to get bubbly, add half of sugar and continue beating on high speed for a few minutes. Reduce speed to medium-high then add remaining sugar and beat until egg whites are glossy, with stiff peaks.
  6. Using a spatula, add one-third of meringue into egg yolk mixture and fold in lightly. Add in another third of the meringue and fold. Finally add remaining meringue and fold to incorporate completely.
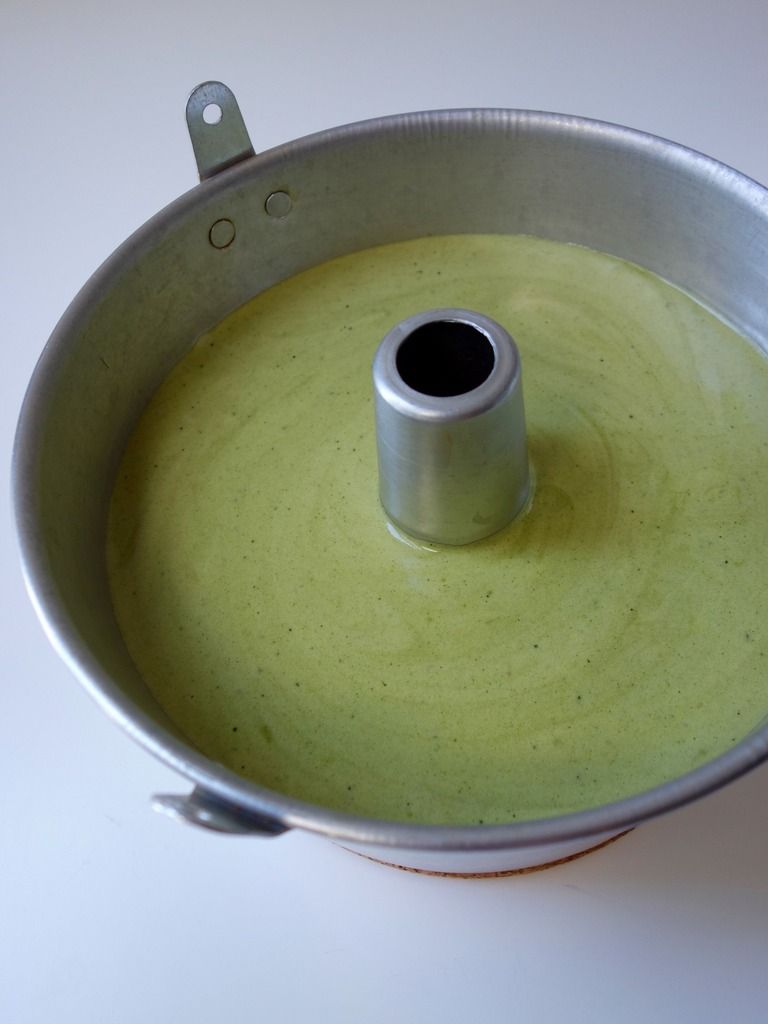
  7. Pour batter into a 22cm chiffon cake tube pan (please do not grease the pan) and knock it lightly on the tabletop to remove air pockets.
  8. Bake in preheated oven for 45 minutes. When cake is done, remove from oven and invert it immediately, leaving it to cool. Please make sure the cake is left upside down until completely cool.
  9. Once cake has cooled completely, carefully run a knife or spatula around the sides of the cake to loosen it before inverting onto a wire rack. You can now enjoy the cake!
I hope you will enjoy the cake as much as I did! :)

*********

I have been asked many times what matcha powder I use in my bakings, so I thought I'd share this little insight on what matcha powder I have been using in the past and what I am currently using.

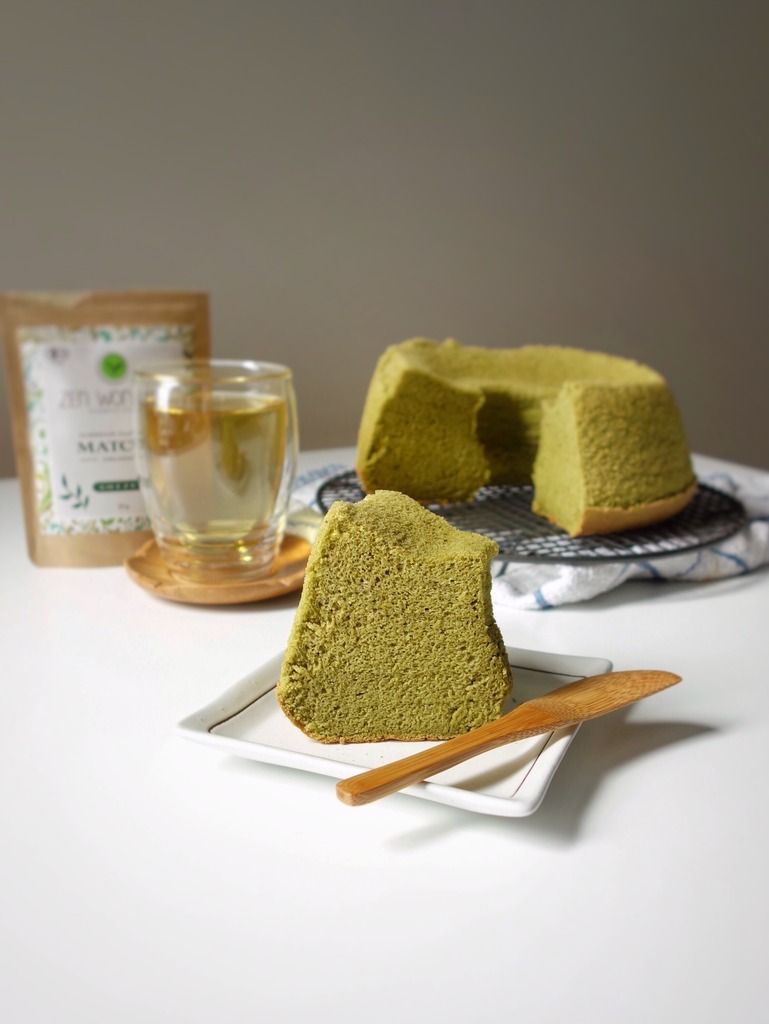
As you can tell from the above few photos, the cake turned out a little dull and brownish in colour after baking as I was using a lower quality matcha powder, namely the Ujinotsuyu Hagoromo Matcha.

A friend once commented on my photo and noted how brown my matcha cake looks, in her exact words "colour looks like gula melaka chiffon cake", and gula melaka as you all know is dark brown in colour! Can you hear my heart break? Lol lol.

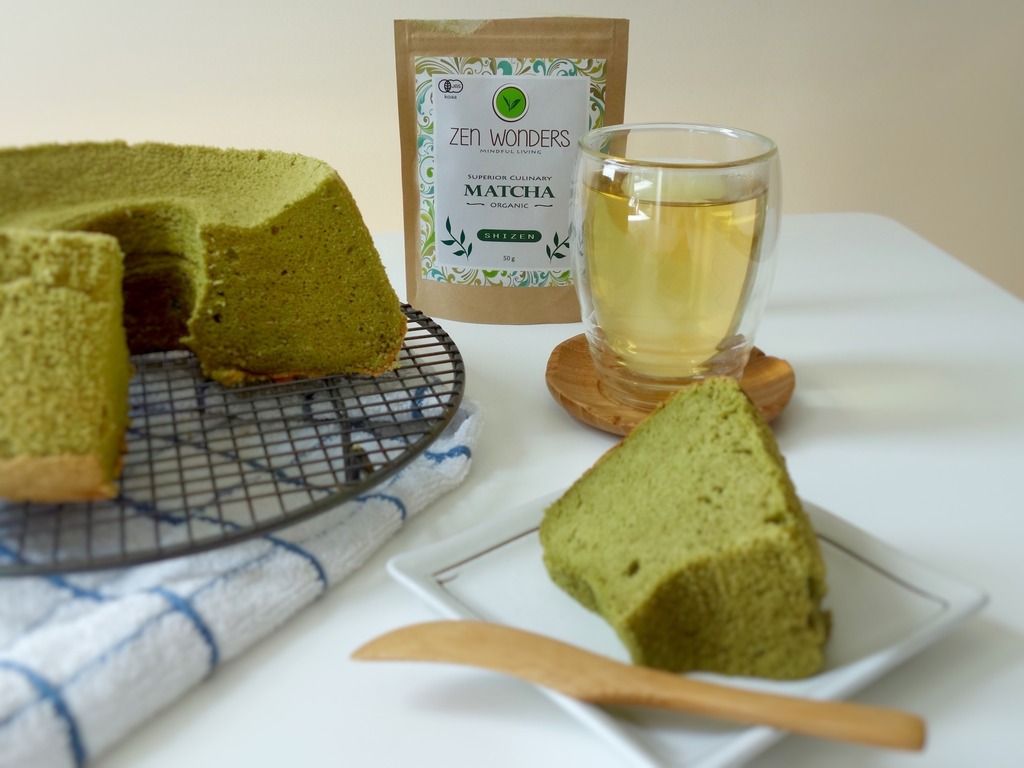
But well, ever since I was recently introduced to Zen Wonders matcha powder, I've never had any more problems with dull looking matcha baked goodies. Yay! See how the cake is greener in this photo? It not only looked greener, the cake also tasted better and smelt so much more fragrant!

I'm now hooked onto good quality matcha. Winning this pack of Superior Organic Culinary Shizen from Zen Wonders has well and truly changed my perspective on using better quality matcha; as the phrase that goes "you pay for what you get".

You can tell from the above photo the difference in the colour itself. The Zen Wonders Shizen matcha powder is more vibrant in colour because it is of higher grade which means the matcha is fresher in taste and a lot less bitter.

So if you're hunting for good quality matcha, a good key point to spot a good matcha is in its colour - ie. the more vibrant and green it is, the better as this means that younger tea leaves have been used to produce the matcha powder. This also translates to the product having slightly higher nutritional values too.

I have also learnt that the vibrant green is an indicator of a proper shading procedure prior to the harvest, which increases the chlorophyll content of the leaves and a good thing to note is that chlorophyll is a powerful detoxifier for our body.

Lower grade quality matcha is dull green in colour because the product is obtained by grounding older tea leaves and many times including their stems, which doesn't happen for higher grades as the leaves are carefully de-stemmed and de-veined prior to grounding.

So although the Hagoromo Matcha is more affordable and widely available in many Asian grocery stores for $6-7 a tin, the difference in using a better quality matcha really is more beneficial as it is more nutritional and hey, it definitely does yield a more aromatic and fragrant matcha cake too!

I have been enjoying my Zen Wonders Shizen in matcha lattes and baked goodies, and hoping that my pack of matcha never finishes! I am a convert now and I cannot recommend Zen Wonders enough.

I rave about it to all my matcha lover friends, and now, to you too! If you're looking for good quality culinary grade matcha powder, look no further - here. ;)

I thought I was a matchaholic before this but now I am even more obsessed with matcha than I have ever been, which I guess makes me a matcha addict 2.0? Haha!

Have a great week y'all. Until my next matcha post strikes again. *waves*

Update (11/01/2016) - For those keen to try, Zen Wonders Matcha is offering an exclusive 10% off the total bill across all products for The Bakeanista's friends. Just enter "BAKENSTA" at check out. 

Sunday, December 6, 2015

Matcha Green Tea Shortbread Cookies

With Christmas around the corner, I'm sure many of you are looking for gift ideas. I'm not sure about you, but I personally love giving edible gifts that I make with care and love.

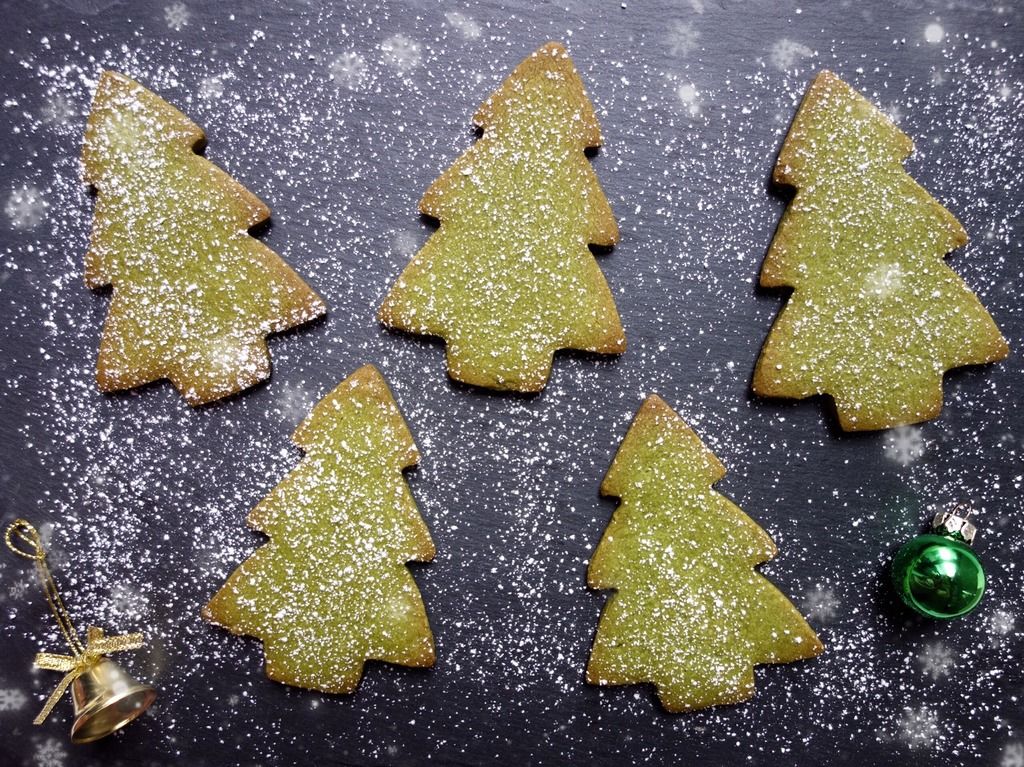
These Matcha Shortbread Cookies are buttery and fragrant, and I reckon would make the perfect Christmas gift for matcha lovers.

What I love about this recipe is that it's so easy to make and requires only 5 ingredients. They are simple but so delicious, and the addition of matcha powder adds an exotic taste to these buttery treats. They're so good, I am trying not to devour them all too quickly.

Of course you can use any cookie cutter that you like, but the Christmas tree shape makes it extra special for the festive season. ;)

Matcha Green Tea Shortbread Cookies
Recipe adapted from Martha Stewart and modified by The Bakeanista

Ingredient

  • 1 cup or 226g unsalted butter at room temperature
  • ½ cup confectioners or icing sugar
  • 2 cups all purpose plain flour
  • ½ tsp salt
  • 2 tbsp matcha powder

Method
  1. Preheat oven to 180°C and line a baking sheet with parchment paper. Sift together the flour, salt and matcha powder then set aside.
  2. Cream butter and icing sugar for approximately 4-5 minutes until mixture turns light, pale and fluffy.
  3. Add in flour, salt and matcha powder mixture then mix on low speed until a soft dough is formed.
  4. Transfer and roll dough out to 1/4 inch thick on either a clean parchment paper or like I did on cling wrap. Refrigerate dough for 25-30 minutes until firm so it will be easier to handle.
  5. Cut cookies using a christmas tree cookie cutter and place them on a lined baking sheet about 1cm apart. Bake for 13-15 minutes on middle rack or until edges are golden brown. Cool on pan for 2-3 minutes then transfer to wire rack to allow to cool completely.
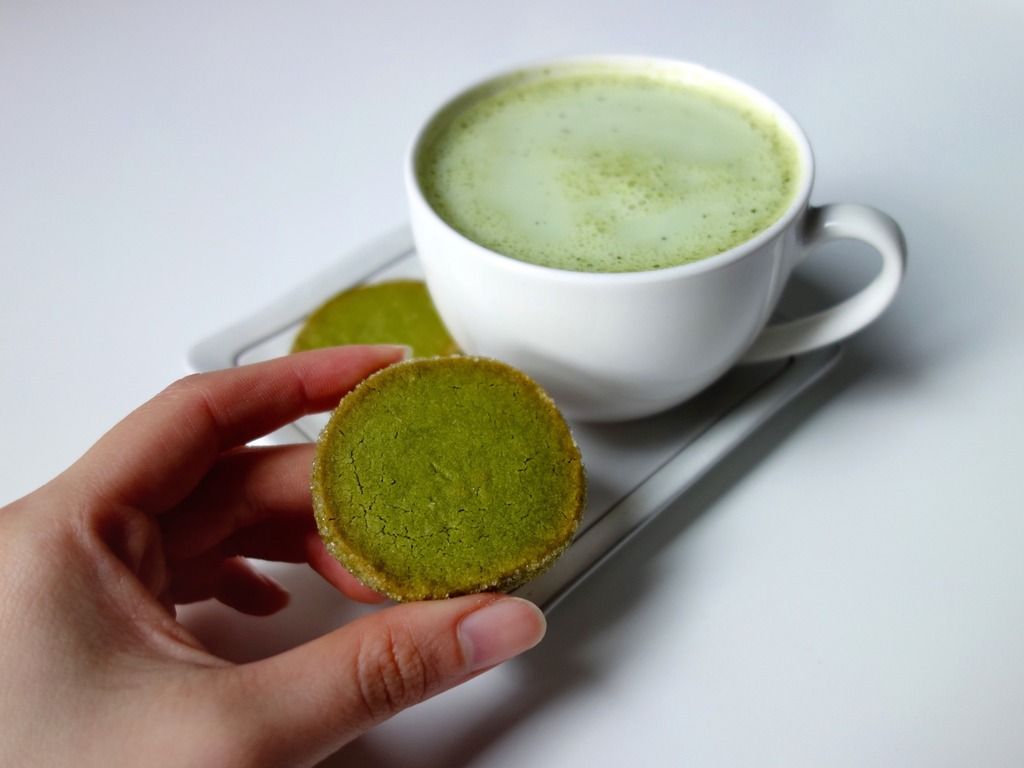
  6. You will have some remaining cookie dough scraps. I gathered them together and placed them onto cling wrap. I rolled the dough into a log about 1½ to 2 inches in diameter then refrigerated for a further 25-30 minutes. When firm, I cut the log using a clean knife into 1/4 inch thick cookie before rolling the sides of the uncooked cookie in white sugar for a crispier edge after baking. I arranged them onto baking sheet 2cm apart then bake for 11-13 minutes as these cookies were slightly smaller in size. Let it cool completely on wire rack before you dig into them. Make sure you don't scoff them cookies all up alone. ;)
This easy recipe is perfect to bake with kids, or if you're looking for a quick last minute recipe for stocking fillers, this would be a good one. I haven't got to it yet, but I'll be making a new batch closer to Christmas and I bet they'd look really cute wrapped up nicely.

For now, The Boyfriend and I are just going to enjoy the cookies. Our afternoon tea snack is set for a few days. Mmmm, delicious! P/S: They're best with a cuppa tea or matcha latte hehe.

Note: I used Zen Wonders Superior Organic Culinary Shizen (that I won from a competition they held on Instagram) in this recipe, and also in many of my recent bakes and I am absolutely loving it. 

Update (11/01/2016) - For those keen to try, Zen Wonders Matcha is offering an exclusive 10% off the total bill across all products for The Bakeanista's friends. Just enter "BAKENSTA" at check out. 

Friday, November 13, 2015

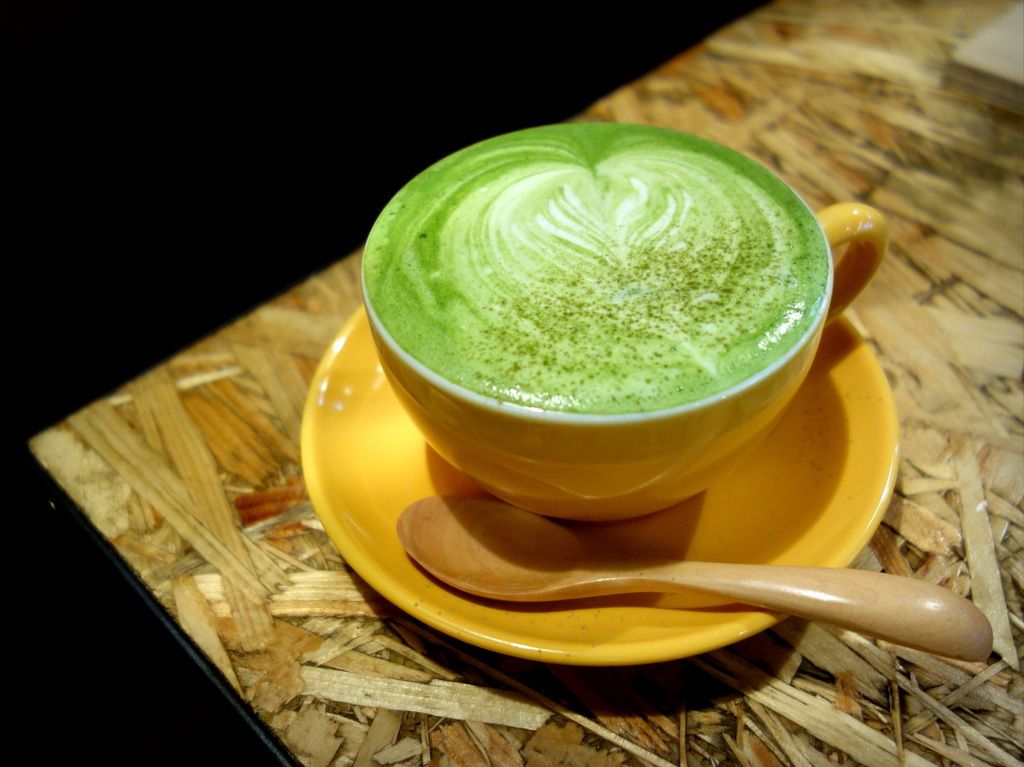
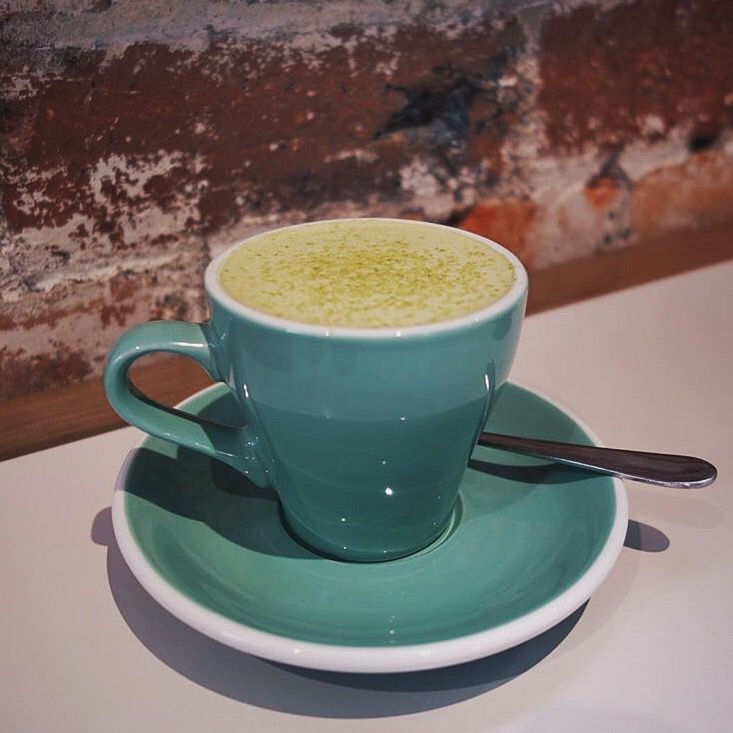
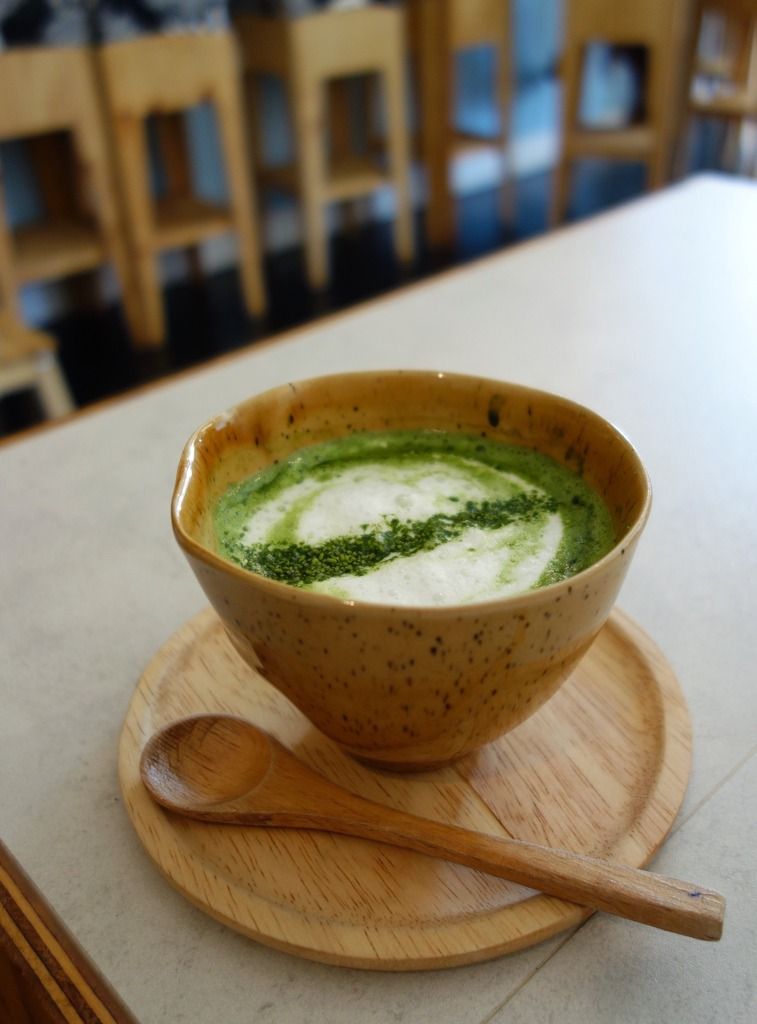
Matcha Latte 抹茶ラテ hunt in Melbourne

Hello and Happy Friday, everybodehhhh! As the post title suggests, today I am writing about one of my most favouritest (if such a word existed) drink which is none other than matcha latte! :)

If memory serves me right, I reckon it was some time last year when green tea started becoming a "healthy trend" in Melbourne which saw many cafes introducing matcha latte to their menu.

If you've noticed, the demand for matcha latte has also been increasing lately, and more and more cafes are brewing this delightful, green "coffee" which is basically a concoction of matcha powder, milk and a sweetener such as sugar or honey.

As I've been a big fan of matcha from years ago, you can imagine how this is only good news to me. ;) If you too love matcha latte as much as I do and often wonder where you can have matcha latte in Melbourne, then this compilation is for you.

But if you haven't yet heard of what matcha is, it is basically green tea powder that offers a number of health benefits such as being high in antioxidants, helps boost metabolism, assists in weight loss and increases your energy level, just to name a few.

Matcha is originally brewed with water as part of traditional tea ceremonies in Japan, but the modern take on it (which I believe was started by Starbucks) is the bittersweet matcha latte that I love.

I personally love my matcha latte strong without being too sweet and I hope you appreciate that this review is based purely on my personal preference. Regardless, I hope this post helps you find a good matcha latte that'd you enjoy and keep you wanting more! :)

**********

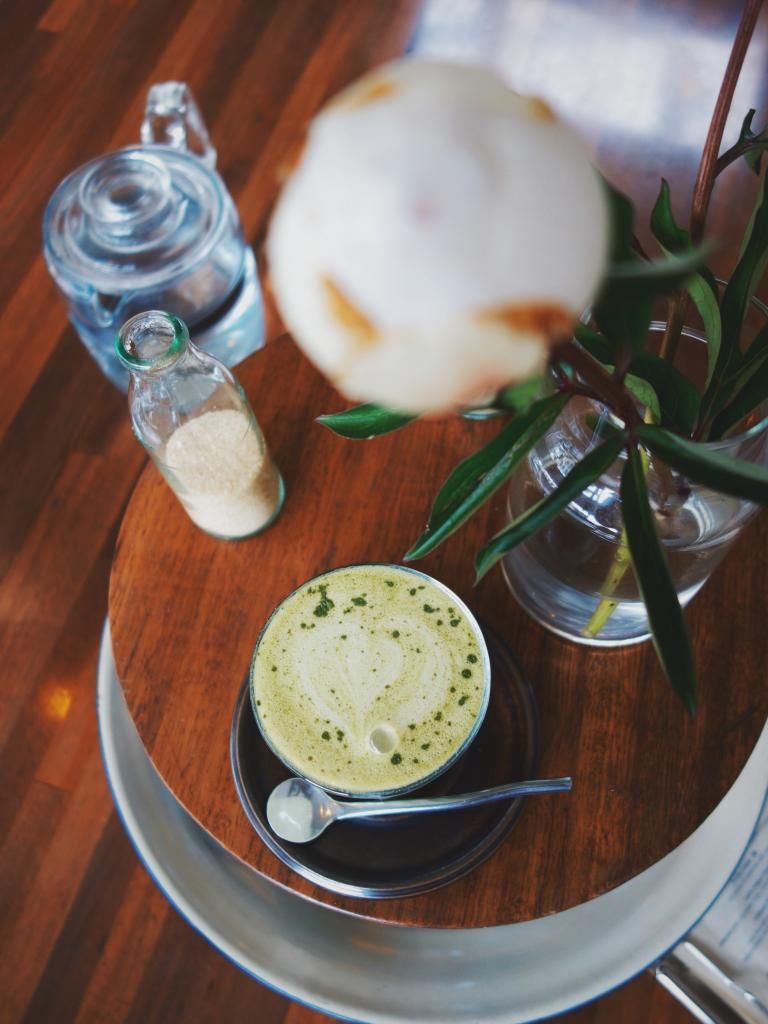
One of the first few sweet matcha lattes I've had in Melbourne was at Tana Cafe which I absolutely love and have returned multiple times since. The matcha latte at Tana have been consistently good over my few visits there. I can still remember how it was oh so creamy and delicious!

I like how tana's version is slightly sweetened, but not overwhelmingly so. The owner mentioned that they make their own mix using matcha powder from Japan and honey but did not disclose further.

One other plus point is that Tana uses bonsoy so there's no aftermath of tummy issues for those with lactose intolerance yay! Even though I don't usually like soy milk in my coffee, but this tasted different, in a good way, of course.

Tana Cafe
Tana Cafe Menu, Reviews, Photos, Location and Info - Zomato 

**********

Little Rogue is also very popular for their matcha latte which I've spotted all over my Instagram feed so I am glad I finally got around to try. My verdict? I loved it!

The bittersweet matcha flavour was really strong and I like how it isn't too sweet at all. I think out of the lot, Little Rogue's is probably the least sweet. I totally regretted getting it in the regular size. The next time I'm there again, I'm opting for the large!

Little Rogue
Little Rogue Menu, Reviews, Photos, Location and Info - Zomato 

**********

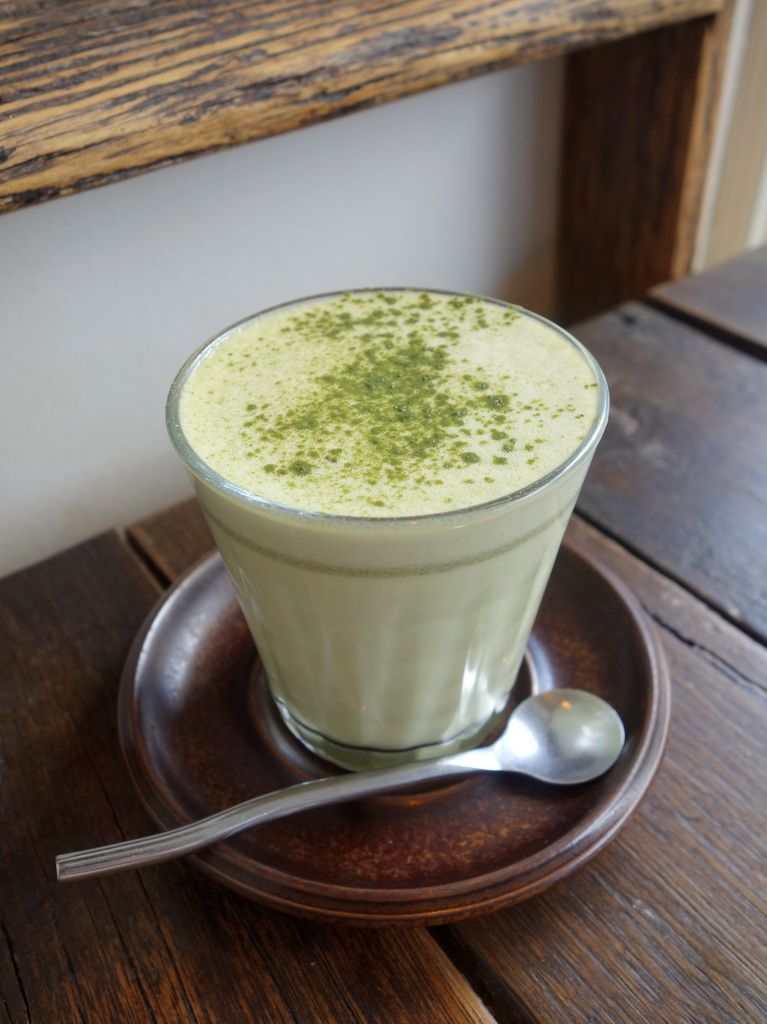
The next one on my list would be Momo Sushi in Hawthorn. I'd say this is one of my top 3 favourites as the matcha latte at Momo Sushi has the perfect blend of bittersweet with a notable matcha strength. As you can also see in the picture above, it was also very smooth and milky... I gulped it all too easily! Definitely one of the best. For coffee lovers, I've heard they've got a coffee matcha version too if you want a bit more of a caffeine kick. ;) Oh, they also serve amazing sushi!

Momo Sushi, Hawthorn
Momo Sushi Menu, Reviews, Photos, Location and Info - Zomato 

**********

Since The Boyfriend and I moved to South Yarra, we've been frequenting Maru Shih a fair bit for their reasonably priced and delicious Japanese food. But I often find myself there for their amazing matcha latte. I first tried their matcha latte mid last year and I remember it to be quite good, but I find it even better now as the matcha flavour is definitely stronger than it was before.

Maru Shih's matcha latte does have a deep matcha flavour but please do note that it is leaning slightly on the sweeter side. Although I do enjoy the original version, I have been trying to cut down on my sugar as you all know I am on a diet so I have specifically requested for a "less sweet" version and I am glad to report that it was still good!

Maru Shih
Maru Shih Menu, Reviews, Photos, Location and Info - Zomato 

**********

Moving on, Operator 25 also recently introduced yuzu matcha latte to their new spring menu. I found that the matcha flavour isn't strong enough for my liking as the yuzu was rather overpowering, but I appreciate how the drink is light and very refreshing. Op25's version is very unique, and it certainly is something different for a change!

Operator 25
Operator25 Menu, Reviews, Photos, Location and Info - Zomato 

**********

I remember I first discovered The Baba Sus when I was looking for places that serve matcha latte. I was really excited when my matcha latte arrived looking this gorgeous, but after having my first sip, I was a little let down. It was alright, but it didn't hit the right spot.

The matcha wasn't strong enough even though I specifically requested for a strong one. I felt like it tasted just like the ones I can make at home which was why I was disappointed. But thankfully the food there made up for it. We've been there thrice for the food and I absolutely loved every dish we tried there. You can read my full blog post on Baba Sus here.

Baba Sus
Baba Sus Menu, Reviews, Photos, Location and Info - Zomato 

**********


I've also tried Cafe Carpenter's green tea latte a while ago but whilst I found that it has the right amount of sweetness, I did find the matcha flavour to be a little too subtle for my liking. It was decent, but I did expect a bit more.

I do however love the presentation and tableware used - it's too pretty, don't you reckon? And although the matcha latte did not quite make the cut on my list, they've definitely got the best takoyaki in Melbourne. ;)

Cafe Carpenter
Cafe Carpenter Menu, Reviews, Photos, Location and Info - Zomato 
**********

Next up on my list is Le Petit Prince's decent matcha latte but if I had to be brutally honest, it was nothing to shout about as I found the matcha strength to be a little weak for my liking. But if you appreciate a weaker version, then you'd enjoy this.

Le Petit Prince
Le Petit Prince Menu, Reviews, Photos, Location and Info - Zomato 

**********

I was going through my list of matcha latte photos and came across this one I had at Sardi a while ago, which I have very conveniently forgotten about. May I selfishly conclude that if it wasn't at the back of my mind, it certainly wasn't mindblowing. Probably one of my least fav out of the lot. =/

Sardi
Sardi Menu, Reviews, Photos, Location and Info - Zomato 

**********

And last but not least, one of the most recent matcha latte I've had was at Kuu Japanese Cafe which certainly did not disappoint. The matcha flavour is quite strong and it isn't too sweet. Another one to go on my good matcha latte list. ;)

With the weather warming up, Kuu's iced matcha latte might appeal more to you. It sure was refreshing but I did find the matcha strength to be slightly weak so I'd personally stick to the hot version. The Boyfriend on the other hand was totally enjoying this. He noted that it was "just right and not too sweet, but was perfect with the ice cream" in his exact words.

KUU Japanese Cafe
KUU Menu, Reviews, Photos, Location and Info - Zomato 

**********

And that's a wrap! If you've been looking for good matcha lattes around Melbourne, why not try one of the above? Or if you know of any others places, please do let me know in the comments below.

Of course, if I come across any other good matcha lattes worth mentioning, I'll be sure to update this post in the future. Thanks for reading and have a great weekend, guys! :D
Click on 'OLDER POSTS' for more! :)