
The late Robin Williams once said spring is nature's way of saying "Let's Party!" and I cannot agree more!

It is gloomy and rainy today, but I am ever so thankful for the great weather that Melbourne has blessed us with over the weekend.
The Boyfriend and I headed out for lunch, went out for walks, and whilst The Boyfriend did a bit of house chores and ironing, I decided at the very last minute that I wanted to bake.
The Boyfriend doesn't have a lot of baking ingredients just lying around at his place, so I had to look around the kitchen to see what I can find, so as to decide on what to make.
5 ingredients and an hour later...
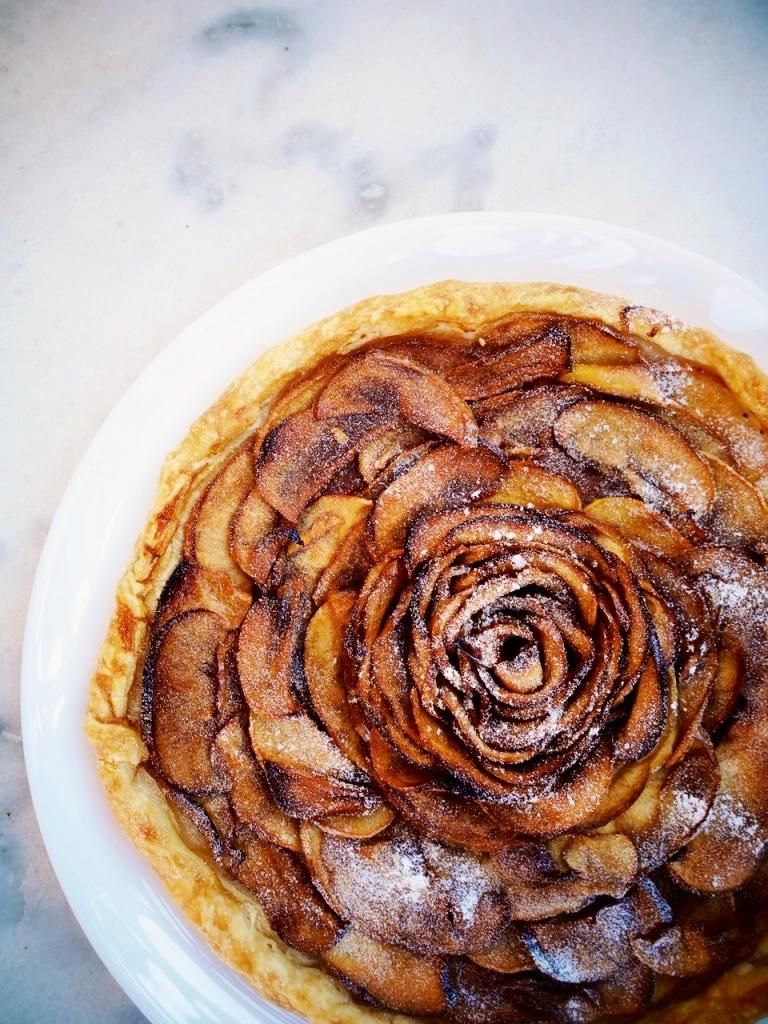
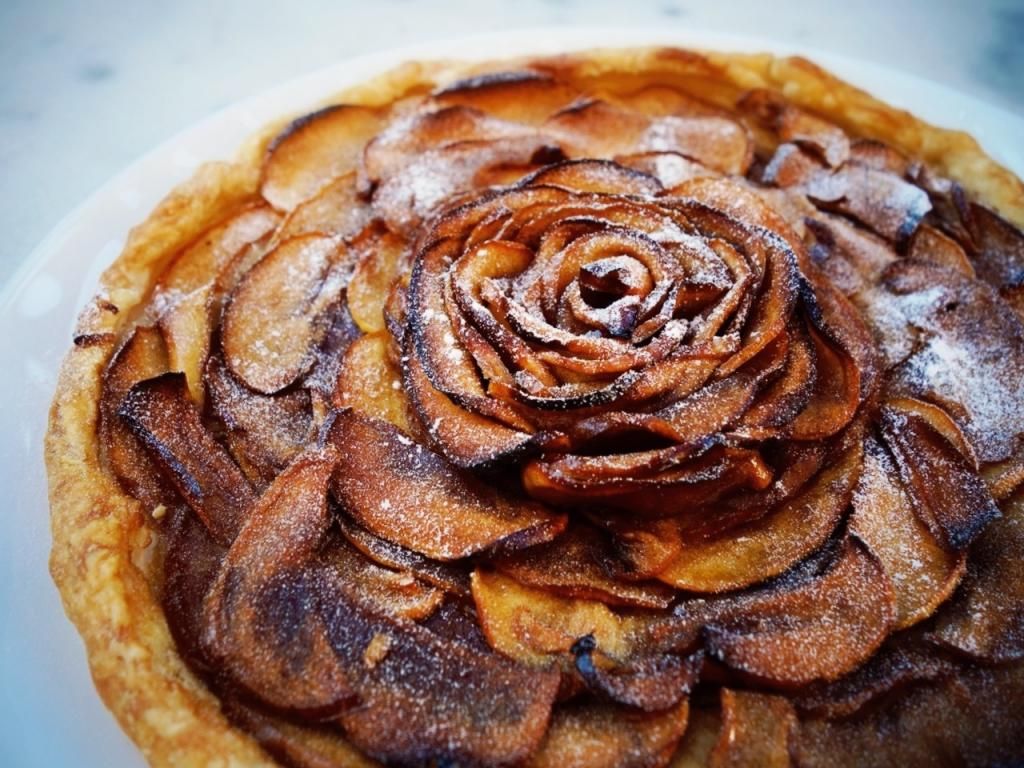
Quick & Easy Apple Tart
Recipe by The Bakeanista; Serves 10
- a sheet of puff pastry
- two red apples, cored then thinly sliced
- 1/2 cup brown sugar
- lemon juice from half a lemon
- 2 tbsp butter

Method
- Core and thinly slice both your apples. I recommend either Jazz Apples (my fav!) or Pink Lady apples.
- Preheat oven to 180 deg C. Thaw puff pastry sheet.
- Melt butter in a saucepan. Add apples, followed by sugar and lemon juice. Give it a good stir until the sugar is fully dissolved.
- Let the apples simmer away in the mixture for 5-8 minutes until it is soft enough to shape them.
- Remove the apple slices from the syrup and allow to drain in a sieve. Leave the syrup kept aside.
- Your puff pastry should now be a little flexible for you to shape. I laid the pastry sheet onto baking paper, then placed it into a round cake tin just to give it a nice round shape.
- Once your pastry is shaped, remove pastry and place on baking pan. If you can manage to shape the pastry free-handed, by all means do so.
- Your apple slices should be cool enough to handle now. Lay out the apple slices, starting from the outer layer and overlapping as you go to form a nice base.
- Roll the remaining apple slices to form the rose. I shaped it from the inside out.
- Brush the apples with a thin layer of the sugar syrup then bake for 30-35 minutes, or until pastry is puffed and golden brown.
- Remove from pan immediately and place on a serving platter.
- Serve warm with a food sprinkling of icing sugar, or with vanilla ice cream.
I brought the tart to dinner with The Boyfriend's family and they all loved it. Everyone commented on how beautiful it looked. :)
It wasn't extraordinary, but I heated it up a little in the oven for 5 minutes and served it warm. I was pleasantly surprised at how satisfying such a simple tart could taste.
It would have been perfect with vanilla ice cream, but we had to make do without. I'll definitely make this tart again, and make sure we have some ice cream to go with it.
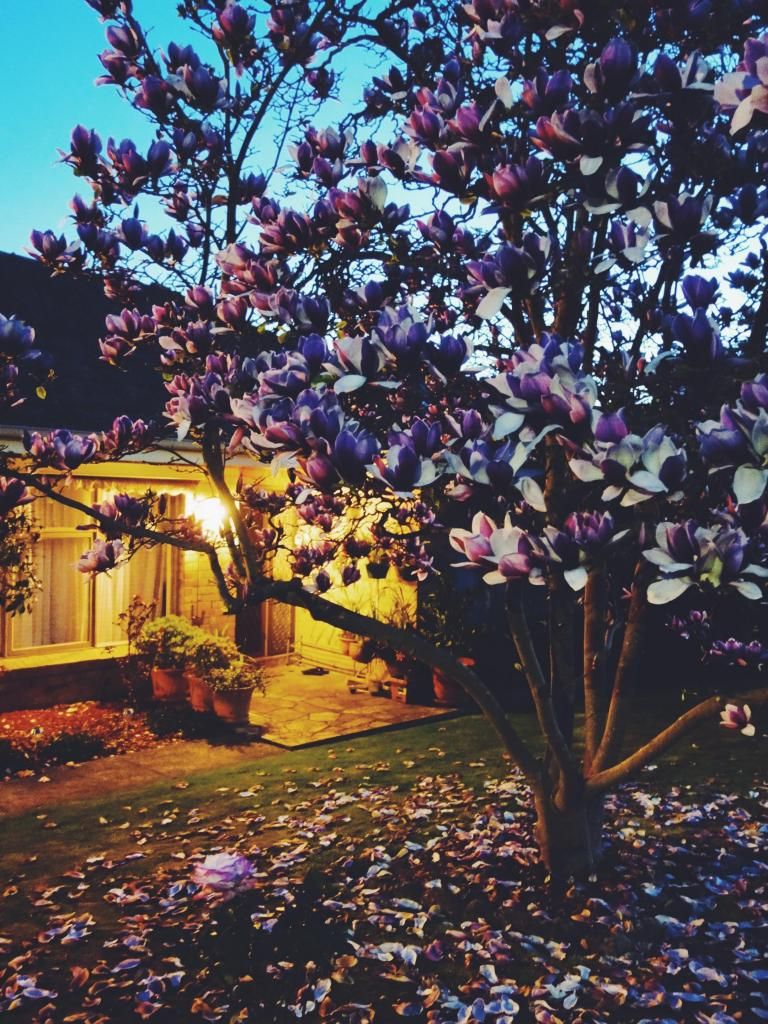
Alrighty, I'm ending this post with this shot I took of the gorgeous Magnolia tree at full bloom at The Boyfriend's uncle's home.
Happy Spring, everyone! (:
No comments :
Post a Comment