I will no longer be updating this blog.
DO CHECK OUT MY NEW BLOG AT WWW.THEBAKEANISTA.COM
Showing posts with label She Can Cook. Show all posts

Friday, October 30, 2015

Healthy Bibimbap using Quinoa

If I'd have to choose one type of food I really struggled not having whilst on my clean eating diet, it will have to be Korean food.

Being a K-food addict, I crave Korean food every single day! Even though I was in Malaysia, I could easily say no to the local food but if anyone were to offer me K-food, I'd be like "GIMMMMEEEEE!" My Mum thinks I am no longer a Chinese. =| #truestory #notkidding #mymumthinksiamcrazy

After being on the diet for several weeks at the start, I was so sick of eating the same mundane food, so I came up with this recipe for a healthier version of bibimbap (비빔밥) to satisfy my K-cravings and at the same time, meet my dietary requirements with a little bit of flexibility.
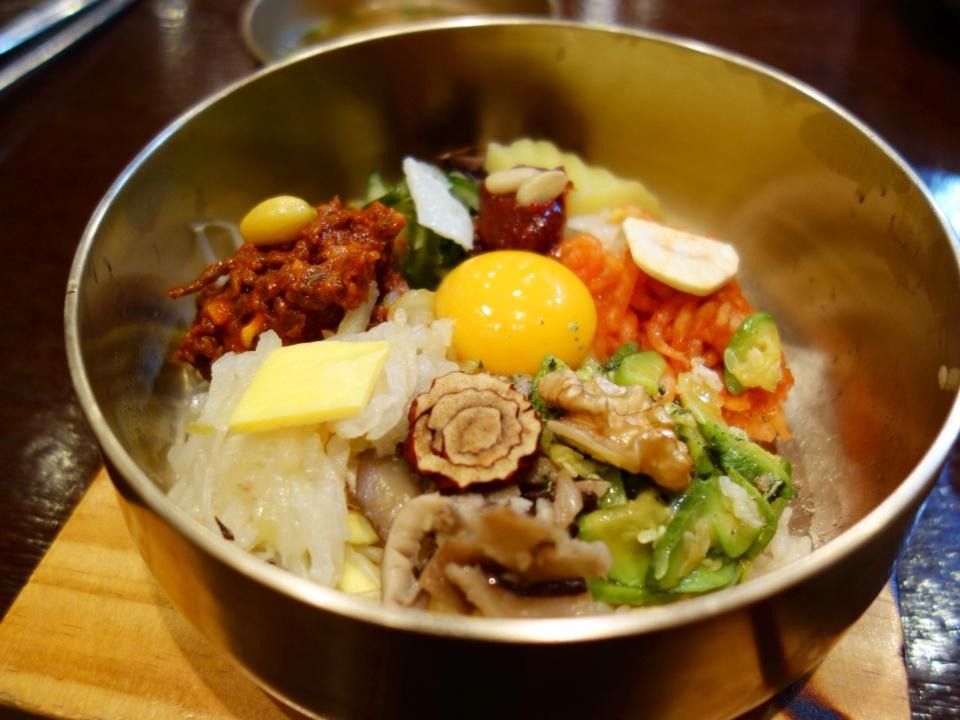
This is the real stuff. I had this Jeonju traditional bibimbap in GoGung whilst in Seoul. SO GOOD!
Bibimbap is a popular traditional Korean dish consisting of a large bowl of rice, topped with a variety of individually prepared vegetables (the usual suspects being carrots, cucumber/zucchini, bean shoots, spinach and mushrooms) and meat, then served with an egg (sometimes raw) and spicy chilli paste in a sizzling hot stone bowl known as dolsot.

I believe there are different types of bibimbap as the bibimbap that this lovely ahjumma was serving at the Gwangjang market in Seoul is completely different.

The bibimbap at Gwangjang market uses mostly fresh vegetables instead, and they mix the white short grain rice with barley as well. It was so delicious, and the sauce makes it even more oomph!

Until I can head back to Seoul to enjoy this delicious bowl of freshly made bibimbap, I will have to make do with my own for now.

As you can see, I substituted rice with quinoa, added lean minced beef, and used a variety of vegetables. I also used as minimal oil as possible when pan-frying the vegetables, but this is up to your discretion.

Although it can be rather arduous having to individually prepare the ingredients but it is so worth it. I guess the Koreans would have it much easier considering that they'd usually have the vegetables as side dishes already.

I had so much fun creating this dish and plating it all up. I love how colourful it looks and it made me very happy to be able to break free from the routine for once.

This recipe serves only one person as I was clean eating alone (yeap, alllll byyyyy myselfffff) and my parents weren't keen. My mum did steal a bite and gave me the thumbs up. The next time I made it, she said to me "Can you please make an extra portion for me too?" ;)

Not trying to blow my own trumpet here, but it was pretty good hehe. So yes, feel free to double or triple the recipe as you see fit, depending on the number of people you're serving it to.

Here's the recipe for those of you who loves bibimbap as much as I do, but want to keep the dish as low carb as possible. :)

Quinoa Bibimbap
Recipe by The Bakeanista - serves only one

Ingredients
  • 100g cooked quinoa
  • 150g lean beef mince 
  • 100g bean shoots or soybean sprout
  • 150g baby spinach leaves
  • 3 shittake mushrooms
  • 1 carrot, julienned thinly
  • 1 zucchini or cucumber, julienned thinly
  • 1 egg
  • 2 spring onion/scallions, chopped
  • gochujang
  • vegetable oil
  • sesame oil
  • soy sauce
  • roasted sesame seeds
  • one whole garlic, minced

Method
  1. Make bibimbap sauce by mixing together 1/2 tbsp gochujang sauce, 1/2 tsp sesame seeds, 1/2 tsp sesame oil and 1 tsp minced garlic then set aside.
  2. Prepare 100g of cooked quinoa and place in the center of a big bowl.
  3. Marinade minced beef with1 tsp soy sauce, 1 tsp sesame oil and 2-3 tsp of minced garlic then set aside for 20 minutes while you prepare the other ingredients.
  4. Slice the cucumber thinly, and mix generously with 1/2 tbsp of salt. Set aside for a couple of minutes.
  5. Boil bean shoots for 15-20 minutes in a cup of water, added with 1 tsp of salt. Drain water, then toss with 2 tsp of chopped scallions, 1 tsp of minced garlic, 1 tsp of sesame seeds, 1/2 tsp of salt and a light drizzle of sesame oil approximately 1/2 tbsp. Display on one corner of the bowl.
  6. Blanch spinach in another pot of boiling water for 30 seconds or until wilted. Rinse in cold water to stop the cooking, then squeeze lightly. Toss with 1/2 tsp minced garlic, 1/2 tsp of sesame seeds, 1/2 tsp of salt and 1 tsp of sesame oil. Display on bowl, next to bean shoots for contrasting colour.
  7. If using dried shittake mushroom, ensure to soak it in hot water, then squeeze out excess water. If you're using fresh ones, you can simply rinse them then proceed to slice the mushroom. Saute in a little vegetable oil with 1/2 tsp salt for 2-3 minutes. Plate it up in the bowl, next to the spinach.
  8. Thinly slice the carrots, then saute in very minimal oil. Add 1/2 tsp salt and let cook for 2-3 minutes. Plate it up next to mushrooms.
  9. Now it's time to come back to our cucumber. Squeeze out excess water then saute in 1 tsp of sesame oil. Toss with 1/2 tsp minced garlic and 1/2 tsp of sesame seeds then plate up on remaining space on bowl.
  10. The meat would have been well marinated by now. Heat up enough vegetable oil in wok and cook meat in medium to high heat for 5 minutes or until thoroughly cooked through. Arrange on the bowl; this should take up the remaining space left on the bowl.
  11. Lastly, prepare your egg. I like my egg done sunny side up with bibimbap as I find the gooey yolk adds an additional dimension to the taste, but you may opt to cook it to your personal preference. Place on top of rice.
  12. Drizzle lightly with sesame oil then serve with bibimbap sauce.
This is the finished look of my homemade healthy bibimbap, complete with a golden sunny side up.

And finally of course, once you're done plating everything up, mix all the ingredients together and dig in! It was so delicious and tasted pretty authentic, if I dare say so myself.

You won't be able to tell that no rice was used in this dish. It tasted quite the same for me hehe. Now to hunt for a dolsot so I can complete the authenticity of this dish!

Happy cooking and I hope you'll enjoy this dish as much as I did! :)

Thursday, April 2, 2015

Homemade Pizza using Hank's Delicious Sultana-based Chilli Jam

I had a craving (as I do every day) for pizza last Tuesday, and I decided I was going to make my own. The thing is, I've never made pizza before, so it was going to be my first attempt.

It was a bit ambitious for a weeknight dinner, especially when I was going to be eating alone (sounds really sad lol) but the overachiever in me was all in for a challenge.

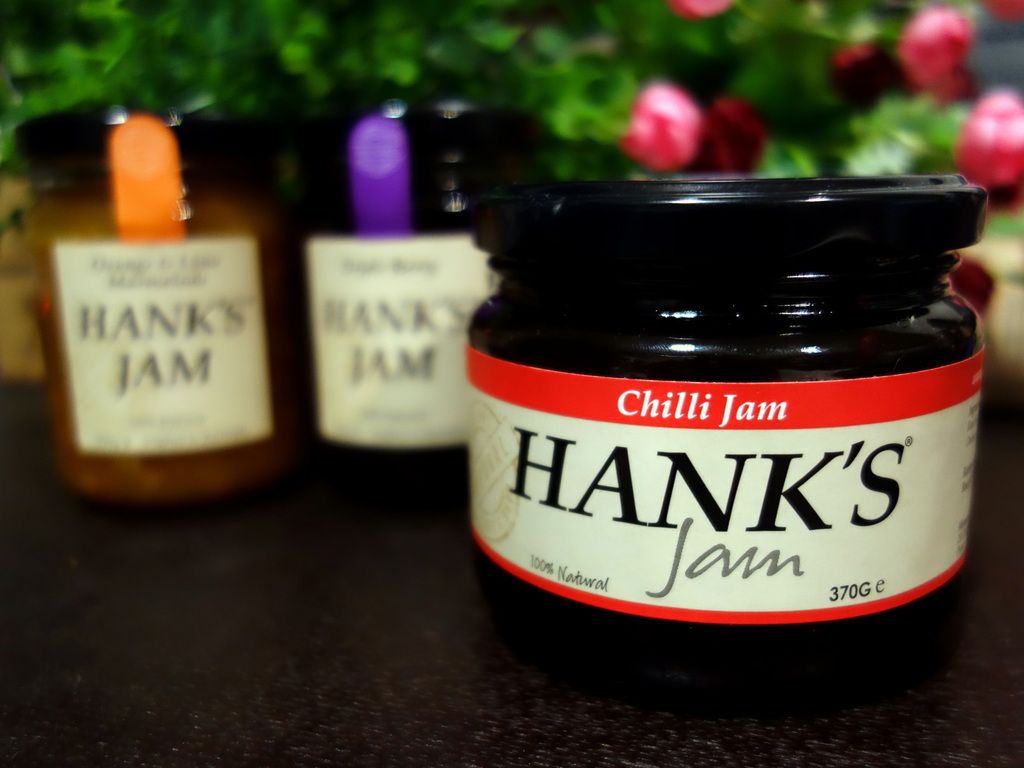
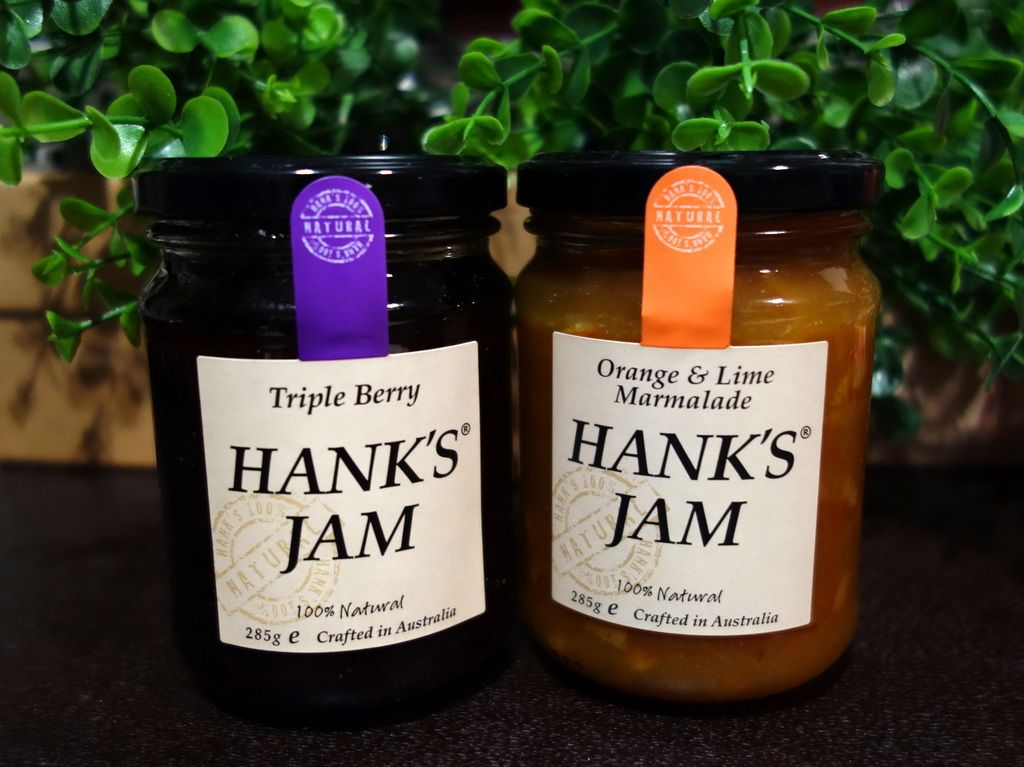
When I was planning the pizza recipe, I thought of the Hank's Jams that Wordstorm PR had so kindly sent to me to sample, cook or bake, and create my own recipes with.

To give you a bit of a background on the brand; Hank as a young chef, 21 years ago, started making these jams and chutneys in a small kitchen near Bronte to earn some extra cash.

When he founded this little business to support his love for surfing, he did not expect to find his jams all around Australia two decades later, but as the reputation and word of mouth for Hank's jams started to spread, the demand for them also increased.

Now Hank's Jam can now be found stocked at local cafes, Woolies, David Jones, IGA, gourmet delicatessens or even online. I'd be very proud if I were you, Hank. ;)

I was really glad Rochelle sent me this little gem, as amongst all of Hank's jams and chutneys, the chilli jam stood out the most.

I was really intrigued by the description - When is a jam not a jam? When it's this rich chilli and sultana based condiment, with just enough heat to fire you up but gentle enough not to overpower. Yep, I'm sold, Hank. You got me at rich chilli.

Anyway, back to pizza making. Being the overachiever that I was, I was reluctant to use a store bought dough or pita bread for the base, instead I was rather adamant on making my own dough.

I came across this easy two ingredient pizza dough recipe and was like WOW okay that's easy! I read up about it and everyone who made it seemed to really rave about how convenient it was.

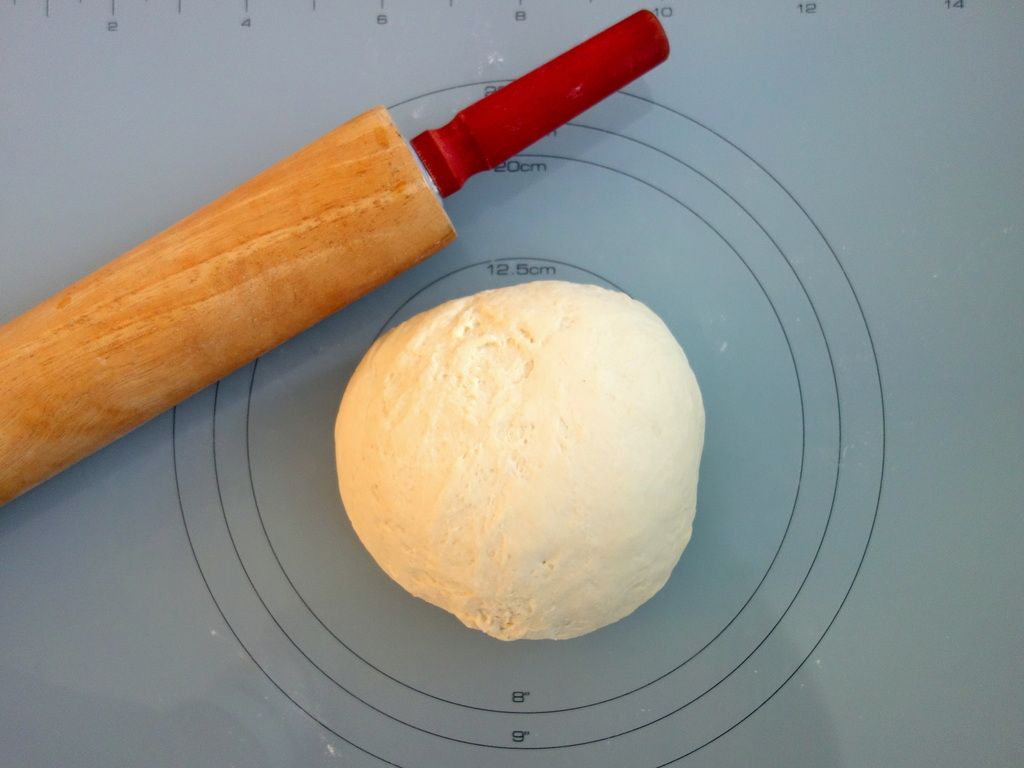
It does sound great for a first attempt, doesn't it? Knead knead knead, and voila... my little ball of dough.

I rolled it into a round, large pizza shape and topped it generously with dollops of Hank's chilli jam. I love the good, thick consistency and boy, it already smelt so good! I also appreciate the chunks of sultana which gave the jam a nice texture.

I was going to use some tomato paste alongside the chilli jam as pizza sauce, but I ran out and had to make a last minute improvisation so I used Barilla Arrabbiata pasta sauce and spread an even, thin layer atop the jam. The jam + sauce combo actually turned out really well.

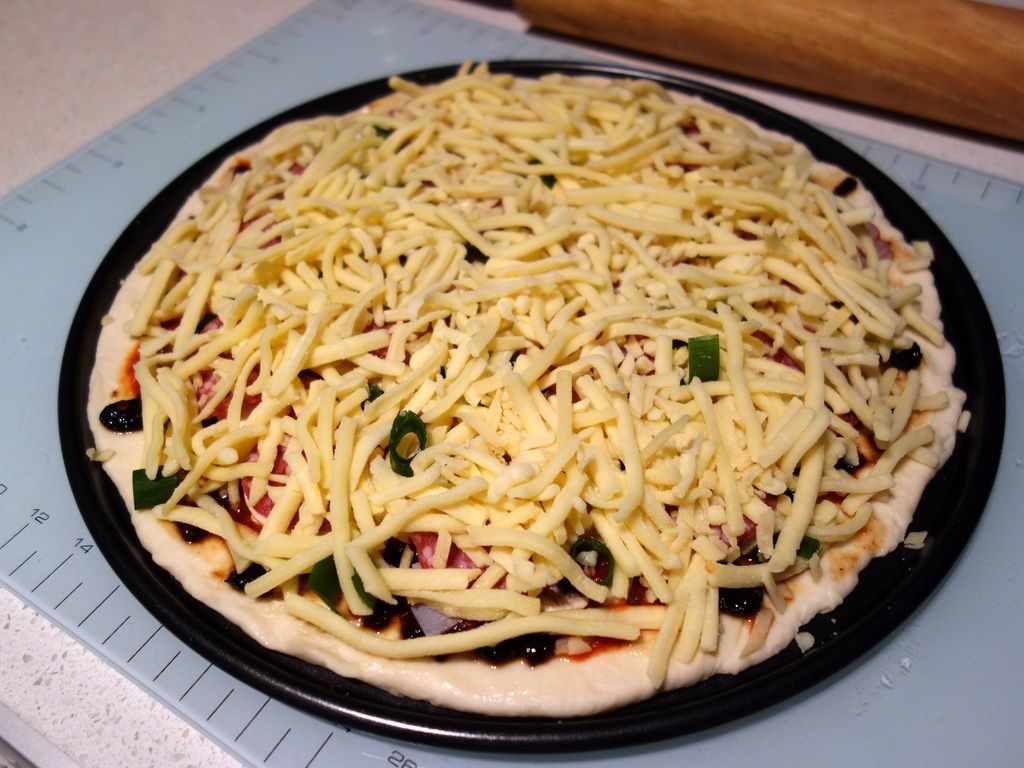
I then topped the pizza with thinly slices honey roasted ham, button mushrooms, spring onion, and pepperoni salami.

The final step was to sprinkle loads and loads of mozzarella and pizza cheese on top. I think I overdid it but I believe one can never have too much cheese, agreed? :P

Pop it into preheated oven at 240°C and pray that it turns out well.

I baked the pizza for 15 minutes until crust is golden and cheese has melted. I think it is slightly overbaked as I was washing up and left it in the oven for an extra 5 minutes. But tadahhh, this is how the pizza looked fresh out of the oven.

I cut the pizza up into 8 slices and dug in immediately! Nothing quite like warm, freshly made pizza with stringy cheese for dinner, hey? It did turn out quite tasty, if I may say so myself.

Although having said that, I have to admit I was a tad disappointed with the dough. It did not taste quite up to par. Next time I'll try a proper pizza dough recipe using yeast and will give it time to proof.

Thankfully the chilli jam was so amazing! It definitely came to the rescue and I cannot stop raving about it! I truly was blown away by how delicious the chilli jam was and I'm not even exaggerating. I don't think I've had chilli jam this delicious before. 

The flavours were very outstanding and I am guessing it is because Hank's jams are all made using slow reduction cooking method which helped enhance the flavours and textures of the jams.

If you're keen to try, which I'd highly recommend, find out where you can buy your Hank's jam here. As for me, I need to get my hands on the onion marmalade next. I can only imagine how delicious it would be and how perfectly well it'll go with a cheeseburger. Om nom nom...

Now I can't wait to bake with these jams next! Any ideas on what I can use them for? ;)

Thursday, October 30, 2014

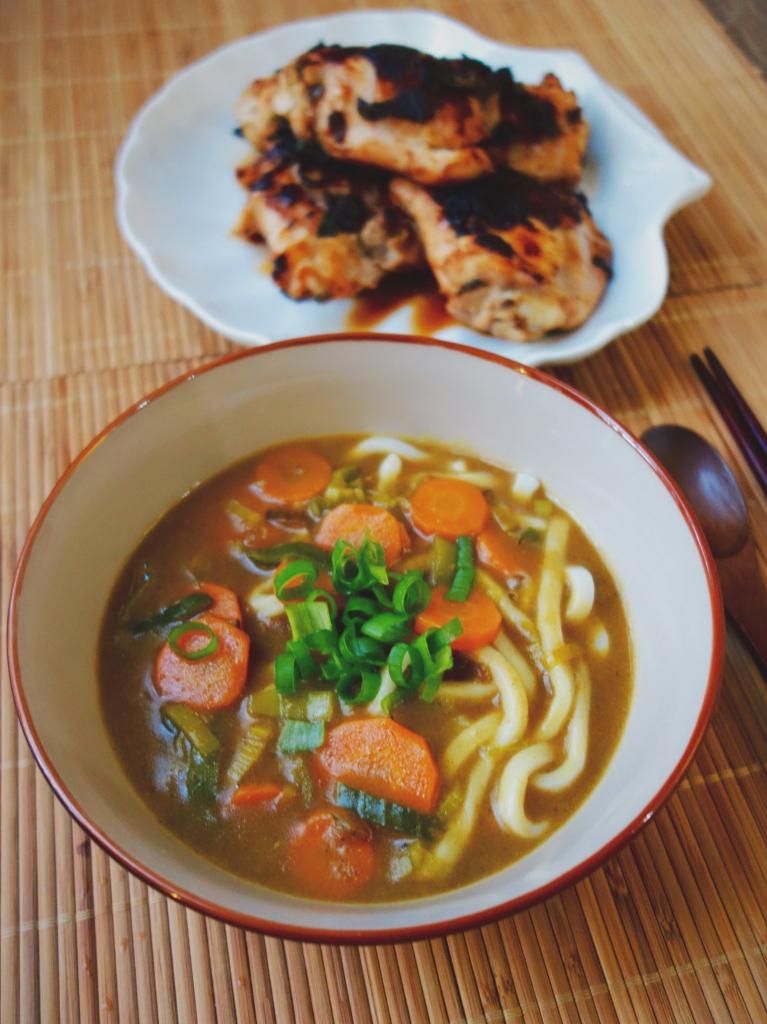
Home-cooked Japanese Curry Udon & Negi Miso Chicken

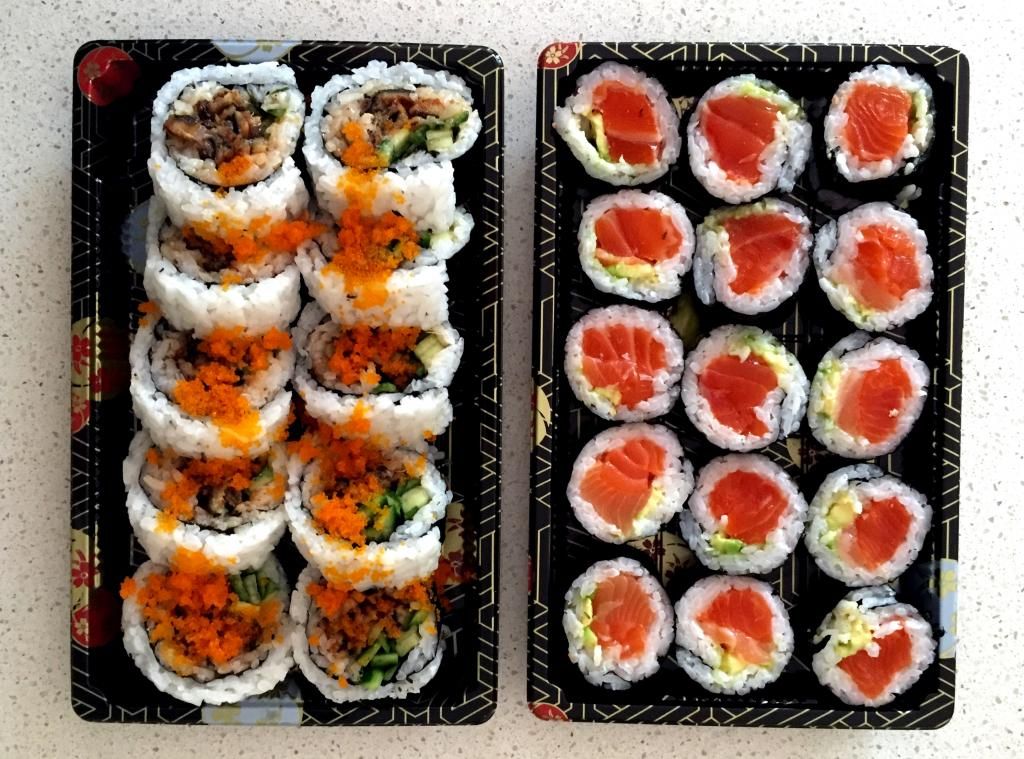
Last weekend, I woke up craving sushi. Good sushi, to be precise. I knew instantly that my best bet would be Suzuran, which is just around the corner from The Boyfriend's.


I love that they make their sushi fresh to order, yum! I've had Suzuran's sushi a few times already now and they were always fresh and delicious. See below store details, if you're interested:

Suzuran on Urbanspoon
I also love that I got to do a quick run of Japanese groceries whilst I was there, waiting for the chef to prepare my sushi, which usually takes about 10 minutes or so.

I got heaps of stuff (which also included my first box of miso paste) and The Boyfriend was like "I thought you were only getting sushi?" when I returned to the car with a few bags. Opps! :P

I was very excited because I've been wanting to learn to cook Japanese food for a while now. *squeeeee!*


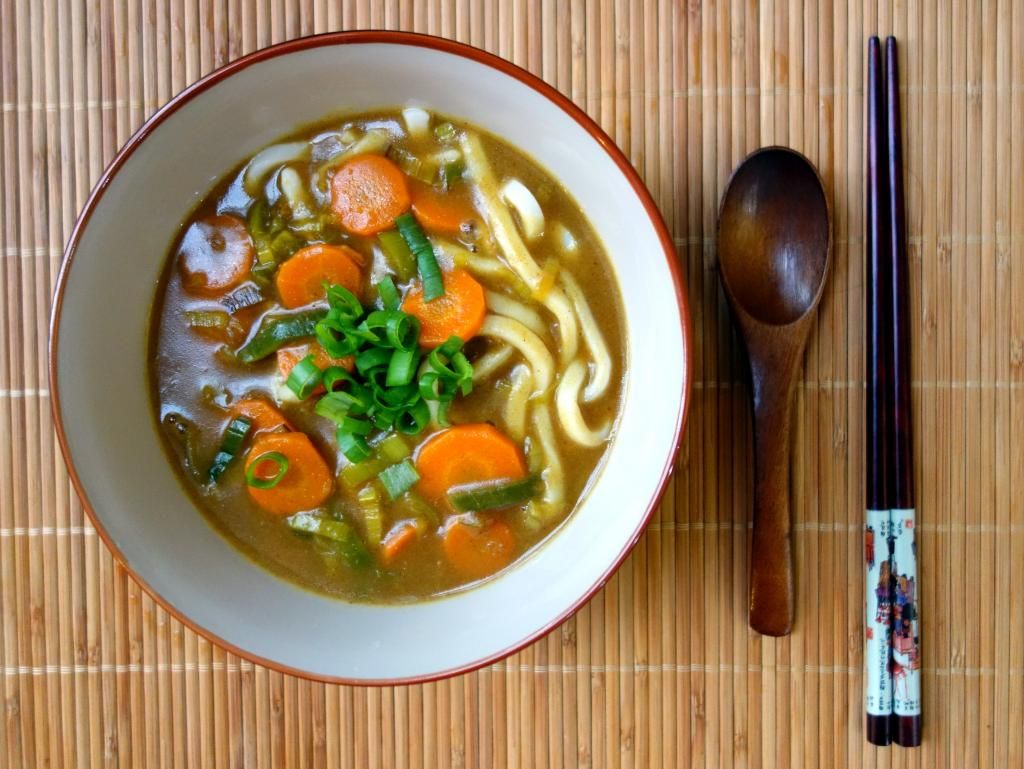
Japanese Curry Udon
Recipe adapted from Wen's Delight & modified by The Bakeanista

Ingredients:
  • 2 packet of udon noodles 
  • Half a leek (green parts only), thinly sliced
  • 1 carrot, thinly sliced
  • 1 litre dashi stock (I used kombu)
  • 120g S&B Golden Curry roux 
  • Spring onion to garnish

Method:
  1. Boil enough water in a sauce pan to blanch the udon. Once soft and cooked, drain and set noodles aside in two separate bowls.
  2. In another pot, heat 1 tbsp of oil to saute leek and carrot on medium heat for approximately 3-5 minutes until wilted.
  3. Add dashi stock to boil, and let simmer until carrot is soft or reaches the texture you desire.
  4. Add in the curry roux, one tiny square at a time. I used 1 packet of 120g as I like my broth and curry thick so adjust accordingly.
  5. Taste and season accordingly with salt or chilli powder, if you like. Mine was just right.
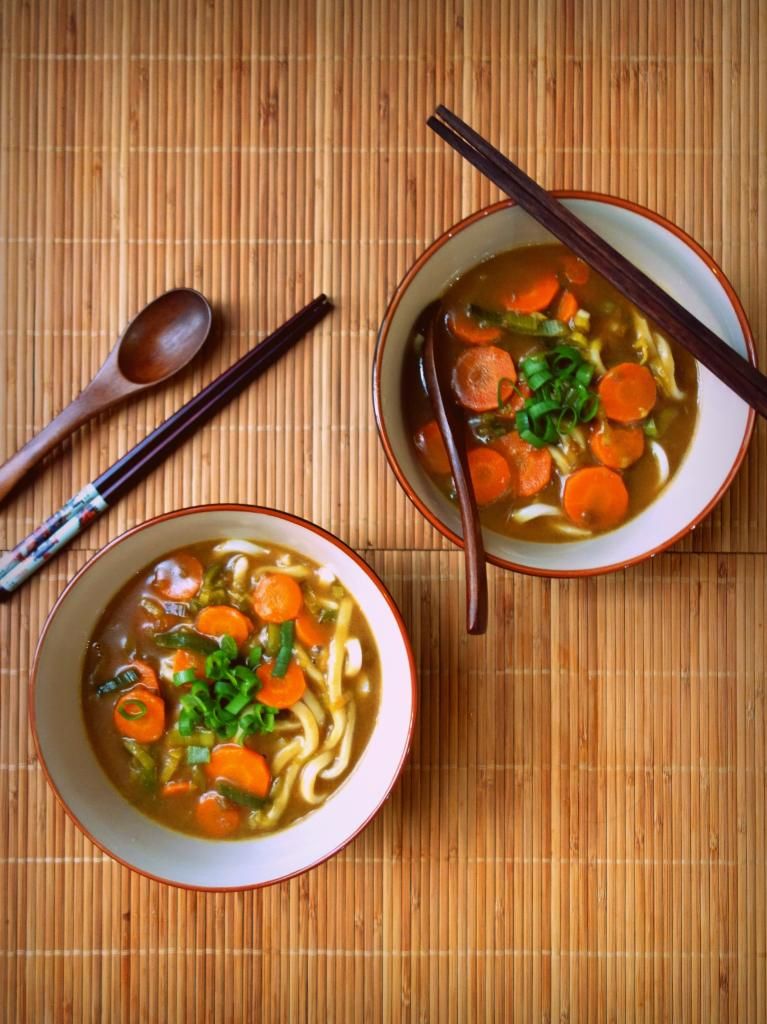
  6. Serve curry broth over udon, then garnish with chopped spring onion. And tadah, you're done!!
It took me less than 20 minutes to prepare the curry udon. It is one of those dishes with a simple recipe yet taste so hearty and comforting.

The noodles were delicious on its own, but if you like, you could serve the udon with a side dish, like I did with the negi miso chicken.

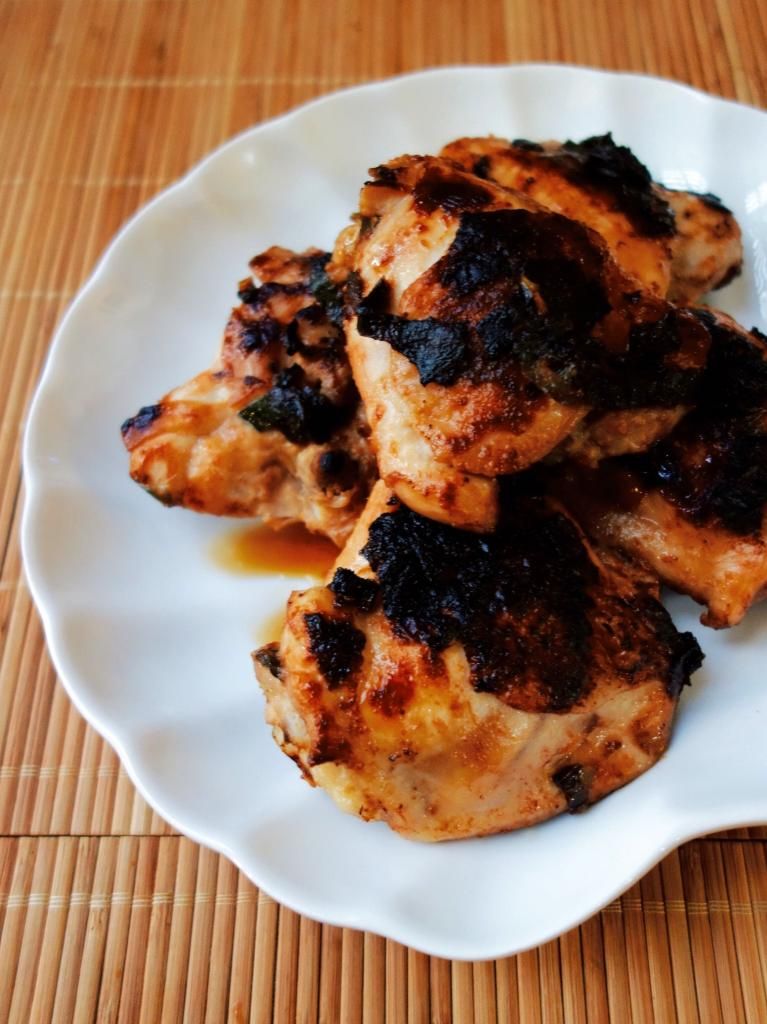
The chicken was absolutely beautiful. I left it to cook a little longer as I wanted a charred effect, and boy oh boy, it was so unbelievably tasty! The Boyfriend gave me two thumbs up. ;)

I used this negi miso chicken recipe by one of my favourite Japanese recipe blogs - Just One Cookbook.

I have been following Nami's blog for a while now and have loved reading her recipes. They always look so enticing! *drools*

But what's best is that her recipes are very easy to follow. It is particularly great for beginners and amateurs as Nami shares step-by-step videos and pictures, along with clear instructions.

So yes, if you love Japanese food, but haven't already heard of Just One Cookbook, I urge that you do visit Nami's blog. ;)

As for me, I can't wait to cook the negi miso chicken again! It'll be great either with salad or Japanese rice, or even paired with soba. It was just absolutely divine, you really gotta try!

The Boyfriend and I both had a great meal and I am definitely a little more confident with attempting other Japanese recipes.

I hope if you too, have been wanting to try Japanese cooking, that you do give it a try. Good luck and happy cooking! :)
Wednesday, August 6, 2014

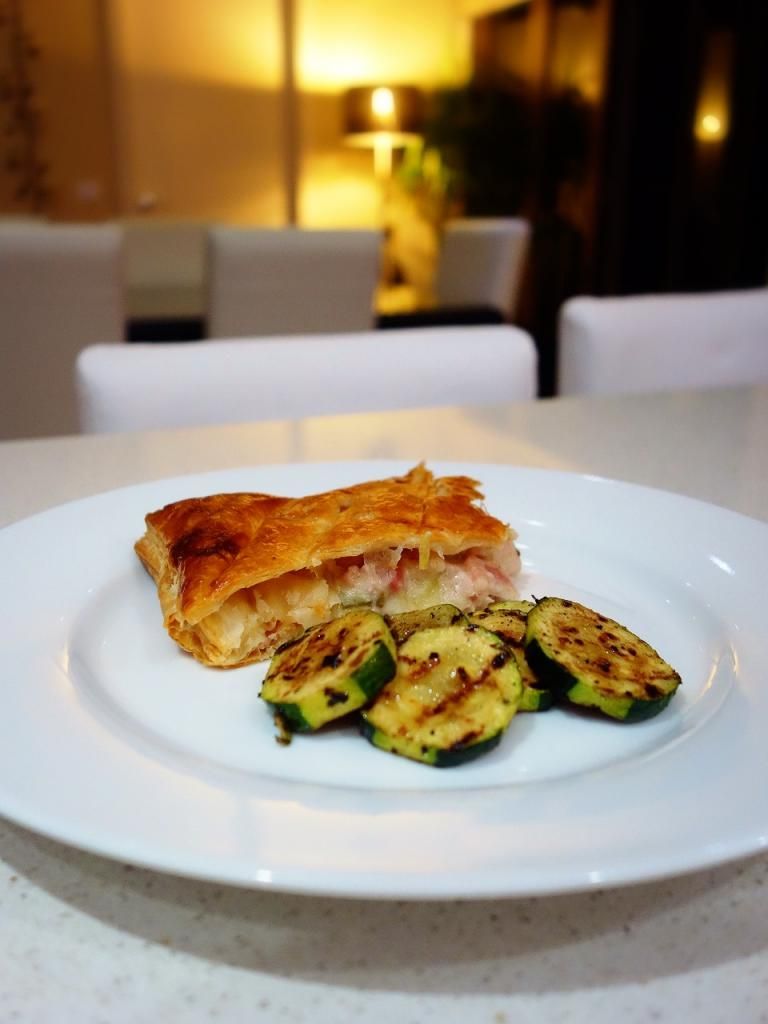
Nigel Slater's Amazing Chicken, Bacon & Leek Pie - SO DELICIOUS!!

Are you on Instagram? If you're not, I recommend that you jump on it. I am on Instagram all the time and I love this app for a lot of reasons.

I love sharing good places where I've dined at, I love hearing about new places from others, I love making new friends on Instagram and taking this friendship offline... and I even get inspiration on things to cook!

One fine day, Sarah from Sarah Cooks shared her amazing picture of her homemade chicken pie (here and here) which got me salivating and craving for pie. I knew I had to make it too!

In her caption, she shared that it was a Nigel Slater's recipe, so I googled it, and that weekend, headed to the supermarket to pick up all the ingredients I needed.

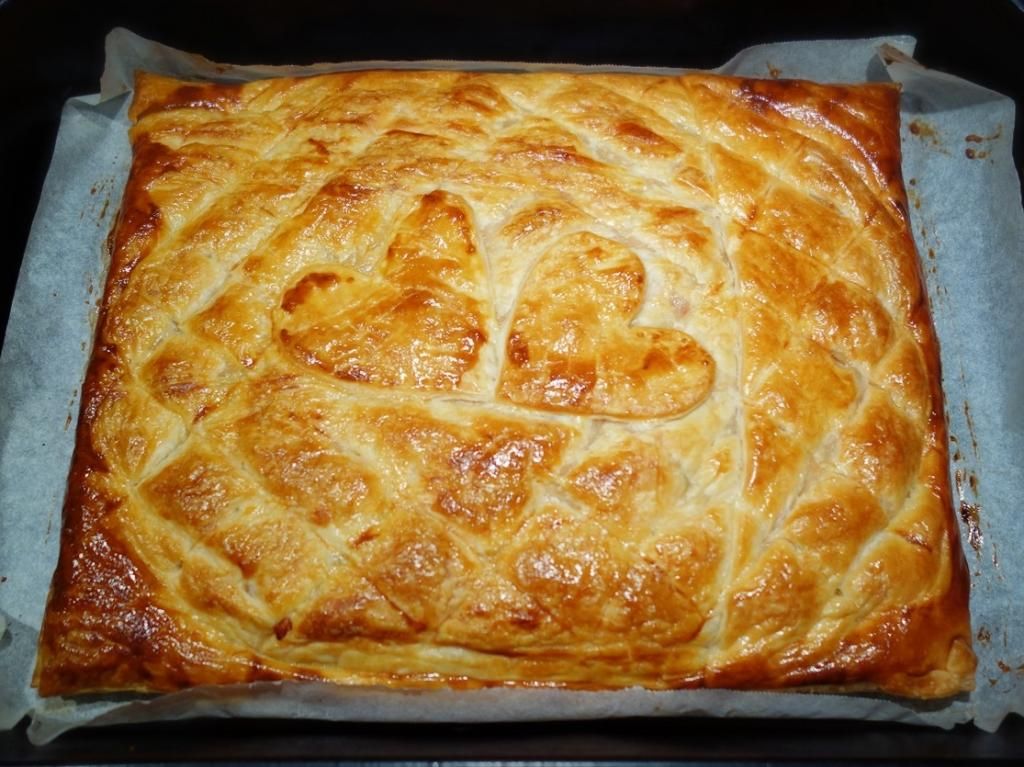
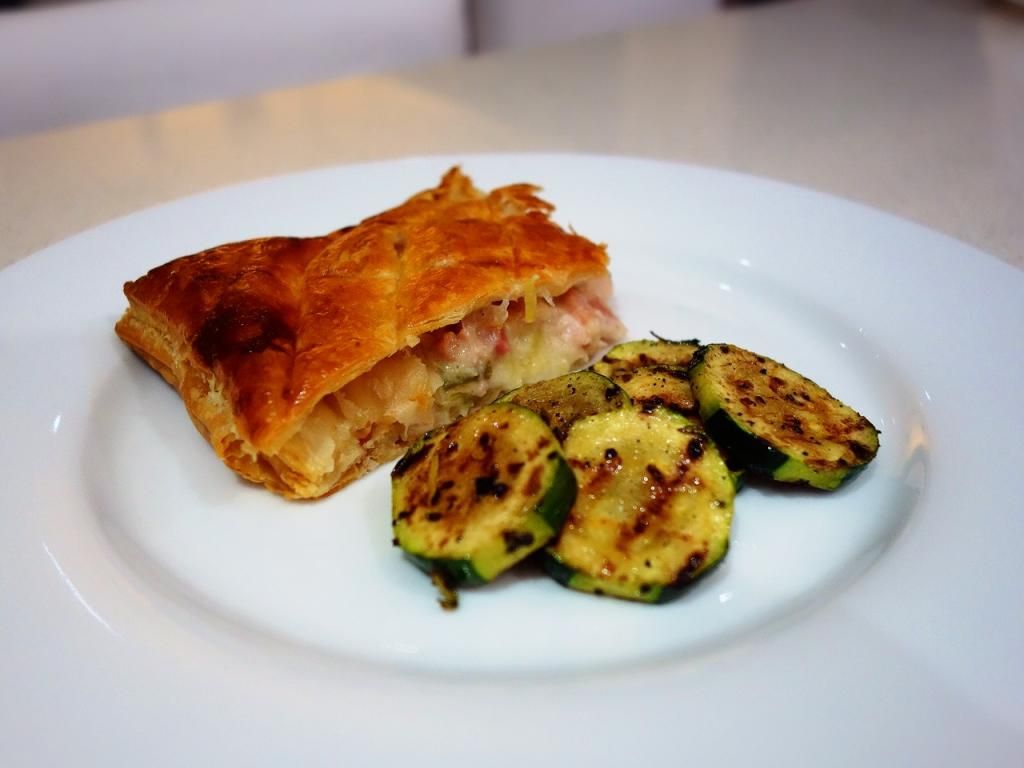
And this was my version of it. Let me tell you, it was so very tasty. The Boyfriend and I both had two servings each that night.

This recipe is no doubt a keeper and I will definitely be making this again, and again, and again. If you love pie and want something hearty for dinner, I'd say give this recipe a go. ;)

My beautiful quilted-pillow pie! 

Nigel Slater's Chicken, Bacon & Leek Pie
Recipe adapted from Food Anthology and modified by The Bakeanista

Ingredients
  • 800g chicken thighs on the bone
  • an onion, quartered
  • 8 peppercorns
  • a bay leaf
  • a few thyme sprigs
  • whole milk, enough to cover
  • 30g butter
  • 6 rashers smoked streaky bacon
  • 2 medium leeks, only white and light green parts
  • 3 tablespoons plain flour
  • two sheets of puff pastry
  • egg wash (a little beaten egg and milk)

Method
  1. Put the chicken pieces into a large saucepan, together with the half onion, peppercorns and herbs and pour enough milk just to cover the chicken.
  2. Bring to the boil, then, just when it starts to bubble, lower the heat and leave to simmer, partially covered by a lid for about twenty minutes.  Remove the chicken from the poaching liquid, reserving the milk. The poaching milk will smell savory and rich. Once the chicken isn’t too hot, pull off the skin and cut the meat off the bone into small, plump pieces.
  3. Preheat the oven to 200°C. Slice the bacon into small pieces and the leeks into thin half moons. Make sure you wash those leeks really well so there's no grit between layers.
  4. Melt the butter in a large saucepan and add the bacon. The bacon should soften without colouring over a moderate to low heat. Add the leeks to the bacon and continue cooking for about fifteen minutes more, until the leeks are totally soft.
  5. Stir the flour into the leek and bacon, continue cooking for a couple of minutes. Gradually strain in enough of the warm milk to make a thick sauce. (I also added a splash of white wine at this stage.) You don’t want this to be a paste, you want it to be a sauce, albeit a thick sauce. There should be enough ‘give’ in the sauce so that the chicken can be mixed in well and coated properly by the sauce. Season generously with salt and pepper. 
  6. Unroll your first sheet of puff pastry onto a lightly floured surface. Roll it out to about 10.5 x 14.5 inches. You might need to put a little flour on your rolling pin to keep it from sticking. Place it on a baking sheet. Spoon the filling onto the pastry, leaving a wide rim all the way around. Brush the rim with the beaten egg and milk. Roll out the second piece of pastry to the same size as the one before and lower it over the filling. Press and crimp the edges together firmly to seal them. You don’t want the filling to leak so ensure the edges are sealed.
  7. Brush the pastry all over with the beaten egg wash and bake for 35 minutes or until golden brown. Your kitchen would be smelling absolutely yummy, and there you go, dinner is ready. ;)
The Boyfriend and I loved the pie, it was oh-so-very-delicious and very comforting especially in cold wintry days like now.

One thing to note though, portion size is a tad big - this could feed 6, or 4 big eaters, so if you're only making it for two, I'd suggest cutting up the remaining pie in portion size that you require accordingly, wrap them up in aluminium foil respectively and keep frozen.

I did that with the leftovers we had, and it was easy for me to grab a pack from the freezer after work, and pop it into the oven (still wrapped in the aluminium foil, so that means less cleaning too!) for approximately 20-25 minutes at 180°C, or until thoroughly warm.

Enjoy your pie with a side of garden salad perhaps, I had mine with grilled zucchini - OH SO DELICIOUS! Trust me, you'll thank me. ;)

Sunday, March 9, 2014

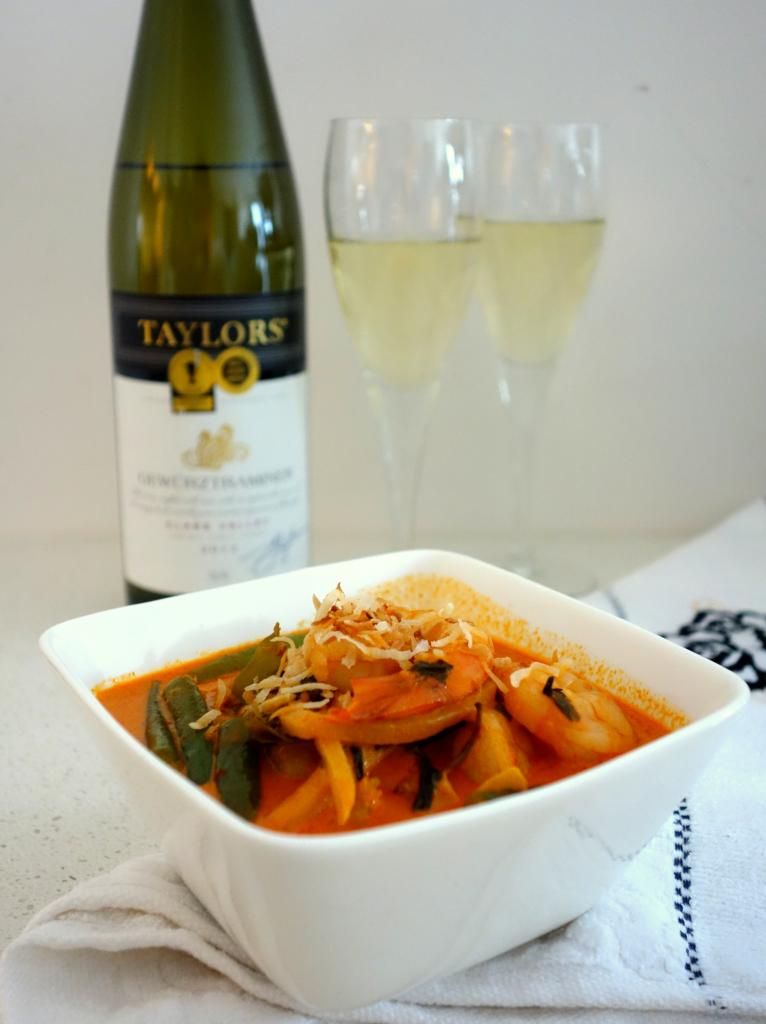
Thai Red Curry Prawns with Coconut Rice + WINE GIVEAWAY!

UPDATE (20/03/14) - THANK YOU ALL FOR YOUR PARTICIPATION. THIS GIVEAWAY IS NOW CLOSED. 

The lucky winner was selected via the Random Number Generator:


Congratulations Leanne! I will be in touch via email today so we can organise for the wines to be delivered right to your door. ;)


*********

Hello and happy Sunday!! How is everyone doing? :)

I believe many of us are happy because tomorrow is a public holiday for us Victorians and I am particularly happy because I get to spend the long weekend with The Boyfriend.

I've also got some good exciting news to share with you. The very lovely Heather from Taylors Wines contacted me a couple of weeks ago, wanting to run a giveaway on my blog. Of course, I said YES! ;)

Uh huh, one lucky reader will be sent two bottles of Taylors Estate Gewürztraminer. Woohoo!!!

I was also glad Heather sent me a bottle to taste test. Crisp and zesty, with a mix of lemon, rose and musk flavours, it's no wonder why this wine has bagged two awards under its belt.

Naturally I thought of whipping up a dish that would match this award winning wine, and was glad to find a food and wine pairing list.

It seems this wine is best when paired with East Asian cuisine especially curry. So I decided, well, Thai Red Curry Prawns it is! ;)


Thai Red Curry Prawns 
Recipe by The Bakeanista

Ingredients
  • 2 teaspoons vegetable oil
  • 600g medium green prawns, peeled and deveined with tails intact
  • 1/4 cup Thai red curry paste (I used Mae Ploy brand)
  • 1 cup chicken stock
  • 250ml can coconut milk
  • 200g snake beans, cut into 5cm lengths
  • 2 kaffir lime leaves 
  • 3 dried chilli
  • 250g bamboo shoots
  • 2 tablespoons fish sauce
  • 1 tablespoon lime juice (optional)

Method
  1. Heat 1 tbsp of vegetable oil in a frying pan over high heat. Stir fry prawns for 1-2 minutes until pink in colour. Transfer to a bowl and set aside.
  2. Heat another 1 tbsp of oil in same pan. Add Thai red curry paste and cook for 2-3 minutes until fragrant.
  3. Add stock and coconut milk then bring to boil.
  4. Reduce heat to medium, add beans, kaffir lime leaves and dried chilli. Stir in fish sauce.
  5. Return prawns and stir until heated through. Serve on bowl then garnish with a squeeze of lime juice and coriander leaves.
This recipe is quick and easy, and won't take you any longer than half an hour. Perfect for a weeknight dinner dish!

Enjoy warm with a bowl of coconut/jasmine rice and of course, a glass (or maybe two glasses) of Taylors Estate Gewürztraminer. ;)

And now onto the best part - the wine giveaway! :)


Taylors Wines would love to giveaway two bottles of Taylors Estate Gewürztraminer to one lucky reader. All you have to do is to simply leave a comment below, sharing your favourite food and wine pairing!

Please also leave your email address in the comment so I am able to contact you via email if you're picked as the winner. You may re-enter once a day to increase your chance of winning. ;)
Winner will be drawn using Random Number Generator on the 20th March 2014 and announced by 21st March 2014.

Please note that this giveaway is open to Australian residents only. You'll also need to be of a legal drinking age (18+) and be able to provide proof of age (ie. photo/scan copy of drivers license will need to be sent to Taylors Wines to verify your age before they can send you the wine).

Monday, February 24, 2014

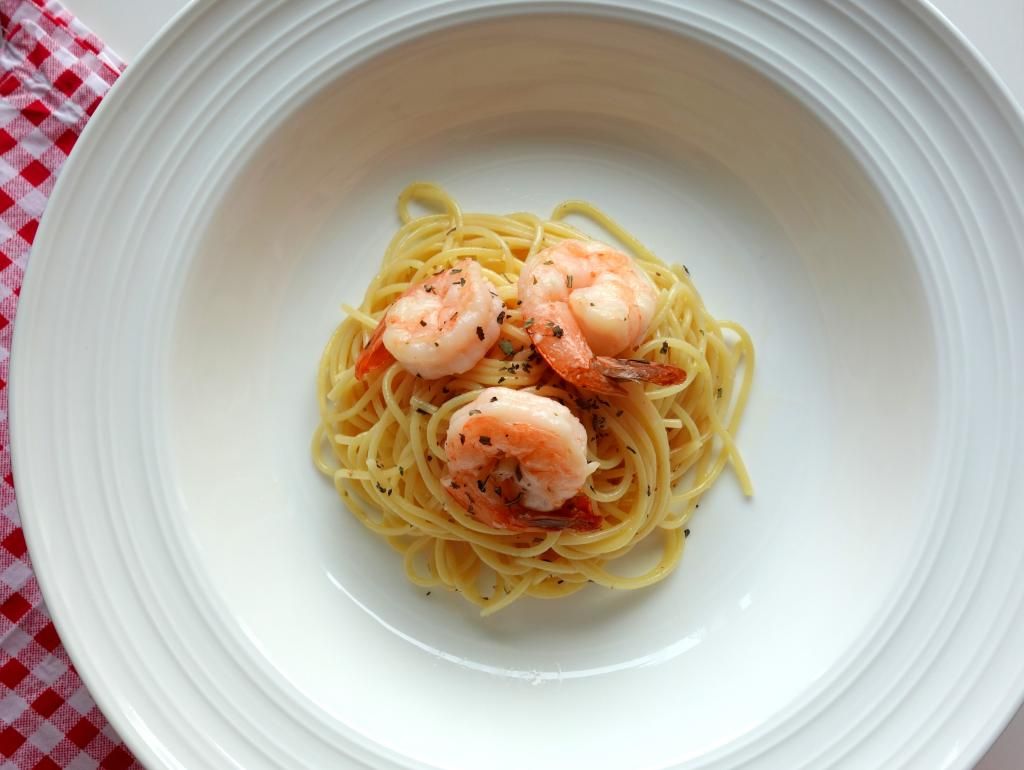
Garlic Butter Prawns Pasta

Whilst holidaying in Malaysia, I allowed myself to be pampered, so I did not do any cooking, or any cleaning for that matter. Okay I admit, I was just lazy. Period.

The last time I did any work was probably a month ago before I left, but coming back to Melbourne also meant it's back to house chores (which I dislike with a strong passion) and cooking/baking in the kitchen (thankfully this part I enjoy immensely).

We, as in The Brudder and I, usually clear out the fridge and freezer before we pack up and leave for our holidays, so this time was no different. Of course this meant we would return to having no food. 

So I headed off to Victoria Market the following day, and bought like bags and bags of meat, vegetables and fruit. And like always, I stock up on a lot of prawns. I use them a lot in my cooking, be it with noodles, in stir-fried vegetables, etc.

But this time I had a different idea, I had a stick of Lurpak with Crushed Garlic butter sitting in my fridge, waiting to be used. *lightbulb moment* I wanted to cook Garlic Butter Prawns pasta!! 

And so I did. It was so so easy, yet so incredibly yummy too!! Below is the recipe, based on what I remember doing that arvo. Heh!

Garlic Butter Prawns Pasta
Recipe by The Bakeanista - Serves 3

Ingredients
  • 250g spaghetti
  • 1 tsp + 1 tbsp olive oil
  • 4 garlic cloves, crushed and chopped finely
  • 12 prawns, peeled and deveined with tails intact
  • 60g Lurpak with Crushed Garlic butter
  • a dash of white wine (approx. 1/3 cup)
  • a generous dash of parsley and basil leaves (I used dried ones)
  • sea salt & cracked black pepper, to season

Method
  1. Cook the pasta in a large saucepan of boiling salted water until al dente. Drain, return to the pan and toss with a little (approx. 1 tsp) olive oil. Set aside to keep warm.
  2. Meanwhile, heat 1 tbsp olive oil in a large pan over medium heat. Stir chopped garlic in until slight brown, then add prawns. Cook for 2-3 minutes.
  3. Melt 30g of the Lurpak butter, then stir in white wine. Cook until sauce has reduced in half.
  4. Add drained spaghetti, and let it cook away in low heat until sauce reduced almost completely. Stir in remaining 30g of butter.
  5. Season with the herbs, salt and pepper as desired. Would be good to give a squeeze of lemon juice, but I didn't have any. Toss to combine, then serve warm. :)
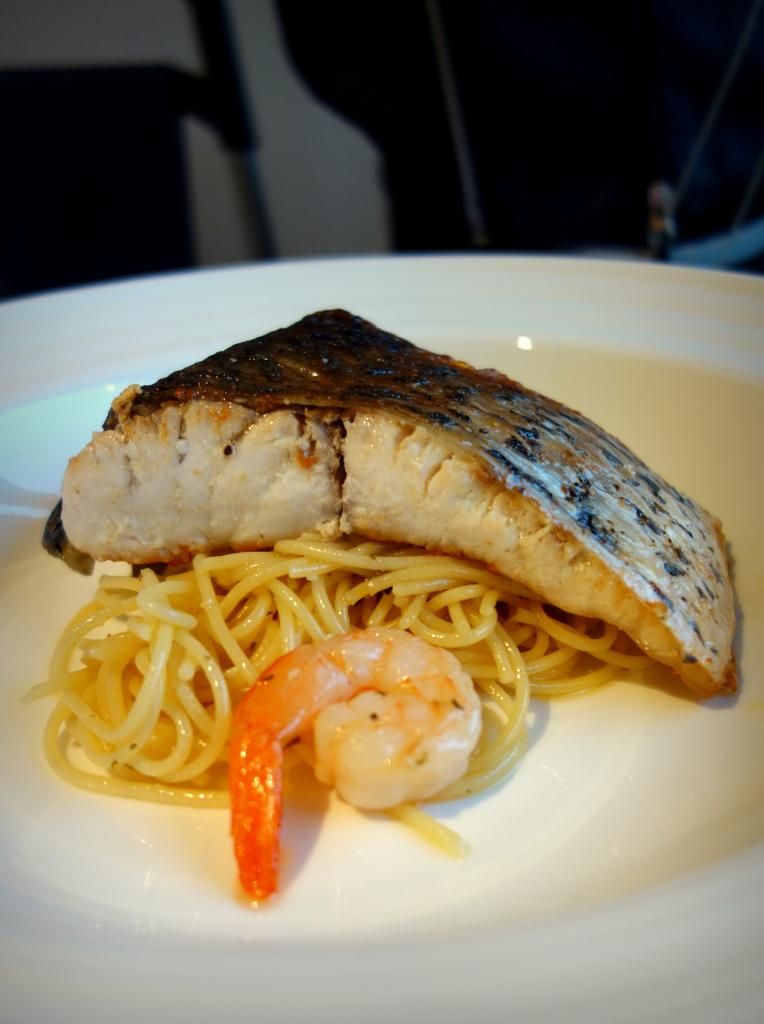
I had a small portion for lunch then came dinner, I grilled a barramundi fillet, then let it sit on a bed of yummy smelling pasta (which I of course reheated), and served to The Brudder.

Is he a lucky boy or what? Haha! #selfpraise

Ahh, thinking about it, it would be nice if I had some bacon to add in as well. Maybe you should do so if attempting this recipe.

What I meant to say is, feel free to tweak the recipe to suit your own taste - that I believe is the beauty of cooking. Good luck! :)

Note: This post is by no means sponsored by Lurpak - I just really liked the product so thought I'd feature it in my recipe post.

Saturday, December 14, 2013

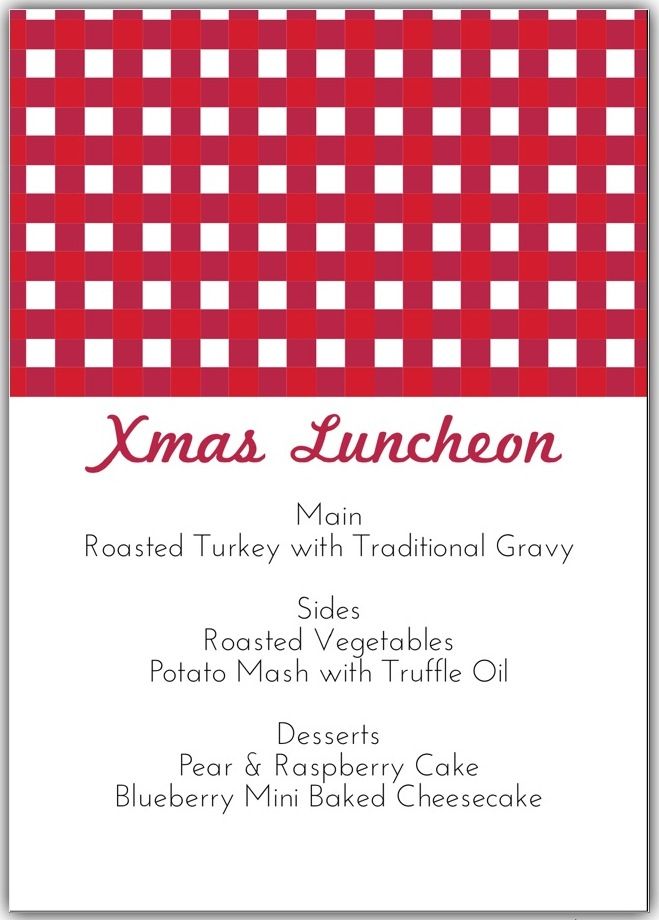
Christmas Luncheon

Last year I hosted a Christmas luncheon with a small group of friends at my place. I put together a menu and started planning a week in advance. I single-handedly prepared the lunch - from appetizers to main, sides and even desserts.

I don't know how I did it, but I managed to put up a delicious lunch although at the end of the day, I was exhausted.

My effort was well paid off though - everything was so yum, and I guess the lunch was my Christmas present to those who attended. :)

This year I'm taking it easy. But if you are considering to host a lunch/dinner with your family and friends, I hope this post would help give you some ideas. :)

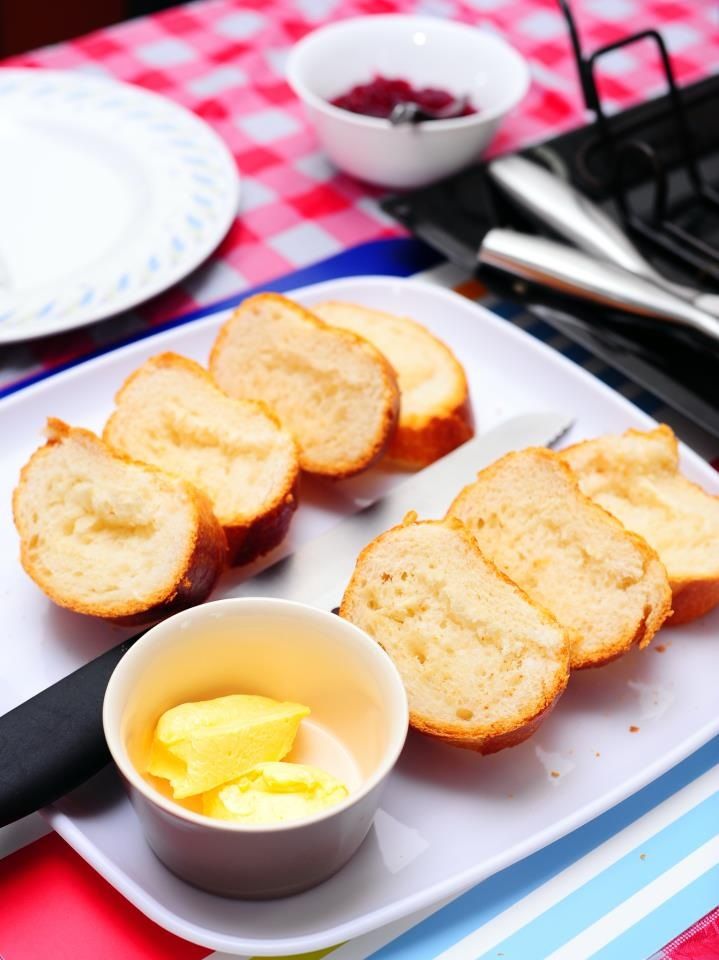
Appetiser - French Baguette with truffle oil infused butter

I cheated a little with this - I didn't make the baguette. I bought a loaf from Coles, popped it in the oven for several minutes prior to serving, and plated it up with truffle infused butter at the side.

For the truffle infused butter, I churned some unsalted butter with a few drops of white truffle oil. I then spooned the mixture along the center of a sheet of plastic wrap and shaped to form a log.

Roll up and twist the ends to secure. I placed the rolled up butter in the fridge overnight to ensure that it is firm and chilled.

Cut into slices to serve with french baguette or dinner rolls. Smells exceptional! ;)

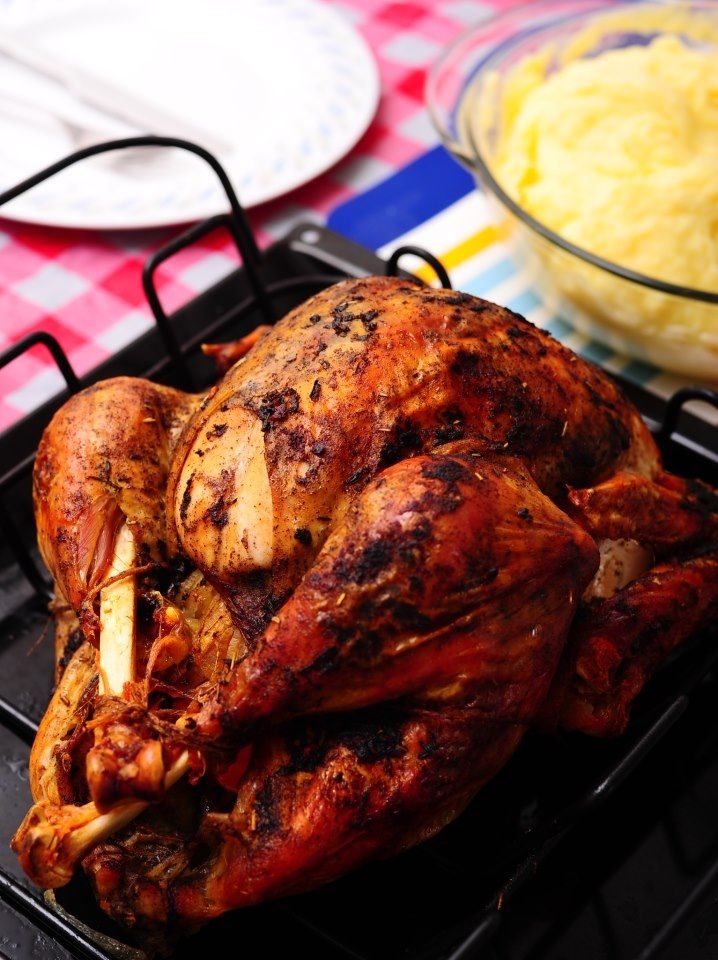
Main - Roasted Turkey with Traditional Gravy
Recipe adapted from Food Wishes - Roasted Turkey & Gravy


Ingredients:
  • 1 medium sized turkey (approximately 2.5 to 3kg)
  • 1 portion of flavoured butter 

Seasoning:
  • 1 tbsp black pepper
  • 2 tbsp kosher salt 
  • 1 tsp ground sage
  • 1 tsp dried thyme
  • 1 tsp ground rosemary
  • ½ bunch sage
  • 3 rosemary sprig

Filling and Base:
  • 2 onions
  • 3 ribs celery
  • 2 carrots

Method:

  1. Mix the pepper, salt, sage, thyme and ground rosemary in a small bowl.
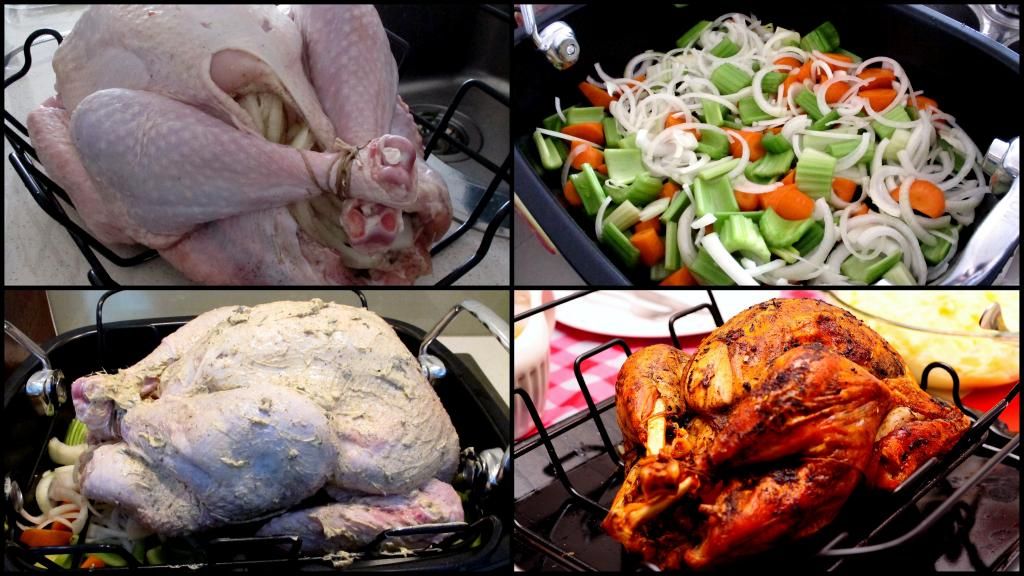
  2. Lift turkey up on its head to have "easy assess into the cavity" then generously season with all the dry seasoning ingredients and give the turkey a good rub. ;)
  3. Fill the cavity with the fresh sage, rosemary sprig and a handful of onions/celery and carrots mix. Reserve some of the vegetable as your base.
  4. Fold the wing underneath the turkey to provide a stable base. Tie the turkey legs together with kitchen string to ensure filling does not fall off the cavity.
  5. Loosen turkey skin with your fingers/silicon spatula. Open up skin gently and rub 2 tbsp of flavoured butter inside skin - this will help keep the breast moist and well-flavoured.
  6. Spread remaining butter on the top of the turkey then sprinkle with some salt and pepper.
  7. Roast at 160°C for 2 hours and 20 minutes until the thigh reaches approximately 75°C. When ready, remove from oven and let sit with foiled lightly covered for half an hour.
  8. Prepare gravy, then serve alongside some cranberry sauce too.

Gravy
  • 1 tbsp butter
  • 2 tbsp turkey fats strained from base
  • ½ cup of cooked onions from base
  • 30g of plain flour
  • 3 cups of cooking liquid (juice) from turkey
  • 4 cups of turkey stock
  • 1 tsp balsamic vinegar
  • 1 tbsp sage
  • Salt & pepper

Method:
  1. Melt butter with turkey fats and cooked onions over medium heat until onions turn brown.
  2. Add plain flour and stir well for abour 4-5 minutes.
  3. Stir in cooling liquid and turkey stock with balsamic vinegar.
  4. Once liquid has reduced, add in sage, then season with salt and pepper.

Sides - Roasted Vegetables

My apologies I can't seem to find a picture of the roasted vegetables. I think this is what happens when you put boys in charge of the pictures. Haha, but see below my recipe anyways:

Ingredients:
  • 2 carrots
  • 1 medium-sized sweet potatoes
  • Half a butternut pumpkin
  • 2-3 potatoes
  • 6-8 crushed garlic cloves
  • Chopped rosemary leaves
  • 2 tbsp olive oil

Method:
  1. Preheat oven to 180°C fan-forced.
  2. Cut vegetables into bite-sized pieces then place chopped vegetables, along with crushed garlic, rosemary leaves and oil in a roasting dish.
  3. Season with salt and pepper then toss to coat.
  4. Roast for 45-50 minutes or until golden and tender. I had my tray of roasted vegetables seating on the rack beneath the turkey. Serve warm.

Sides - Potato Mash with Truffle Oil

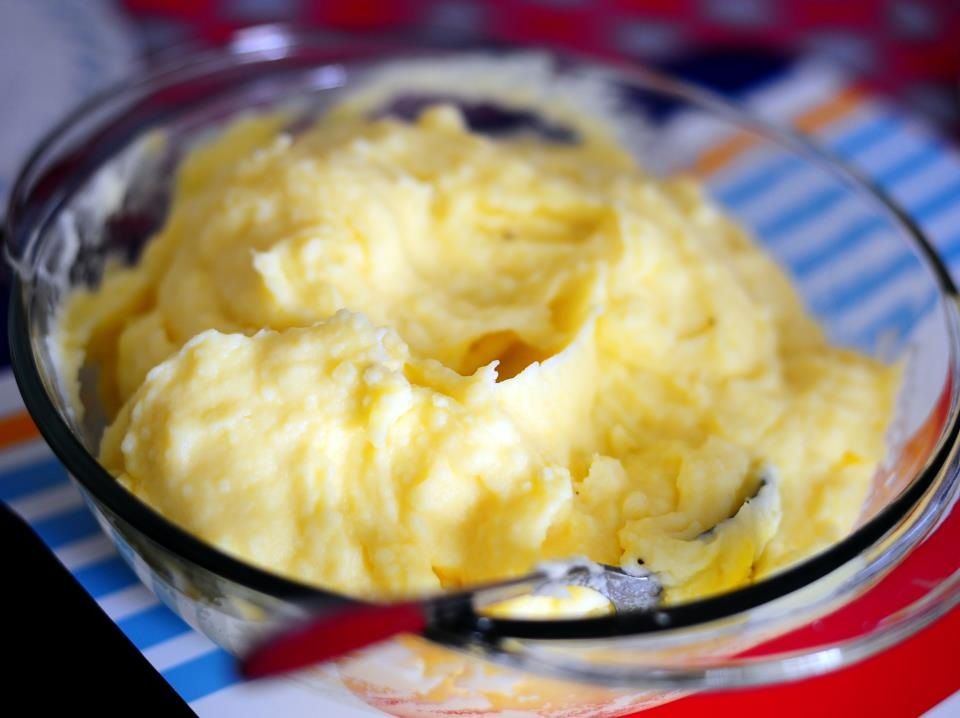
Mashed potatoes are a staple on our table for Christmas/Thanksgiving. Particularly this recipe that I adapted from The Pioneer Woman. ;)

It was the highlight of our meal - so creamy and heavenly good! The addition of truffle oil brought the mash to another notch higher. The Boys and myself kept going oohh and ahhh. YUM!

Ingredients:
  • 1 kgs of potatoes (I like using golden delight)
  • 120g butter
  • 125g cream cheese, softened
  • 30ml of milk 
  • ½ tsp salt
  • ½ tsp black pepper
  • 1½ tsp of truffle oil

Method:
  1. Peel and cut the potatoes into pieces that are generally the same size. Bring a large pot of water to a simmer and add the potatoes. Bring to a boil and cook for 30 to 35 minutes. When they’re cooked through, the fork should easily slide into the potatoes with no resistance, and the potatoes should almost, but not totally, fall apart.
  2. Drain the potatoes in a large colander. When the potatoes have finished draining, place them back into the dry pot and put the pot on the stove. Mash the potatoes over low heat, allowing all the steam to escape, before adding in all the other ingredients.
  3. Turn off the stove and add 80g of butter, cream cheese and milk. Mash, mash, mash!
  4. Next, add salt, black pepper and truffle oil. Stir well and place in a medium-sized baking dish.
  5. Slice the remaining 40g of butter and place over the top of the potatoes whilst still warm. The softened butter will melt and voila! NOW DIG IN!

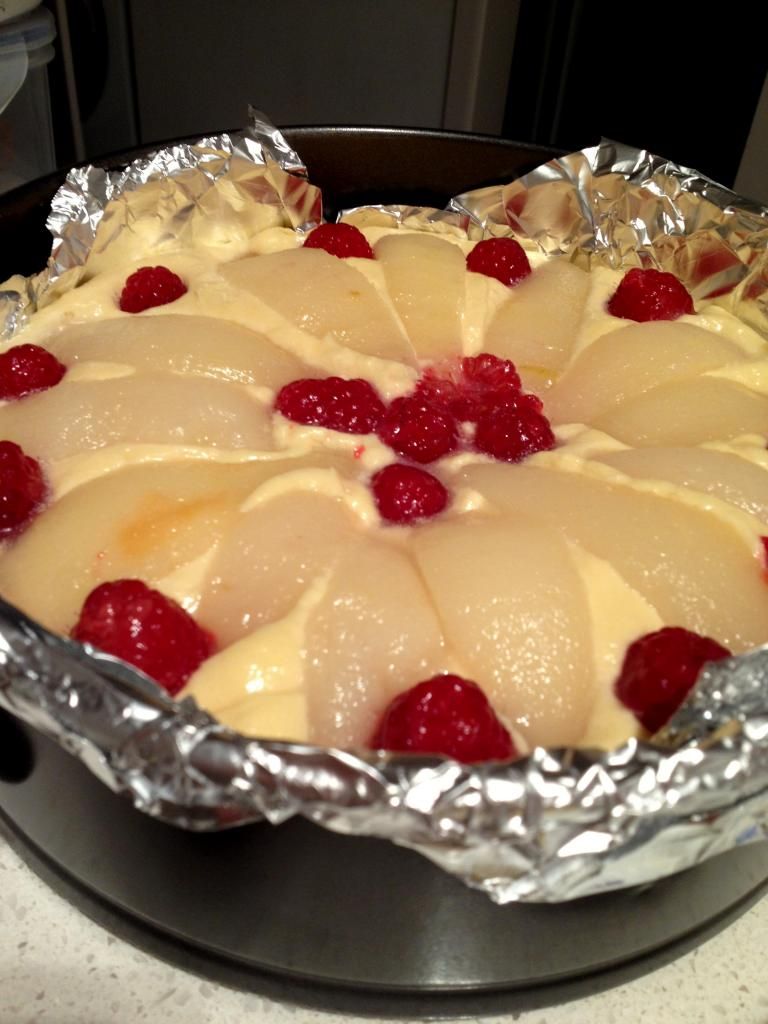
Dessert - Pear & Raspberry Cake

This Bourke Street Bakery cake is by far one of my favouritest cake ever. This cake is perfect for almost any occasion, or even as a gift. So moist, not too sweet, and most importantly very very delicious.

It is perfect eaten on its own or served with a dollop of cream at the side. My guests enjoyed the cake so much, they were fighting over the last few pieces. ;) Recipe can be found here.

Desserts - Blueberry Mini Baked Cheesecakes

I'm sorry this picture isn't at all very enticing, but believe you me, these cheesecakes were divine! And your well-fed guests would appreciate them being mini ones.

My guests were mostly boys, and I guess they digest their food pretty quickly seeing as they came back for double serving.

This is one of The Boyfriend's favourite and he has since requested that I remake these for him, a couple of times! You may find the recipe from Exclusively Food here.

For the topping, I used fresh ready-made blueberry pie filling. To be precise, Fresh Berry Farm's blueberries in their own sauce which you can get at Woolies supermarket.

And that is it! I hope you enjoyed reading this post and found some helpful ideas along the way. Oh, and do you like my new Christmassy header too? :D

Have a Merry Christmas, everyone! :)

Signing off, The Reindeer Bakeanista

Thursday, November 21, 2013

Korean Pork Bulgogi (돼지 불고기)

Continuing with my K-food series, today I'm sharing with you the recipe for one of The Boyfriend's favourite Korean dish - Pork Bulgogi.

Well, as they say, the best way to a man's heart is through his tummy. So I learnt how to make this dish at home, just for him.

Very yummeh! :)
This recipe is fairly simple - makes a good quick and easy dinner if you marinade the pork beforehand.

Korean Pork Bulgogi 
Recipe adapted from Kimchimari and modified by The Bakeanista


Ingredients:
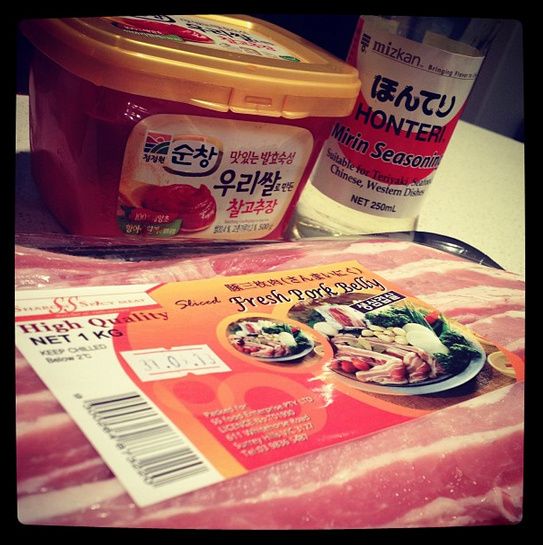
  • 1 kg finely sliced pork belly (can be purchased at any Korean grocery stores)
  • 3 tbsp light soy sauce
  • 3 tbsp gochujang (Korean red pepper bean paste as pictured below)
  • 3 tbsp mirin
  • 1 tbsp sake
  • 3 tbsp sugar (note: reducing sugar would affect taste)
  • 1.5 tbsp sesame oil
  • 1 tbsp chopped garlic
  • 1 tbsp grated ginger
  • 1 stalk of green onion, chopped
  • 1/4 tsp garlic powder
  • 1/4 tsp black pepper

For garnish:
  • 1 tbsp sesame seeds
  • 1 tbsp chopped green onions

Method:
  1. Make the marinade by mixing all of the ingredients above.
  2. Mix the pork slices and the sauce together and marinate for at least 15 minutes, but I prefer to let it sit and marinate in the fridge for at least a day, or even two days.
  3. The best way to cook pork bulgogi is to BBQ it over a grill. But for everyday easy cooking, just heat a non-stick frying pan on medium high heat. The pan should be hot enough for the pork to sizzle as soon as it touches it. Cook the pork in the pan turning them over when it starts to brown. Please see below notes at bottom of post for some further info on cooking pork.
  4. Once nicely seared, remove pork and serve on plate then garnish with sesame seeds and chopped green onions. 
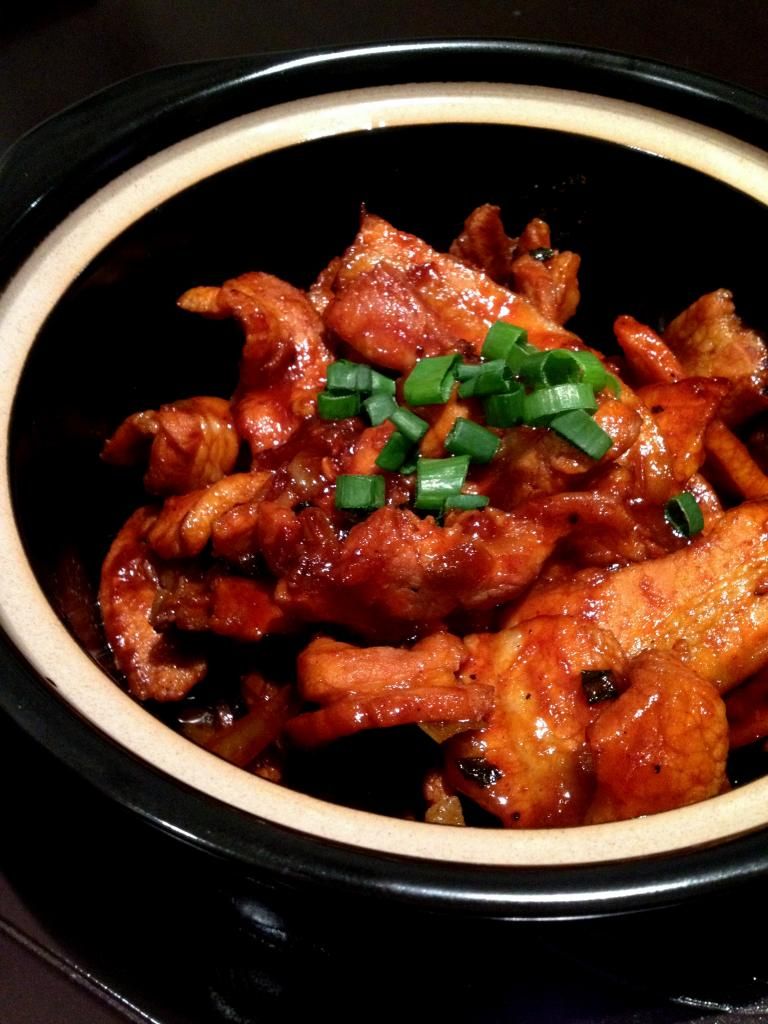
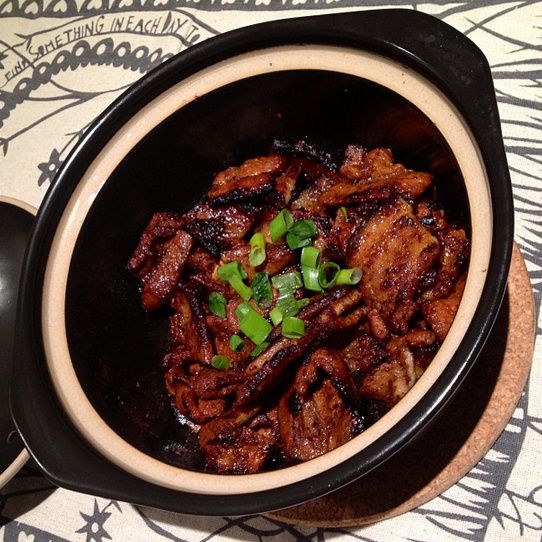
And tadah!! Dinner is now ready!!! :D And also, I like serving the pork in my claypot as it helps keep the cooked meat warm whilst I am cooking the remaining batches.

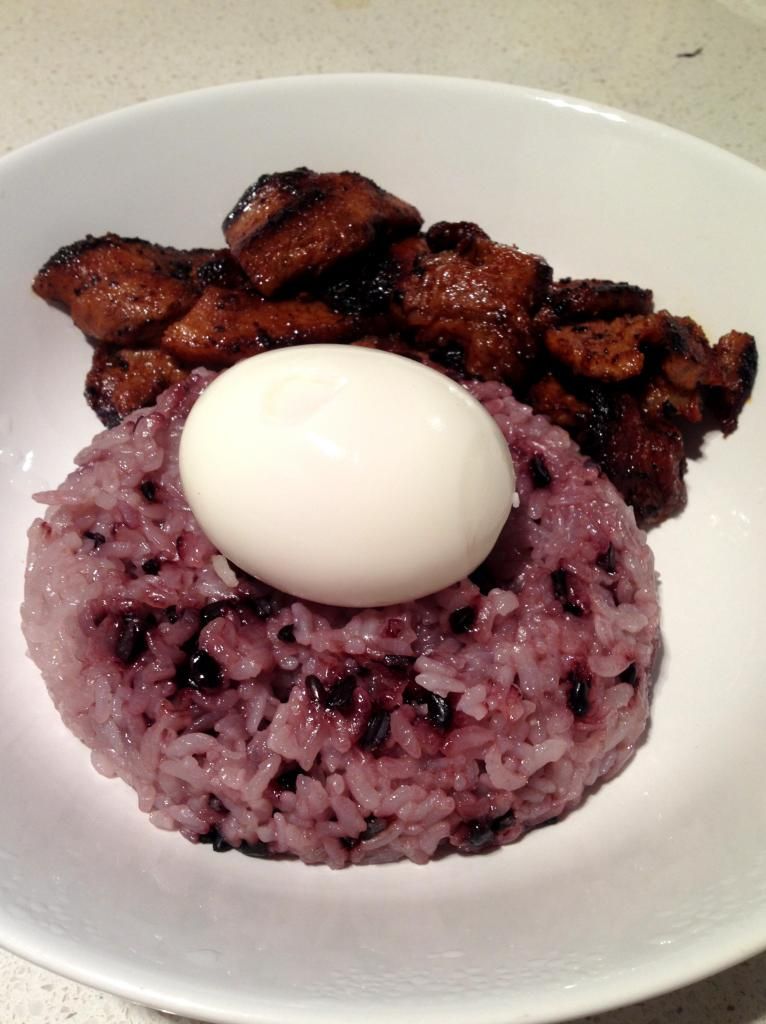
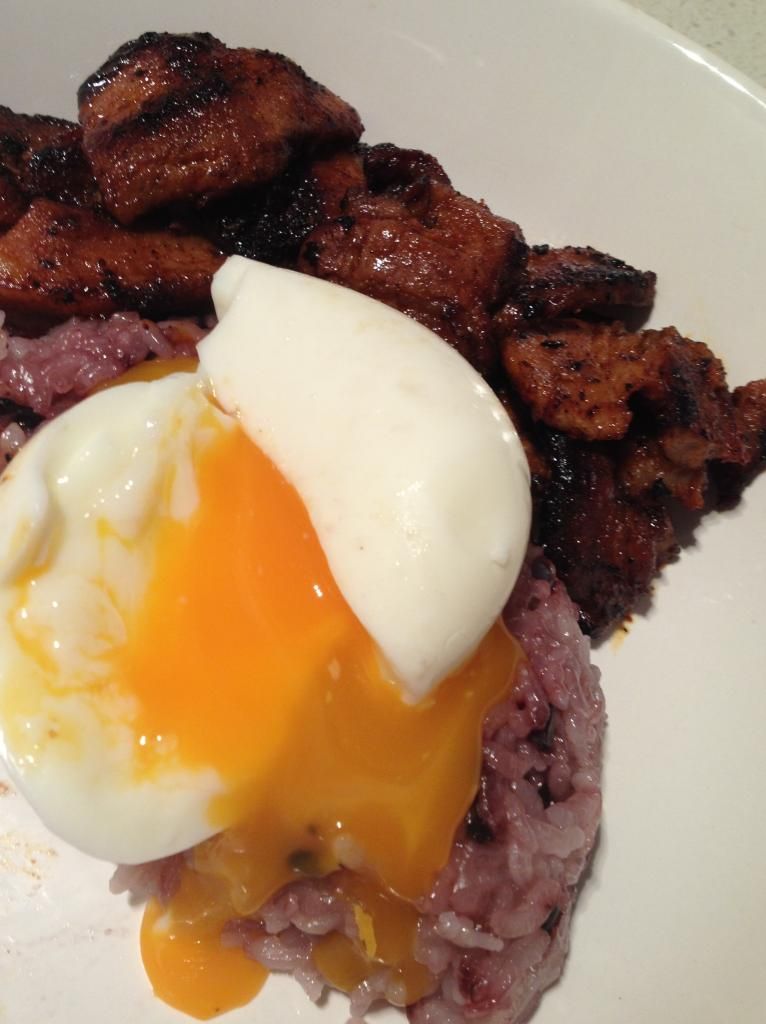
Serve with a bowl of Japanese rice, or black rice like I did. I also added a soft boiled egg (yes, with oozing yolk) to boot! ;)

YUMMEH RIVER OF YOLK PORN!!! *slurps*


The Bakeanista's notes:
  • The pan should be really really hot. But take note that it can get a tad smoky, so be sure to have the ventilator on at full mode and the balcony door open (if you're living in an apartment). Yeap, this is from experience of having the fire alarm go off not once, but twice. xD
  • Cook in batches - do not cook too much pork at once because that can lower the temperature. You want to cook the pork quickly and have a nice sear to them. 

Tuesday, November 12, 2013

Korean Beef Ribs (갈비)

I told you I am on a roll with Korean food, didn't I?

Even after having Korean food for a few days consecutively, I was still craving it! So I made these super yummy Korean beef ribs (if I may say so myself) the other night.

The meat was so flavoursome, and fall-off-the-bone tender. Really really very scrummy, I was so happy!

My Brudder so cheeky, he jokingly said, "It was so good, I could even speak Korean after!" What does that even mean? I don't know but I'm taking it as a compliment! xD

This recipe is a keeper and I will definitely be making it again! Maybe when my Mummy comes to visit. I proudly sent her a picture of my beef ribs and she responded with this super sad face emoji followed by "Why you make me drool?!!"

And then later that night, she made a good come back - she sent me a picture of my favourite apple strudel. :(

Korean Beef Ribs (갈비)
Recipe adapted from Trissalicious and modified by The Bakeanista

Ingredients:
  • 1.5 kilo beef ribs (I used a mix of back & short ribs)
  • 2 tbsp vegetable oil
  • 3 tbsp dark soy sauce
  • 1 tbsp soy sauce 
  • 3 tsp sesame oil
  • 3 spring onions, chopped
  • 6 cloves garlic, crushed
  • 2 tbsp grated ginger
  • 2 tbsp brown sugar
  • 2 tbsp Japanese sake
  • 1 tbsp mirin
  • 3 cups water

To serve; garnish:
  • Toasted sesame seeds to serve
  • 1 spring onion, chopped to serve

Method:
  1. Season the beef ribs with salt and pepper and fry the pieces in batches a pot with the oil. It is best not to overcrowd the pot, otherwise you won’t sear the meat and get a nice golden brown color.
  2. Once done, throw in the rest of the ingredients including the 3 cups of water until beef is covered in the braising liquid.
  3. Bring to a boil and skim off any scum that rises to the top of the pot.
  4. Lower the heat to a simmer and cook uncovered for at least 2 hours or until the beef is tender and falling off the bone. Mine cooked away for 3 hours.
  5. To thicken the sauce, add 1 tbsp of cornstarch which has been diluted in 2 tbsp of cold water when the ribs are done. I omitted this step as my sauce was thick enough to my liking.
  6. Garnish with toasted sesame seeds and the chopped spring onions.
And tadahhhhhh!!! Serve whilst warm, and enjoy with a bowl of Japanese rice or Korean black rice. 맛있다!!! In case you were wondering, that reads as 'masissda' which translates to delicious. :)

P/S: I love it when Korean waitresses, whilst clearing our table, ask how our meal went. I take every opportunity to go "Ahhhh... 맛있다!" in true Korean style and see the shocked reaction on their faces! :P

Oh! You can speak Korean? 
Click on 'OLDER POSTS' for more! :)