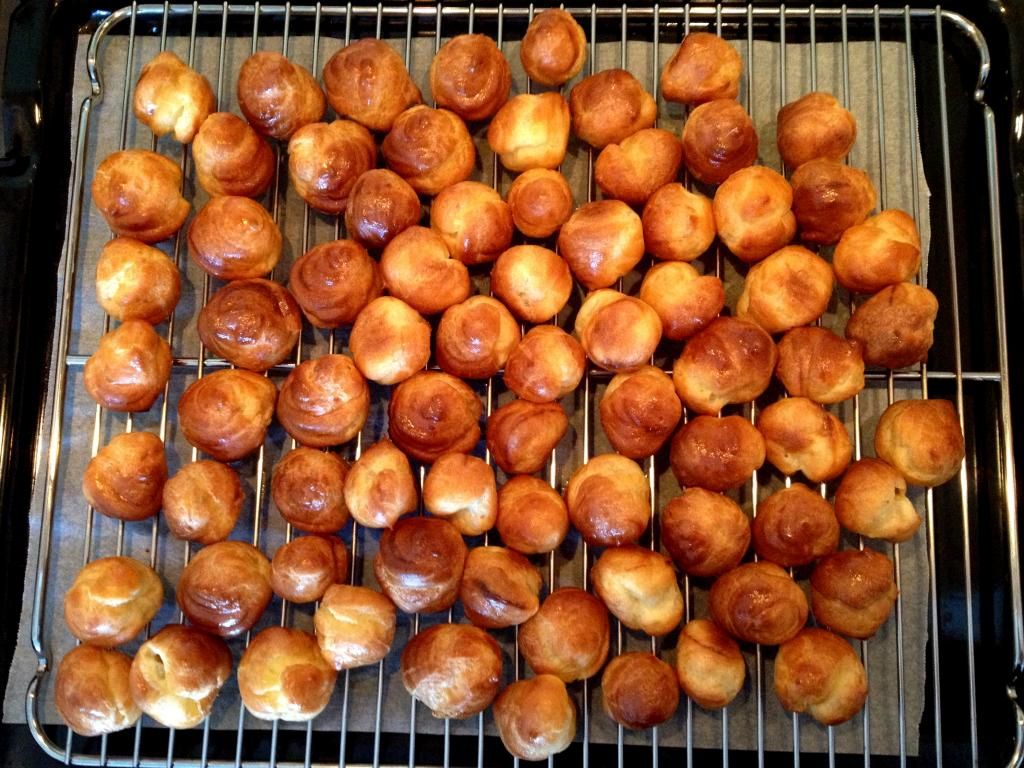
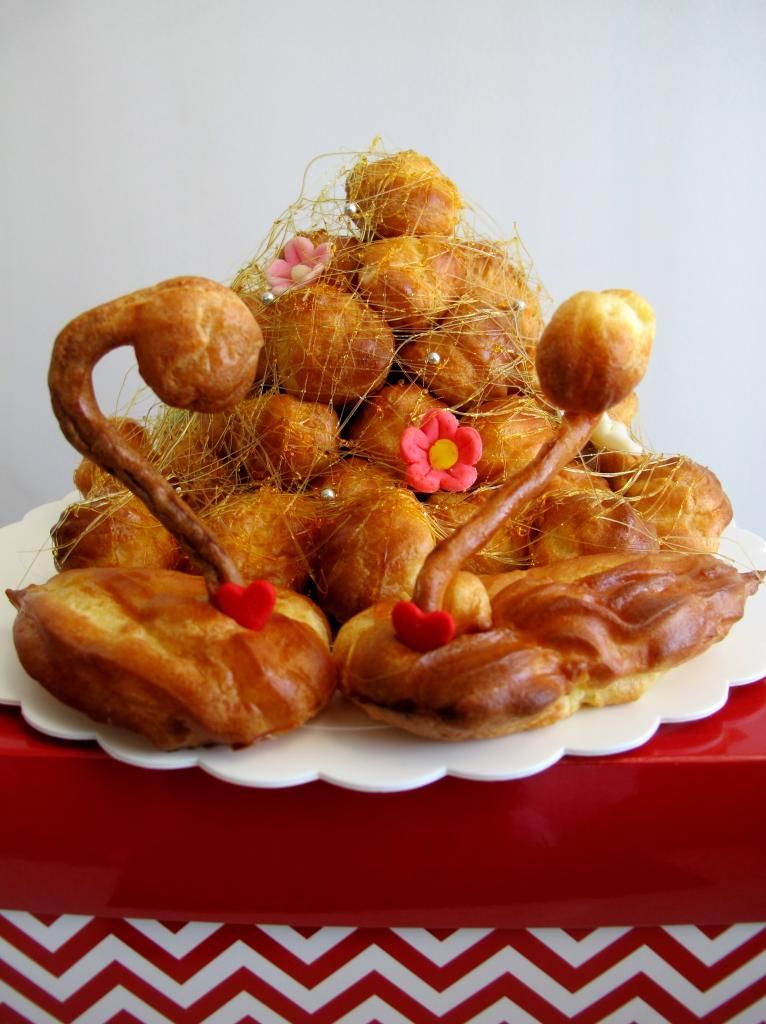
I will no longer be updating this blog.
DO CHECK OUT MY NEW BLOG AT WWW.THEBAKEANISTA.COM
Showing posts with label Pastry and Tarts. Show all posts

Monday, September 1, 2014

Rose-shaped Apple Tart

I can't believe we're in September already. Time has flown by so quickly, but I ain't complaining because I LOVE SPRING!!

The late Robin Williams once said spring is nature's way of saying "Let's Party!" and I cannot agree more!

Spring is my favourite season of the year. With sunny, clear blue skies, beautiful blooms, brighter days... What more can one ask for?

It is gloomy and rainy today, but I am ever so thankful for the great weather that Melbourne has blessed us with over the weekend.

The Boyfriend and I headed out for lunch, went out for walks, and whilst The Boyfriend did a bit of house chores and ironing, I decided at the very last minute that I wanted to bake.

The Boyfriend doesn't have a lot of baking ingredients just lying around at his place, so I had to look around the kitchen to see what I can find, so as to decide on what to make.

5 ingredients and an hour later...
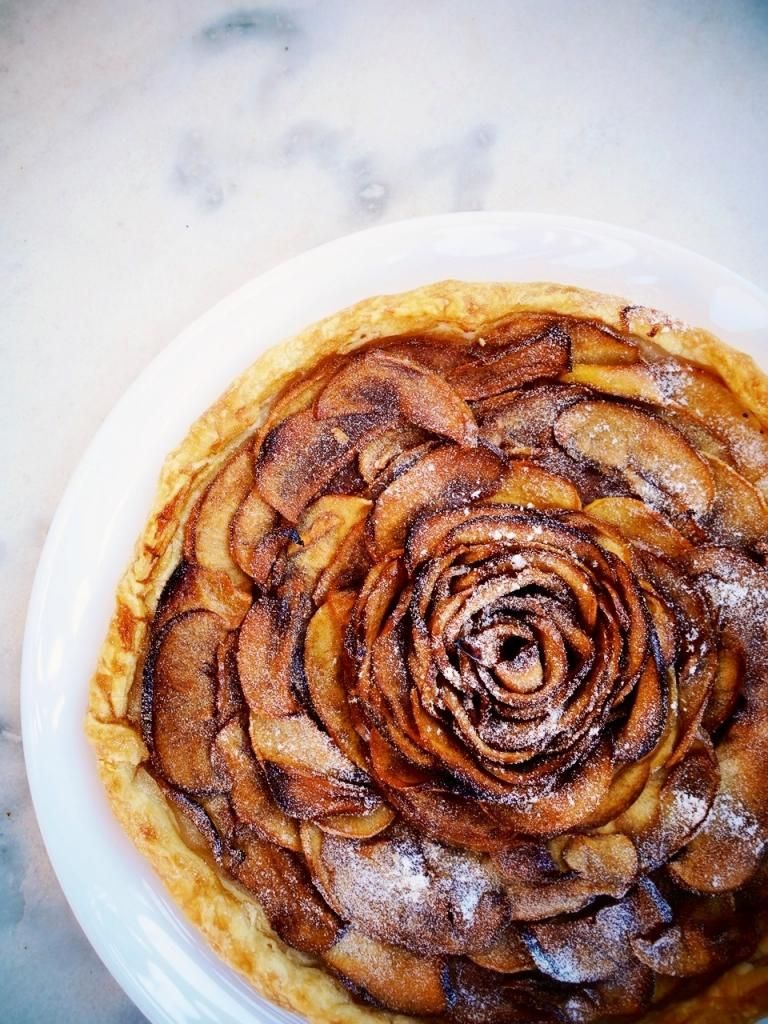
A full bloom rose-shaped apple tart! I am so so very pleased with how it turned out. It is very beautiful, isn't it? *beams gleefully*

Quick & Easy Apple Tart
Recipe by The Bakeanista; Serves 10
  • a sheet of puff pastry
  • two red apples, cored then thinly sliced 
  • 1/2 cup brown sugar
  • lemon juice from half a lemon
  • 2 tbsp butter


Method
  1. Core and thinly slice both your apples. I recommend either Jazz Apples (my fav!) or Pink Lady apples.
  2. Preheat oven to 180 deg C. Thaw puff pastry sheet.
  3. Melt butter in a saucepan. Add apples, followed by sugar and lemon juice. Give it a good stir until the sugar is fully dissolved.
  4. Let the apples simmer away in the mixture for 5-8 minutes until it is soft enough to shape them.
  5. Remove the apple slices from the syrup and allow to drain in a sieve. Leave the syrup kept aside.
  6. Your puff pastry should now be a little flexible for you to shape. I laid the pastry sheet onto baking paper, then placed it into a round cake tin just to give it a nice round shape.
  7. Once your pastry is shaped, remove pastry and place on baking pan. If you can manage to shape the pastry free-handed, by all means do so.
  8. Your apple slices should be cool enough to handle now. Lay out the apple slices, starting from the outer layer and overlapping as you go to form a nice base.
  9. Roll the remaining apple slices to form the rose. I shaped it from the inside out.
  10. Brush the apples with a thin layer of the sugar syrup then bake for 30-35 minutes, or until pastry is puffed and golden brown.
  11. Remove from pan immediately and place on a serving platter.
  12. Serve warm with a food sprinkling of icing sugar, or with vanilla ice cream.
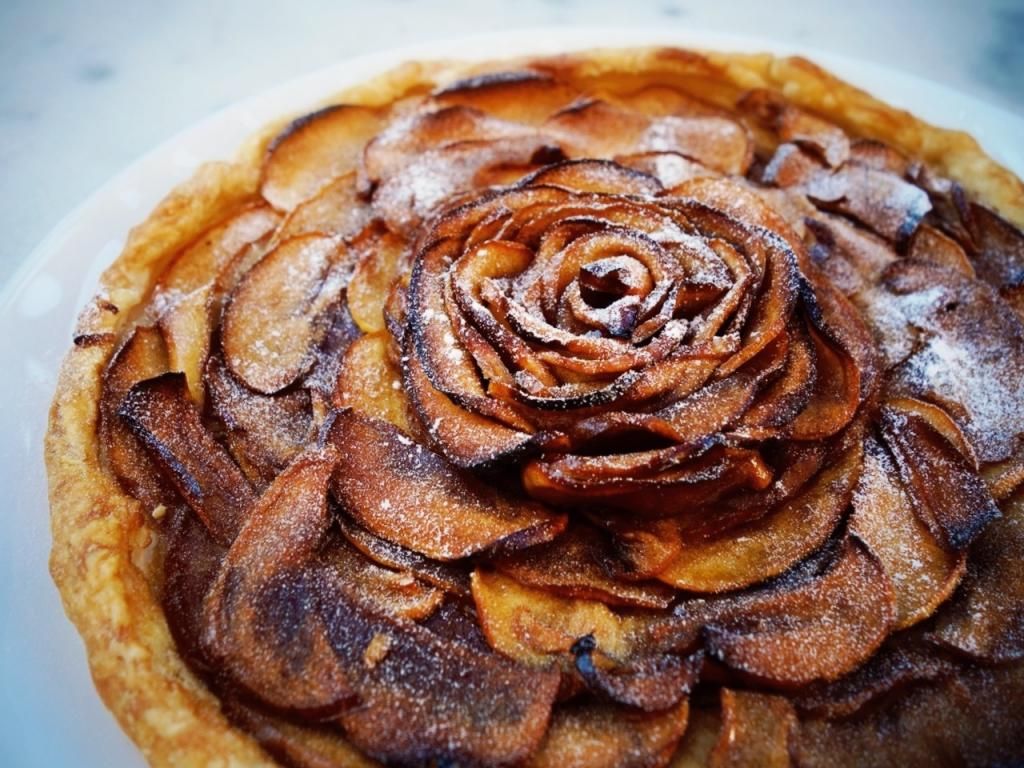
I brought the tart to dinner with The Boyfriend's family and they all loved it. Everyone commented on how beautiful it looked. :)

It wasn't extraordinary, but I heated it up a little in the oven for 5 minutes and served it warm. I was pleasantly surprised at how satisfying such a simple tart could taste.

It would have been perfect with vanilla ice cream, but we had to make do without. I'll definitely make this tart again, and make sure we have some ice cream to go with it.
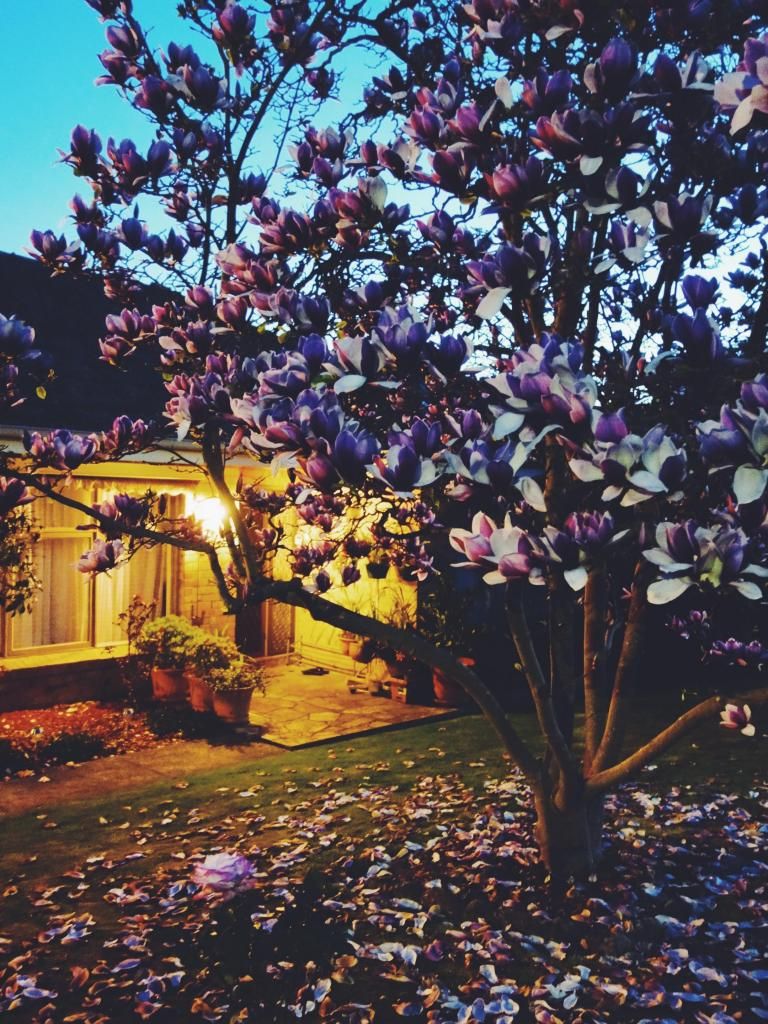
Alrighty, I'm ending this post with this shot I took of the gorgeous Magnolia tree at full bloom at The Boyfriend's uncle's home.

Happy Spring, everyone! (:

Friday, May 9, 2014

A Pastry Addict - Danish Dough & Pain Aux Raisins recipe

I have a confession to make. I love pastries. And I am a pastry fiend. I simply cannot get enough of them!

I wish Lune Croissanterie isn't located all the way in Elwood, as I don't drive and it gets a little tricky getting there by public transport.

But glad I can now make my own, although they don't turn out to be anything like Lune's but good enough to satisfy my cravings!

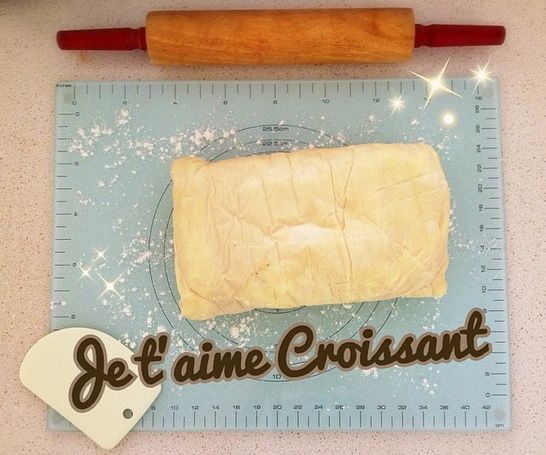
I'm not sure if you've read my previous post on the art of lamination class I attended at Brasserie Bread, but we got to take home the two types of dough - croissant and danish - that we mixed (by hand), kneaded and laminated two folds in class.

All I needed to do when I got home was to give the dough another fold, roll it out and then start shaping!

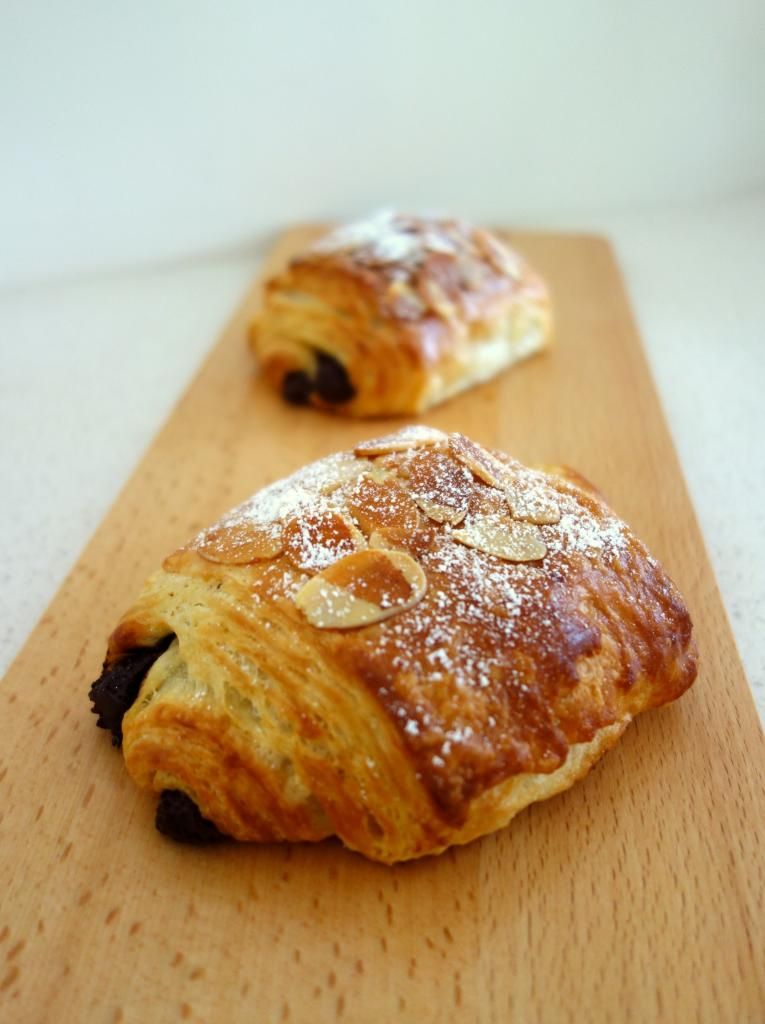
This is what I managed with the croissant dough! Nothing beats the smell of freshly baked chocolate croissants in the comfort of your own home - it was so intoxicating! In a good way, of course! ;)

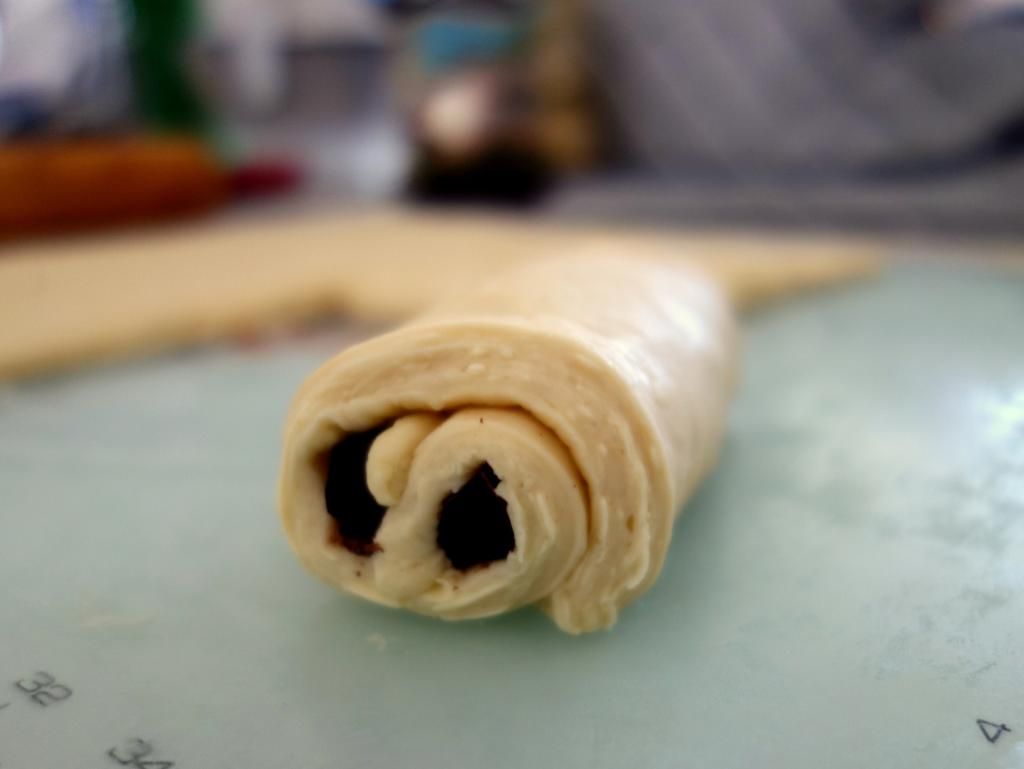
I decided since The Boyfriend really enjoyed the pain au chocolate, I'd make more of them this time around! This is my nicely shaped pain au chocolate before I left them to proof and double in size.

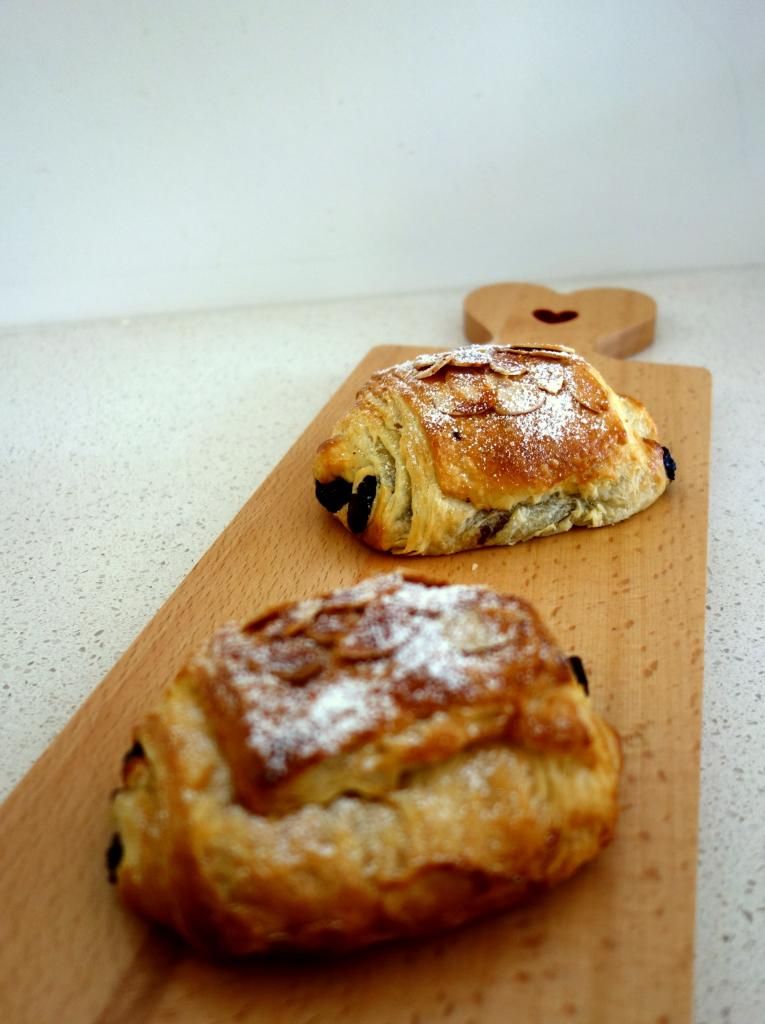
Oh yes, I also added some flaked almonds before giving the croissants an egg wash for extra fragrance and crunch! ;)

And tadahhhhh! This is the final product! How do you think I fared? The Boyfriend gave me two thumbs up and I was grinning from ear to ear.

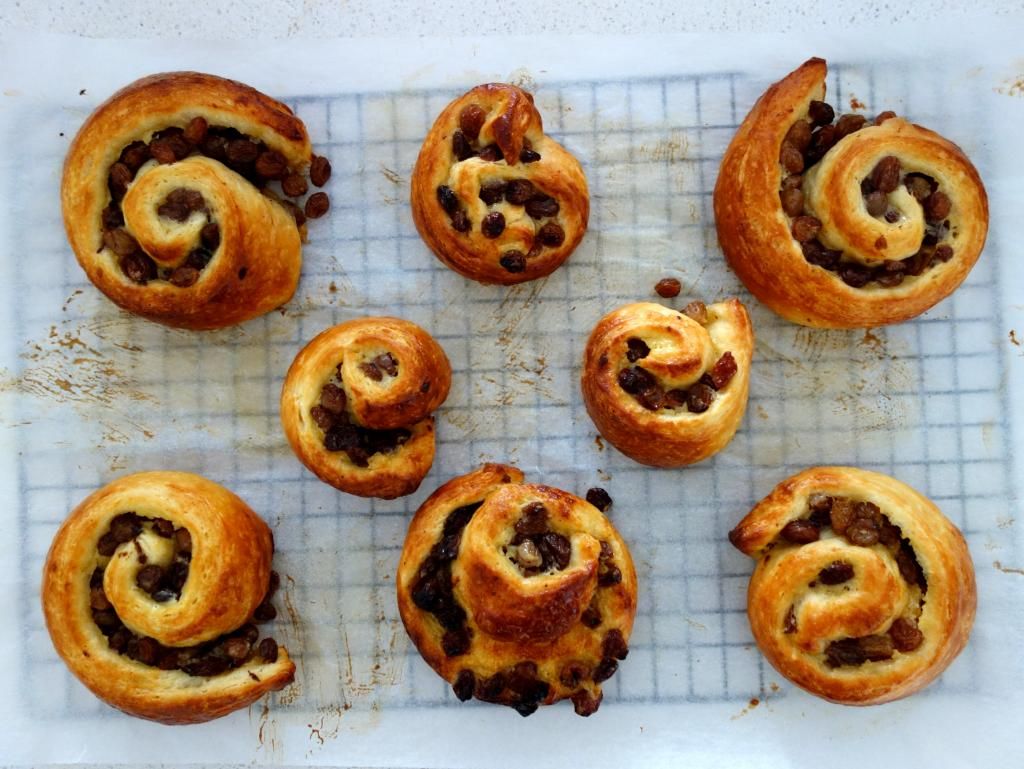
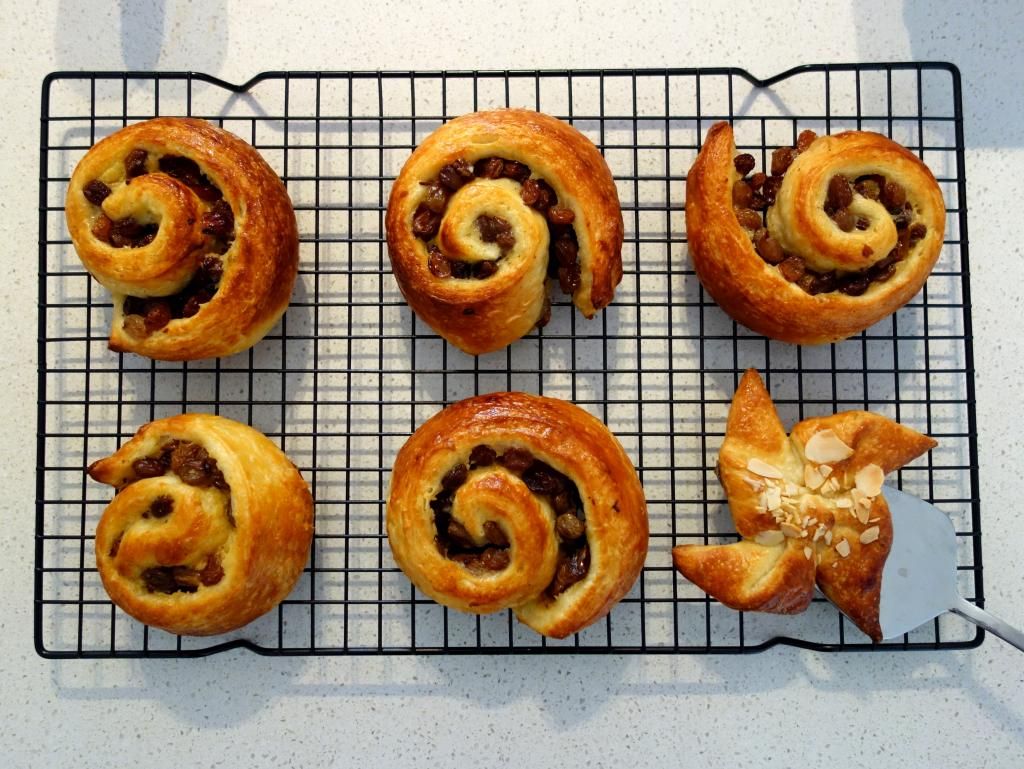
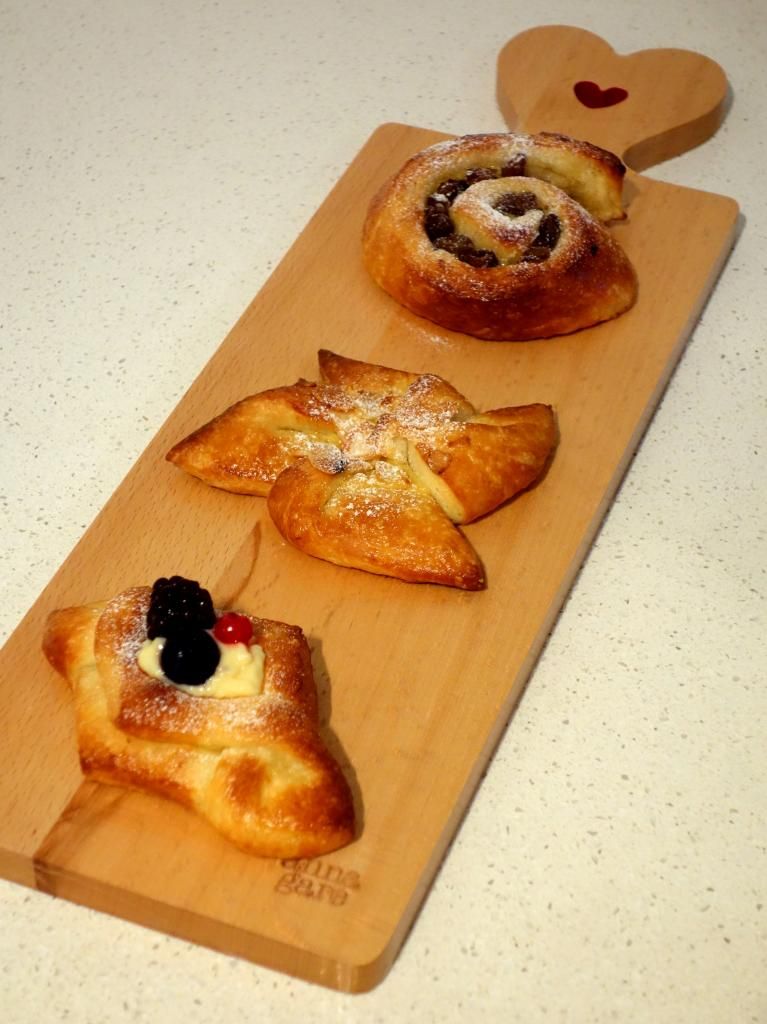
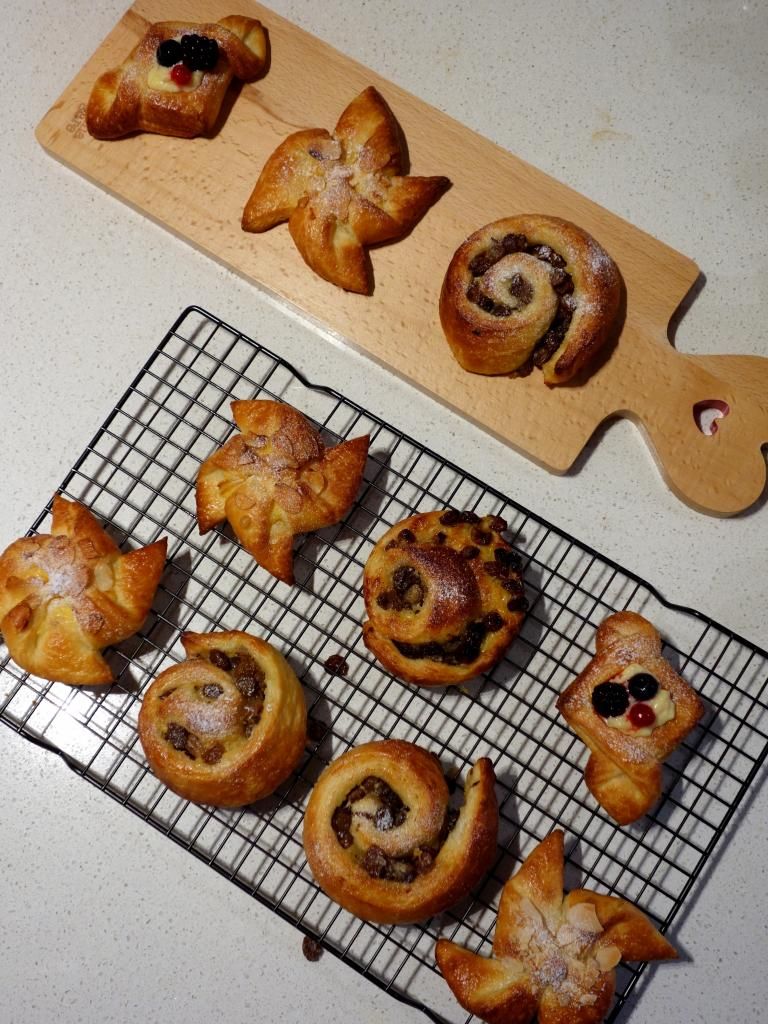
As for the danish dough, I decided to make my favourite Pain Aux Raisins, also better known as French snails to most Aussies.

I have always loved pain aux raisins ever since I was a kid. Every time we walked past a Delifrance in Malaysia, I'd pester my mum to get me one. Can't believe I'm making my own now! ;)

I made some mini ones too for when I want a quick bite! They were so so so so good, if I may shamelessly say so myself. Especially fresh out of the oven! I could not stop at one.

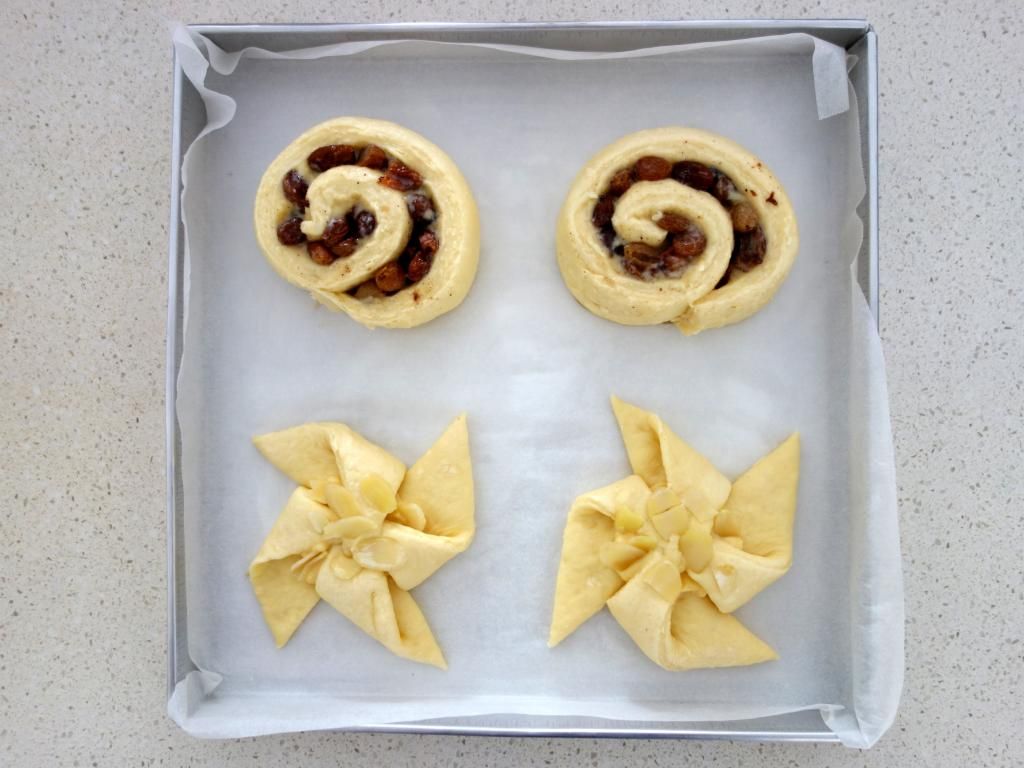
I also made some almond and custard pinwheels for The Boyfriend and The Brudder, both of whom aren't big fans of sultanas.

As you can see above, I got a little creative and made some kite shaped ones, which I topped with custard and berries for variation.

It was so much fun shaping the pastries!!! At the end of the day, although I was knackered, I was so happy and proud of myself. I told myself, I really should consider taking up a pastry course.

Anyhoos! I asked Brasserie Bread for their permission to share the Danish dough recipe with my readers, and they kindly agreed, so here you go! I will also be sharing the Pain Aux Raisins recipe below. :)

Danish Dough (with a sponge)
Recipe provided by Brasserie Bread Melbourne

(A) For the sponge
  • 125g plain flour 
  • 80ml water
  • 1g fresh yeast (can be substituted with half the amount of instant yeast)

Method
  1. Mix of all of the ingredients in (A) for the sponge together until well incorporated.
  2. Allow to ferment for approximately 14 hours at 18°C.

(B) For Danish Dough
  • 300g plain flour
  • 120ml milk
  • 45g eggs
  • 50g sugar
  • 9g salt
  • 11g fresh yeast
  • 15g butter
  • 205g of the sponge (recipe above)
  • 200g butter for roll-in 

Method
  1. Flatten the butter for roll in to approximately 5 inch wide x 8 inch long. It is recommended that you add 7% of plain flour (ie. 14g in this recipe) before rolling.
  2. Mix of all of the ingredients in (B) except for the roll-in butter.
  3. Work the dough until you have a good gluten structure, cover and rest for 30 minutes.
  4. Roll out the dough on a lightly floured surface to approximately 6 inch wide x 13 inch long.
  5. This is when the lamination starts. Place the prepared butter for roll in over two thirds of the dough  and fold the uncovered dough towards the center.
  6. Fold the dough with the butter on it toward the opposite side, cover and rest for 15 minutes.
  7. Repeat step (3) and fold one third of the dough towards the center. From the other side, fold the remaining third toward the center, cover and rest for another 30 minutes.
  8. Complete 2 more single folds, resting for 30 minutes between folds.
  9. The dough is now ready for use, or you may wrap well and freeze for future use.

Pain Aux Raisins (makes 30)
Recipe adapted from Bourke Street Bakery and modified by The Bakeanista

Ingredients
  • 600g sultanas
  • 200g currants (I omitted and used only sultanas)
  • 1.2 litre of boiling water
  • 60g brown sugar
  • ½ tsp mixed spice (I used cinnamon instead)
  • 1 quantity of creme patissiere (recipe below)
  • 1 quantity of danish dough (recipe above)
  • egg wash, for brushing
  • icing sugar, for dusting

Method 
  1. To make fruit mix, pour boiling water over sultanas, and set aside to cool. Cover with plastic wrap and place in refrigerator overnight to achieve plump, juicy sultanas. Before use, drain the fruit, and add brown sugar and cinnamon, stirring well to combine. Set aside.
  2. Take rested dough from refrigerator and roll out into a rectangle about 35 x 100cm and about 5mm thick. If the dough keeps springing back to its original size, rest the dough in the refrigerator for 10 minutes then resume rolling. This resting process may need to be done a number of times.
  3. Cut dough into half to make two 35 x 50cm rectangles. Place the dough on trays lined with baking paper and lace in refrigerator for about 10 minutes.
  4. Lay one sheet of dough on a light floured surface, with the short length running parallel to the edge of the bench.
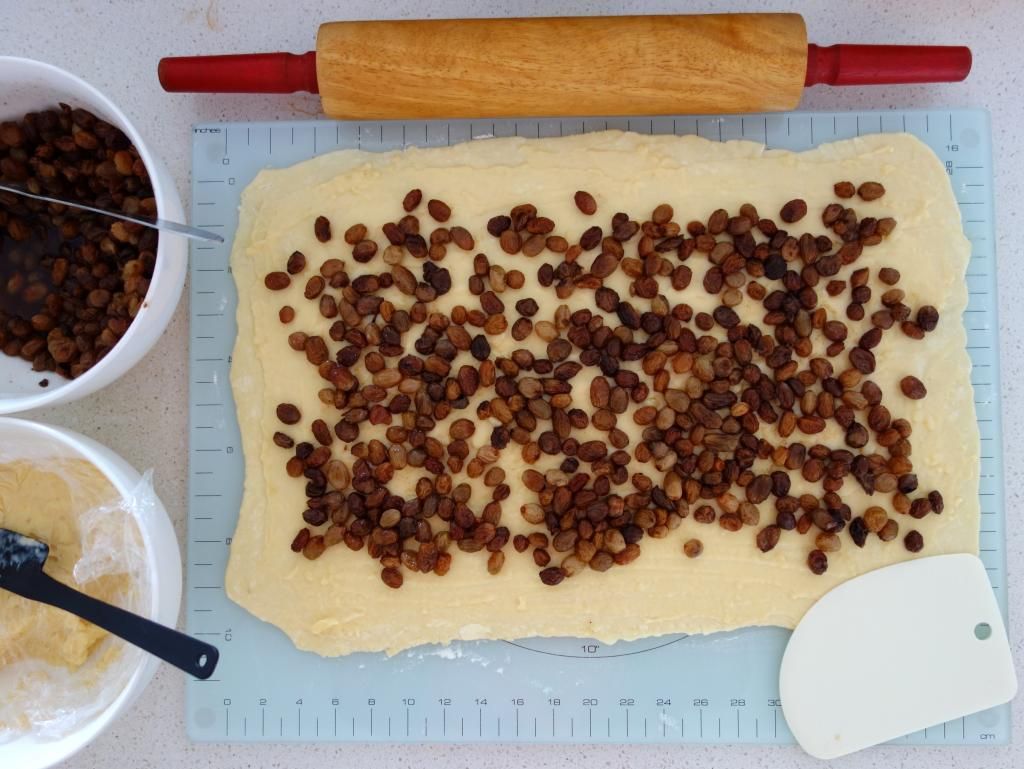
  5. Spread ½ cup of creme patissiere evenly over the rectangle, spreading all the way to the edges. Top with half the fruit mix to evenly cover the creme patissiere. 
  6. Starting with the short edge furthest away from you, firmly and tightly roll the dough towards you. Wrap the log in baking paper and rest in refrigerator for 20 minutes until firm. Repeat with remaining sheet of dough.
  7. Remove baking paper from logs and place dough on clean work surface.Cut each log into slices, about 1.5cm wide.
  8. Preheat oven to 240 . Place rolls onto lined trays at well-spaced intervals. Cover loosely with damp tea towel and set aside in warm room for 1½ - 2 hours, or until doubled in size.
  9. Remove tea towel, brush the top of each pain aux raisin lightly with egg wash and place in oven. Reduce oven temperature to 190 and bake for 15 minutes until golden brown. 
  10. Cool slightly on trays before dusting with icing sugar. 
*The Bakeanista's note: I only used half of the completed danish dough for the French Snails, and the other half for pinwheels and kites. If you're doing the same, simply half the ingredients.

Creme Patissiere
Recipe adapted from Bourke Street Bakery and modified by The Bakeanista

Ingredients
  • 250ml milk
  • 1 vanilla bean, split lengthways (I used 1 tsp vanilla extract)
  • 50g caster sugar
  • 3 egg yolks
  • 15g plain flour


Method
  1. Pour milk into saucepan and scrape in vanilla seeds and bean, or simply add in 1 tsp of the vanilla extract. Gently heat up milk and vanilla mixture over low heat.
  2. Whisk egg yolks continuously, adding sugar a little at a time until mixture is smooth. Pour warm milk through a fine sieve directly onto egg yolk mixture and whisk well until combined.
  3. Return custard to a clean saucepan and bring to a boil, stirring continuously until custard boils. Reduce heat and simmer for a further 5 minutes whilst stirring continuously.
  4. Remove from heat, allow to cool, then transfer to airtight container.
  5. Place plastic wrap directly on the surface of the custard and refrigerate until ready to use. The creme patissiere can be made in advanced and stored for up to 3 days.
If you're keen to give lamination a go but skeptical on how it would turn out, trust me, the recipe sounds more complicated than it actually is. I'd say definitely consider the art of lamination class at Brasserie Bread - you can read all bout my experience here.

The next class is scheduled on the 14th of June. If you're interested, click here to book online. Or if you have any questions, fire away in the comment box below or shoot through an email. ;)

Friday, January 3, 2014

Happy 2014!!! And a croquembouche.

Hello everybody!!! Happy new year 2014!!! *throws confetti* :) How is everyone? I hope you are all enjoying your well deserved break and eating your heart out like me. Heh!

I've also been catching up on my sleep a lot - feels sooooo good! Seriously all I've done this holiday is eat, sleep, eat, sleep. I'm turning into a (not so) little piggy. Oink!

But at least I also did put my free time to good use. I've been spending a lot of good, quality time with The Boyfriend and catching up with friends over good food.

Of course, I've also spent a fair amount (not excessively) of my time in my kitchen, more so during the Christmas period.

The Boyfriend's parents hosted a BBQ party at their place on Christmas Eve and I didn't want to turn up empty handed, although I was asked to just bring an empty tummy.

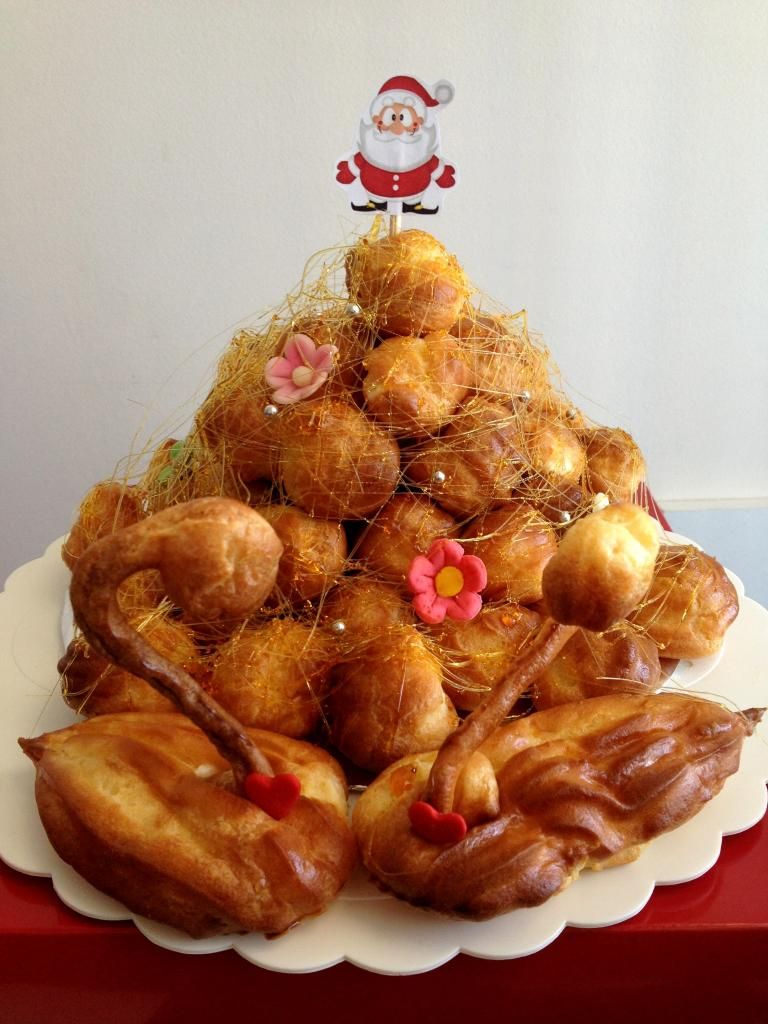
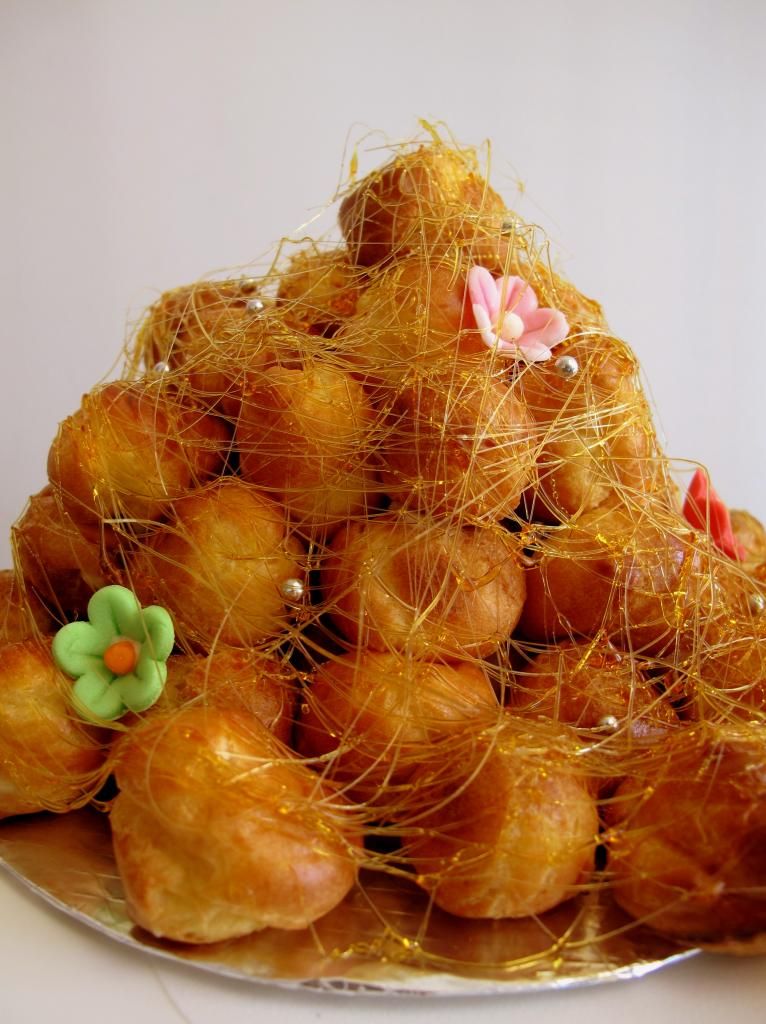
So, this was my contribution - a mini croquembouche!!! :D

Making a croquembouche, regardless of how mini it is, was a crazy decision the over-achiever in me made. I had only that morning on Christmas Eve and heck was it arduous! But I still made it. :D

You have no idea how proud I was with how it turned out - I was so so happy! My croquembouche not only looked pretty, the profiteroles were very scrumptious too! *beams in glee*

It was my first time working with toffee, and I was a little scared I might burn myself given how clumsy I am, but thankfully, no accidents. In fact, I'd say making spun sugar is fun! But oh, I won't say the same for the cleaning bit. :P

I'm going to share the recipe here for my own future reference. This recipe is a keeper and I'm definitely making it again! You should too! ;)

Mini Croquembouche
Recipe adapted from Citrus&Candy, and modified by The Bakeanista

Ingredients

(A) Choux Pastry

  • 125ml milk
  • 125ml water
  • 100g butter, diced
  • ½ tsp salt
  • 1 tsp sugar
  • 150g plain flour
  • 4 eggs (medium to large)
  • eggwash (1 egg beaten with a tablespoon of milk)

(B) Crème Patissiere
  • 6 egg yolks
  • 125g caster sugar
  • 40g plain flour
  • 500ml milk
  • 2 tsp of vanilla extract
  • Icing sugar or butter (optional)

(C) Caramel for Spun Sugar
  • 1 cup caster sugar
  • ½ cup water

Method

(A) Choux Pastry
  1. Preheat oven to 200°C.
  2. Combine milk, water, butter, salt and sugar in a saucepan and place over a low heat. Bring to a boil and immediately remove from heat.
  3. Working quickly, shower in the flour and beat the mixture with a wooden spoon until smooth.
  4. Return the pan to the stove and stir constantly over a medium heat to cook the flour and dry out the paste for about a minute or two. Tip into a large mixing bowl.
  5. Using hand/stand mixer (it does a better job in aerating the mixture so it will puff up better when baked but alternatively, you can opt to use a wooden spoon) to beat the flour paste for a few minutes to release heat from paste until it has cool down. Then add eggs one by one, beating after each addition.
  6. Once all the eggs are added and incorporated well into the mixture, the batter should be smooth, shiny and just thick enough to pipe.
  7. If you're not using the choux pastry immediately, brush the surface with an eggwash to prevent a crust forming.
  8. With a piping bag fitted with a 1cm nozzle, pipe small mounds on a baking pan lined with greaseproof paper in staggered rows. Brush with egg wash and lightly mark the top with back of fork.
  9. Bake for 15-20 minutes until dry and crisp but still soft inside.
Tip: You may opt to switch off the oven and leave the profiteroles to sit for a few minutes instead of taking it out straight away where they usually start to deflate. As I had to bake them in batches, I simply removed the tray and placed them on the kitchen bench as they are done, and the puffs thankfully did not deflate. 


(B) Crème Patissiere
  1. Combine the egg yolks and a 1/3 of the sugar in a bowl and whisk to a light ribbon consistency. Whisk in the flour thoroughly.
  2. In a pan, heat the milk with the remaining sugar and the vanilla extract. As soon as it comes to a boil, pour the milk into the egg yolk mixture, whisking constantly as you do. Mix well then pour back into the saucepan and return to the heat.
  3. Bring to a boil over a medium heat, whisking constantly. Allow the mixture to bubble, while still stirring constantly for about 2 minutes, then tip into the bowl.
  4. To prevent a skin from forming, dust the surface with a think veil of icing sugar or dot over with little flakes of butter. Alternatively you could also place a sheet of baking paper/cling wrap over the entire surface.
  5. Once cold, you could keep the crème patissiere in the fridge for up to three days.

(C) Caramel
  1. Combine water and sugar in a saucepan and bring to a boil, stirring slowly to dissolve the sugar and brushing down the sugar crystals on the side of the pan with a wet pastry brush.
  2. Once it has boiled, lower the heat to low and simmer until it’s caramel in colour (do not stir!). When ready remove from the heat and dip the base into a bowl of cold water to stop the caramel from cooking.

To assemble
  1. Dip the bases of the profiteroles in the toffee to coat and place upside down on baking paper lined tray.
  2. Dip the side of the profiteroles in toffee and assemble on the toffee base/platter in a mound or cone shape. I did not have a cone, so it was free-hand mound.
  3. You’ll have to work as fast as you can before the toffee cools and sets. if it has cooled down too much, it would harden up. Simply place it back on the stove to reheat and melt the toffee.
  4. Once the remaining toffee has remelted, using two forks back to back, dip the prongs in the toffee and spin around the croquembouche to create spun sugar wisps. Decorate asyou wish.
Tip: You must wait until the caramel is thick enough to get nicely spun sugar. If you do it while it’s too hot, the caramel will just drip too quickly forming ugly beads and uneven strands.

Warning: If you get any hot caramel on your hands, DO NOT wipe it otherwise the smear of caramel will continue to burn your hand. Leave a bowl of cold water aside to plunge your hand in if you do burn yourself. Thankfully I got away without any burns! Phewww.

And tadahhhhhhhh!!! :D 

Your mini croquembouche is now done! Grab a fork, crack the toffee, dig in and enjoy that amazing crunch in your mouth. Trust me, it is a very rewarding experience. Go get cracking already! ;)

Sunday, March 24, 2013

The ultimate Bourke Street Bakery's Passionfruit Meringue Tart! ♥

For those of whom have been following my blog, you'd know by now how much I love Bourke Street Bakery and how I've raved about them.

The gem of this boulangerie is none other than its TARTGASMIC Passionfruit Meringue Tart.

It is the most delicious tart I've ever had! The filling was smooth and creamy-like, but not too rich. It hits all the right spots!

I have attempted to replicate this tart once, back in 2011, however as I did not own a kitchen blow torch then, it did not turn out as beautiful as I'd like.

When I've finally purchased a kitchen blow torch, I decided to give the Passionfruit Meringue Tart another go. It was a huge success, if I may say so myself. *beams happily*

My version of the Passionfruit Meringue Tart was as amazing as I remembered it to be. As tedious and arduous as the recipe was, it was well worth all my effort and hard work. :)

I have summarised the recipe for you below, but I urge that you get a copy of the BSB Ultimate Baking Companion Cookbook. All the recipes are so detailed!

If you're keen to attempt this recipe, I highly suggest that you spare two days. Make the pastry tart the night before and have it ready to go when you're ready to bake.

A big tip would be to read the recipe thoroughly and ensure that you understand all the steps. :)


BSB Passionfruit Meringue Tart
Recipe adapted from the BSB Ultimate Baking Companion Cookbook

Ingredients for Sweet Shortcrust pastry
Makes 20 x 8cm tarts
  • 400g butter, chilled and cut in to 1.5cm cubes
  • 20ml vinegar, chilled
  • 100g caster sugar, chilled
  • 170ml water, chilled
  • 665g plain flour, chilled
  • 5g salt

Method for Sweet Shortcrust pastry
  1. Remove butter from fridge 20 minutes before using - it should be just soft but still cold enough to not melt through the pastry while mixing.
  2. Put vinegar and sugar in a bowl, and ad the water, stirring well. Set aside for 10 minutes, then stir again to completely dissolve the sugar.
  3. If you're mixing by hand, mix together flour and salt in a large bowl and toss through the butter. Use fingertips to rub the butter into flour to partly combine. If you're using food processor, put flour and salt in the bowl of the food processor, and add the butter, pulsing in 1-second bursts about 3-4 times to partly combine.
  4. Turn out onto clean work surface and gather together. Sprinkle over the sugar mixture and use the palm of your hand to smear the mixture away from you across the work surface.
  5. Gather together again and repeat smearing process twice before gathering dough again. You may need to repeat once or twice more to bring it together. You should still be able to see streaks of butter marbled through the pastry - this will give the final product a slightly flaky texture.
  6. Divide dough into two even-sized portions and shape into two round, flat discs about 2cm thick. Wrap discs in plastic wrap and refrigerate for at least 2 hours or overnight.
  7. Remove the pastry from the refrigerator about 20 minutes before you are ready to use it. 
  8. Gently roll out the dough away from you between two floured non-stick paper sheets until you achieve a flat round disc, about 3mm thick. Transfer pastry to a tray and place in refrigerator, covered in plastic wrap for 2 hours, to allow gluten to relax.
  9. Brush 20 x 8cm individual tart cases with a little butter. Cut the pastry with an 11cm diameter big round pastry cutter.
  10. Place each pastry on top of mould, ensuring it is in the centre and use your fingers to gently push the pastry into mould. You should have some remaining dough hanging over the sides, use your index finger and thumb to work around the edge, forcing the pastry into the mould. Repeat for all tart cases.
  11. Set the pastry cases aside to rest for 20 minutes in the freezer then line it with foil.
  12. Blind bake the tarts in a preheated oven at 200 deg C for 20-25 minutes, or until golden.
  13. The pastry can be frozen for up to 2 months, so it makes sense to line all the shells, freeze them and simply blind bake them as you need them. I would highly recommend that you have the tarts all done in advance. ;)

Ingredients for Passionfruit Bavarois
Makes 20 x 8cm tarts
  • 300ml milk
  • 2 tsp gelatine powder
  • 6 egg yolks
  • 175g caster sugar
  • 250ml passionfruit juice (I used passionfruit pulp, but sieved the seeds)
  • 350ml whipping cream (35% fat)

Method for Passionfruit Bavarois
  1. Mix powdered gelatine in a bowl with 2 tbsp of milk.
  2. Put remaining milk in saucepan over high heat and bring to just boiling. 
  3. Whisk egg yolks, sugar and passionfruit together in a stainless steel bowl. Sit bowl over a saucepan of simmering water, making sure that the base of the bowl does not touch the water. 
  4. Add hot milk and continue whisking for about 5mins, or until mixture thickens.
  5. Whisk gelatine mixture into passionfruit mixture.
  6. Pour through fine sieve and refrigerate for 30mins to 1 hour, until mixture starts to set.
  7. Whip cream to soft peaks, then fold through passionfruit mixture.
  8. Pour bavarois mixture into the tart shells, up to the brim. Place in fridge for 2-3 hours, or until set. While the passionfruit bavarois is setting, make the Italian meringue. 

Ingredients for Italian Meringue
Makes 20 x 8cm tarts
  • 200g caster sugar, plus 20g extra
  • 100ml water
  • 4 egg whites

Method for Italian Meringue
  1. Put sugar and water in small heavy-based saucepan over high heat, stirring until mixture boils, then stops stirring.
  2. Brush the sides of the saucepan with wet pastry brush every couple of minutes to ensure crystals don't start forming.
  3. Allow mixture to boil until it reaches 118 deg C (you'll need a sugar thermometer), then remove from heat immediately.
  4. Whisk egg whites in a very clean bowl for 2 minutes on high speed until foamy. Add extra sugar and whisk until soft peak form.
  5. With mixer still running on high, slowly pour in the sugar syrup, adding small amounts at a time and making sure it is incorporated before adding more. Be careful not to pour syrup directly onto beater to avoid spraying syrup over yourself.
  6. Once syrup is added, turn mixer to low speed and mix for a further 10-15mins until meringue is cool.

And now steps on how to assemble the tarts:
  1. Use a piping bag to pipe meringue onto the top of the bavarois, completely covering the top of the tart.
  2. Use a palette knife to create a less formal shape for a rustic look. Be as creative as you like! ;)
  3. Brown meringue using blow torch.
  4. Best to refrigerate tart for 30 minutes to an hour until chilled. 
Tadaaaaahhh!!! It's now time to ENJOY YOUR TARTGASM!!! ;D

This recipe is to-die-for! Trust me, it does seem like a lot of work, but just one bite of the tart, and you'll know what I mean when I say it's all well worth it! I'd say this is the perfect recipe to bake if you're thinking of impressing someone special! ;)

I hope you'll enjoy this recipe. Let me know if you're unclear of any elements or if you have any questions at all - happy to help! :)

And yes, although I was so exhausted by the time I finished cleaning up, I had a lot of fun baking this recipe. Even more so with using the kitchen blow torch.

I have never used a blow torch before, you have no idea how excited I was! I'm like a big kid, give me a new toy, and I'm happily occupied. :P

It was fun and did not take me long to get a hang of it. Hmmm, I'm already thinking of other ways to use my torch! Do you have any suggestions? Or maybe I should make these tarts again? :)

**********

UPDATE (4 Jan 2014) - I baked a larger version of this amazing passionfruit meringue tart for Christmas Day at The Boyfriend's family lunch gathering.


I've learnt that this recipe either makes 20 x 8cm tarts or two 23cm large tarts.

Of course making two larger tarts was way easier than having to line 20 individual tarts, but I still much prefer the mini tarts. Nothing quite beats having a mini tart all to yourself! ;)

Although having said that, I wouldn't mind a slice of the tart now. Hehe! I hope everyone had a really good Christmas and New Year! :)

Friday, April 20, 2012

Melt-in-Mouth Pineapple Tarts

When I first returned to Melbourne after spending Chinese New Year in Malaysia, you'd think I'd be over and done with all the festive cookies.

But no, instead I had this really massive craving for pineapple tarts. Knowing very well that it's close to impossible to get any good ones from here, I decided I should take matters into my own hands.

This is my first attempt at making pineapple tarts and I was very nervous. Because if I screw up, I'd be disappointed in myself and also have no tarts. And you will get one little upset cheffie.

I did my homework well, read up PLENTY of pineapple tarts recipes and tips. Finally, I decided to go with Table for Two's recipe.

I like how her post was very thorough with all the details I needed. It helped big time, especially for a first-timer who had no experience.

The preparation was easy despite the fact that the jam took quite a while to cook, but the wrapping process... Man, t'was a nightmare!

Well, it wasn't to say, very difficult, but it was just an arduous task having to roll all the jam into balls, followed by the pastry dough.

But let me tell you this, all the arduous effort was definitely worth it. :) Although my skills in wrapping aren't up to par, but the tarts were very delicious, if I may say so myself.

The way it melts in your mouth... I felt really proud of myself. And to see my family and friends devour these babies and singing my praises, I was floating on cloud nine!

If you too are feeling adventurous, why don't you give this awesome recipe a go? I bet you wouldn't regret. Satisfaction guaranteed! :D

Melt-in-Mouth Pineapple Tarts
Recipe adapted from Table for Two & modified by The Bakeanista

(A) Homemade Pineapple Jam
Ingredients:
900g pineapple (I used canned pineapple chunks)
400g sugar (in the future, I'd reduce to 350g)
1 cinnamon stick

Methods:
1) Put half of the pineapple chunks into the blender, add 1/3 cup water and pulse. Add remaining pineapple chunks and continue to blend.

2) Pour the blended pineapple into a pan or wok, and cook pineapple paste with cinnamon stick on medium heat until pasty, like thick oatmeal.

3) After the cooked pineapple jam has lost 80% of its water content, add in sugar. It will turn watery again but don't worry, it's normal. The jam splatters quite a bit, so be careful.

4) Turn to lower medium heat, and cook until very pasty. Stir occasionally, but be sure to keep an eye on it to ensure that the pineapple jam don't burn.

5) When the jam is pasty enough, increase the heat to high to allow the base to take on some colour and caramelize the jam. Stop when the jam reaches your preferred colour and consistency.

I think preparing the jam one day ahead would make it easier for you to focus on the tarts the following day. Please refer to Table for 2's pineapple jam post for additional helpful notes. 

B) Pastry
Ingredients:
250g salted butter 
75g caster sugar
170g cream 
 50g cream cheese 
3 egg yolks
400g cake flour, sifted together with
30g corn flour 
1 additional egg yolk (for glazing)

Method:

1) Sift cake flour and corn flour together, then set aside.

2) Using a cake mixer, blend the butter, sugar, cream cheese and cream together for approximately 10 minutes until you get a creamy mixture. Remember to scrape the sides from time to time.

3) Beat in the 3 egg yolks one at a time, and mix until well incorporated.

4) Gradually add in the sifted flour into the creamed butter mixture. Mix on low until the dough comes together. Ensure that the dough is smooth and oily enough to not stick to your hand. Yes, it does look like a cake batter.

5) Allow the dough to stand for 10 minutes - this will help you manage the dough better.

6) Divide dough into small balls and the pineapple filling into balls roughly 1/2 the size of the dough. 

7) Wrap filling ball within the dough ball and shape as desired. It takes a bit of time, but once you get a hang of it, you'll start to speed up.

Step-by-step picture - Credit to Table for Two

8) Preheat your oven at 180°C for 15 mins in a oven or if using convection oven with turbo fan, lower temperature to 160°C.

9) Glaze your tarts with egg yolk and bake for 15-20 minutes until the tarts are golden brown on the top.

10) Enjoy your pineapple tart! Om nom nom nom! :D

Thursday, June 16, 2011

Cherry Frangipane Tart

I love tarts. Oh, that is an understatement really. So when I first got my food processor, you had no idea how excited I was, jumping straight at the opportunity to make a tart.

Looking at the pictures make me crave for tarts yet again... Okay, I think I'm making 'em again this weekend. :)


Cherry Tart Frangipane
Recipe adapted from my Pear Tart Frangipane

(A) Pâte Sablée
225g cups flour
70g icing sugar
1/2 tsp salt
135g butter (cold, cut into small pieces)
1 egg yolk

(B) Frangipane
90g butter (at room temperature)
150g sugar
83g almond meal
2 tsp flour
1 tsp cornstarch
1 egg + 1 egg white
2 tsp vanilla extract

(C) Cherries
1 can (425g) of pitted black cherries in syrup

Method:

1) For the tart shell: Using a stand or hand mixer, mix together butter, sugar, and salt at medium speed until you reach the cream stage. Scrape down the bowl with a rubber spatula while mixing. Rub in cold butter with fingers until combined. With a spatula, add in egg yolk and and combine until dough starts to become dry/clumpy. (This time around, I just dumped everything into my food processor in the same order and PULSE!)

2) Butter a 9-inch tart tin with removable bottom. Turn the dough out into the tin and press into the bottom and up the sides with your fingers. You probably will not need all the dough - save the extra for patching the shell after you bake it. Do not press the dough too hard or it will become tough - just enough for it to form to the tin.

3) Freeze the tart shell for at least 30 minutes. When you are ready to bake it, preheat the oven to 190 degrees Celcius.

4) To partially bake the tart shell, take a piece of foil and butter the shiny side, then press the buttered side tightly to the shell (you do not need pie weights). Place the tart shell on a baking sheet and bake for about 25 minutes, until the shell is dry and lightly colored. If any places have cracked, repair with the extra dough. Let cool on a rack until room temperature.

5) For the frangipane: Mix butter and sugar until combined and smooth. Add the almond meal and mix well. Add the flour and cornstarch, and then the egg and egg white. Mix until smooth. Add in the vanilla extract.

6) To finish the tart: Preheat the oven to 180 degrees Celcius. Spread the frangipane evenly into the cooled tart shell.

7) Take the cherries out of the syrup if you're using canned cherries and please do remember to drain them on paper towels. You want them dry or they will make the frangipane soggy.

8) Arrange the cherries as desired, ensuring that they are evenly spaced. Push the cherry halfway into the frangipane mixture.

9) Place the tart on a baking sheet and bake in the oven for about 45-50 minutes, until the frangipane is puffed, golden brown, and firm to the touch. Cool the tart on a wire rack.


10) Enjoy your cherry tart frangipane whilst it's still warm! :D

Om nom nom nom! So delicious! :)

Sunday, March 20, 2011

BSB, my love.

Do you remember this super-duper-yummehlicious passionfruit tart from Bourke Street Bakery (BSB) of which I blogged about two months back? Every now and then, I think about this tartgasmic gem and hope if only BSB can move down to Melbourne.

But well, that's quite impossible. And considering that I won't be heading to Sydney anytime too soon, I decided to take matters into my own hands and guess what?

I baked my own passionfruit meringue tart with the recipe from Bourke Street Bakery! I am not trying to blow my own trumpet here, but heck, it was goooooooood. :D

The only disappointment is not having a kitchen blow torch, so my meringue did not turn out as pretty. But still, I didn't quite mind.

Having said that though, I'd make sure that I either buy or borrow a torch the next time I wish to bake this again.

Well, if you look at the recipe, you'd be shocked to see how the entire baking process was both tedious and arduous, but every effort put into making this tart was definitely worthwhile.

May I add that it is quite good an alternative before I can fly over to Sydney for a good ol' passionfruit meringue tart? Argh, I am drooling even at the thought of it, and I could really do with one NOW!

Thursday, January 27, 2011

My Mini Croquembouche

Grandpa turned 94 a week ago, and we decided to throw him a surprise party. Considering how big my family is, it was quite impossible to let someone handle it all. So, we decided to hold a potluck instead. 

After much thought, I decided to make a mini croquembouche, but without the sugar spin to nest it in fear that it might be too sweet for my uncles and aunts.

I'm not trying to blow my own trumpet but my croquembouche was a big hit! The profiteroles were all gobbled up even before I knew it.

Even grampa, who doesn't usually eat sweet stuffs, had a bite! That's quite an achievement for me can!

I got many praises, which of course were music to my ears that made me beam gleefully at the end of the night. (:

But the headache now is, what should I bake for our reunion dinner on the Chinese New Year's eve? I'm thinking passionfruit bavarois tart.

Or perhaps, do you have a better suggestion? :D

Friday, November 19, 2010

Apple Pie

I'm heading off for a two weeks holiday but I had an abundance of apples sitting in my fruit basket which I couldn't possibly finish eating in a day. And I know my best friend has been craving for apple tart for a good while already. Hence, this apple pie. ;)

Apple Pie
Recipe adapted from Joy of Baking and modified by The Bakeanista

Pate Brisee:
I cheated and used Pampas Shortcrust Pastry! :P

1. For the bottom crust, thaw and transfer one sheet to a 9 inch (23 cm) pie pan. Let chill in fridge as you prepare your apple filling.

2. For the top pastry lattice crust, cut another sheet of shortcrust pastry into 1cm strips. Once the bottom crust is filled with the apple slices, starting at the center with the longest strips and working outwards, space the strips about 1cm apart. Use the shortest pastry strips at the outer edges. Weave the top strips over and under the bottom strips. Seal the edges of the pastry strips by folding them under the bottom pastry crust and flute the edges of the pastry. Brush the lattice pastry with egg yolk.

Apple Filling:
4 apples (peeled, cored, and sliced 1/4 inch thick)
40 grams granulated white sugar
40 grams light brown sugar
1 tbsp lemon juice
1 tsp ground cinnamon
1/4 tsp ground nutmeg
2 tbsp butter
1 tbsp cornstarch

1. In a large saucepan, melt butter and sugars. Add in sliced apples, lemon juice, ground cinnamon, and nutmeg. Let simmer for 15-20 minutes over medium heat until the liquid has reduced to about 1/3 cup and is syrupy and lightly caramelized.

2. Pour the apples and their syrup into the chilled pie crust.

3. Preheat oven to 220 deg'C. Place the oven rack at the lowest level and place a baking sheet on the rack before preheating the oven. Place a piece of aluminum foil on the pan to catch any apple juices.

4. Set the pie on the pan and bake for about 50 minutes or until the juices start to bubble through the slits and the apples feel tender (not mushy) when a toothpick or sharp knife is inserted through one of the slits.

5. Make sure to cover the edges of the pie with a foil ring to prevent over browning. Remove foil 15 minutes before it was done to let it brown evenly.

6. Remove pie from the oven and place on a wire rack to cool for about 3-4 hours before cutting. Serve warm or at room temperature with vanilla ice cream or softly whipped cream. You may store at room temperature for 2 to 3 days.

The apple pie is excellent just plain on its own, but heck even better with vanilla ice cream. Or whipped cream if you prefer! ;)

Thursday, November 18, 2010

Pear Imperfection

So yes, as mentioned in previous post, I was very inspired to try baking Adriano Zumbo's Pear Perfection. And well, I did. The following day, I went out first thing in the morning to get all the ingredients and spent my entire day trying to perfect this pastry. However, due to tools/ingredients constraints, I failed to present Zumbo's perfect little artwork, but instead I tweaked it into my little Pear (Im)perfection.

Adriano Zumbo's Pear Perfection - Picture from Masterchef


Pear Imperfection
Recipe adapted from Masterchef and modified by The Bakeanista

Sable pastry:
140g flour
80g butter
55g icing sugar
½ tsp salt
1 yolk
½ tsp vanilla extract
Few drops of green colouring

1. Dice the butter and cream until the mixture is smooth and white.

2. Add the sugar and salt and mix. Add in the flour and finally, the egg yolks, and combine into a ball.

3. Remove the pastry from the bowl and flatten it out on a tray lined with parchment paper. Cover with film and allow to rest in the fridge for at least an hour.

4. Place pastry between 2 sheets of baking paper and roll out to 2mm-thick.

5. Place on a tray and place in blast chiller for 3 minutes. Using a 3cm-round pastry cutter, cut out 5 discs, then using a 6cm-round pastry cutter cut out 5 discs.

Green Marzipan:
100g almond meal
50g icing sugar
½ tbsp lemon juice
1 tbsp maple syrup
½ tbsp cold water
½ tsp vanilla extract
Few drops of green colouring

1. Mix together the ground almonds and powdered sugar. Make a well in the centre of the marzipan mixture and add all of the liquid ingredients. Mix thoroughly.

2. You should be left with an almond pastry textured dough. Cover and place marzipan into the refrigerator for an hour.

3. Roll out to 2mm-thick, and using a 5cm-round pastry cutter, cut 5 discs from green marzipan.

Choux Pastry:
100g butter
5g caster sugar
105ml water
135ml milk
¼ teaspoon electric green colour
5g salt
135g plain flour
3 eggs
1 egg yolk

1. Preheat the oven to 185°C.

2. Combine 100g butter, sugar, water, milk, colour & salt in a large heavy based saucepan and bring to the boil.

3. Remove from the heat and quickly beat in the flour with a wooden spoon. Return to the heat and continue beating until the mixture comes together and leaves the side of the pan.

4. Keep beating over low heat for 1–2 minutes to cook the flour. Remove from heat and cool slightly.

5. Transfer to a large bowl of an electric mixer and beat on medium-high to release the heat.

6. Add the eggs one at a time beating well between each addition, continue beating until the mixture is thick and glossy.

7. Lightly grease two oven trays with extra cold butter and then wipe off excess using paper towel. Using a 3cm circle cutter; dip top in flour and mark 5 rings spaced apart on one of the trays.

8. Use a 6cm round pastry cutter; dip top in flour and mark 5 rings spaced apart on the other trays.

9. Spoon choux mixture into a piping bag and pipe large and small balls of choux onto flour stencils on trays all the way to edge of stencils.

10. Place discs of sable a choux on top of piped choux balls.

11. Bake the small choux buns in oven for approx 16 minutes until golden and hollow when tapped and sable pastry has cracked on top.

12. Bake the large choux buns in oven for approx 25 minutes, then drop oven to 120C and cook for a further 6-8 minutes until hollow when tapped and sable pastry has cracked on top.

Pear Vanilla Creme Patissiere:
150g pear puree
150g apple juice
1 teaspoons vanilla bean paste
4 egg yolks
50g cornflour
75g caster sugar
20g butter, diced at room temperature

1. Place the pear puree, apple juice and vanilla in a saucepan until it just comes to the boil, remove from heat.

2. Combine egg yolks, cornflour and sugar in a large bowl, whisk until combined and smooth.

3. Gradually whisk hot puree mixture into egg mixture. Return mixture to saucepan, and whisk continuously over medium-high heat until the custard is thick and flour is cooked out.

4. Transfer custard to a large bowl, cover closely with cling film to prevent a skin forming and place in blast chiller for 3 minutes. Remove from chiller and gradually whisk in butter. Cover closely with cling film and refrigerate until needed.

Pear Mousse:
80ml thickened cream
250g of the pear vanilla creme patissiere, reserve remaining mixture
180g mascarpone

Place cream in a small bowl of an electric mixer and beat until soft peaks. Place crème patissiere and mascarpone in a small bowl of electric mixer and beat until combined. Remove from mixer. Using a plastic spatula, gently fold cream into crème patissiere mixture. Spoon into a piping bag and refrigerate until ready to use. Spoon remaining crème patissiere into a separate piping bag and refrigerate until ready to use.

Pear Gel: (I didn't make this)
250g pear puree
20g caster sugar
7g of gelatine/agar

1. Place pear puree and sugar in a saucepan, cook over medium heat for 1 minute, whisk in gelatin and bring to nearing boiling, but do not allow it to boil.

2. Leave to cool, pour into a mould and leave to set in the fridge.

Green Chocolate Squares: (Ended up not making this either)
250g of white chocolate
Few drops of green colouring

1. Melt chocolate over double boiler then spread on baking sheet, and let it rest.

2. Carefully cut five 4cm x 4cm squares of chocolate using a knife, then peel chocolate square off the plastic strip.

Almond Crunch:
25g butter
50g dark chocolate 70%
210g streusel (recipe below)
75g almond praline (recipe below)
45g whole almond (toasted and crushed)
2 pinches sea salt

1. Melt chocolate and butter together in a bowl over simmering water. Remove bowl and add praline, almond and salt, mix well.

2. Place between 2 sheets of baking paper and roll to 4 mm-thick. Using a 7.5cm round cutter, cut out 5 discs.

Streusel:

2/3 cup flour, sifted
1/3 cup brown sugar
80g soft butter

Combine flour and brown sugar, then rub cold butter until crumbly.

Almond Praline:
1/2 cup sugar
1/3 cup slivered almonds

Spray a rimmed baking sheet with cooking spray; set aside. Bring sugar and 2 tbsp water to a boil in a small saucepan over medium-high heat. Swirl pan to dissolve sugar. Wash down sides of pan with a wet pastry brush to prevent crystals from forming. Boil until sugar turns light amber, about 7 minutes. Add almonds and salt; cook, stirring constantly, until almonds are toasted and caramel turns dark amber. Pour onto prepared sheet. Let cool completely.

To assemble:
1. Pipe pear crème patissiere into small choux balls without bursting the top, until choux bun is full and heavy.

2. Pipe pear mousse into large choux ball and fill until one third full, press in a pear gel and push up into bun without bursting the top of choux buns, pipe in more of the pear mousse to fill completely until choux bun is full and heavy.

3. Place almond crunch disc on a gold serving disc, top with a large filled choux bun using a little of the mouse to stick it down.

4. Place green marzipan disc on top of large choux bun.

5. Place a square of green chocolate, shiny side-up, on top of marzipan disc.

6. Place small choux ball on top of green chocolate square, using a little of the crème patissiere to stick it down.

7. Place candied almond on top of choux ball, stick with a small amount of crème patissiere.

I tweaked the recipe a fair bit, and assembled it differently from Adriano Zumbo's, as you can see above. Because my marzipan turned out a tad bit too wet, I threw it out. So instead of using the almond crunch as the base, I used it to hold my mini puff. And by then I was so tired, I didn't want to make the choc sheet, so yeah.

I know from the looks of it, it doesn't even look mind-blowing or anything like that. However, whilst it looks nothing like Zumbo's Pear Perfection, my little Imperfection is unique in its own too. No doubt, I was rather upset I couldn't replicate my idol's work but then again... Sometimes we strive so hard for perfection that we forget that imperfection is happiness. (:

I think I fared pretty well, no?
Click on 'OLDER POSTS' for more! :)